The work-up to the end of 2017 has been both busy and involved.
As 2017 has presented many challenges and rewards, I look to the future and what 2018 will bring.
We have many great things on-tap this coming year. Workshops, cooperations and many informative efforts for everyone to benefit from.
As we move into the new year, we will be rolling out a lot of exciting things.
I’d like to thank everyone who has read, followed and supported the efforts here at True North Tradecraft this inaugural year and together, we can make 2018 even better.
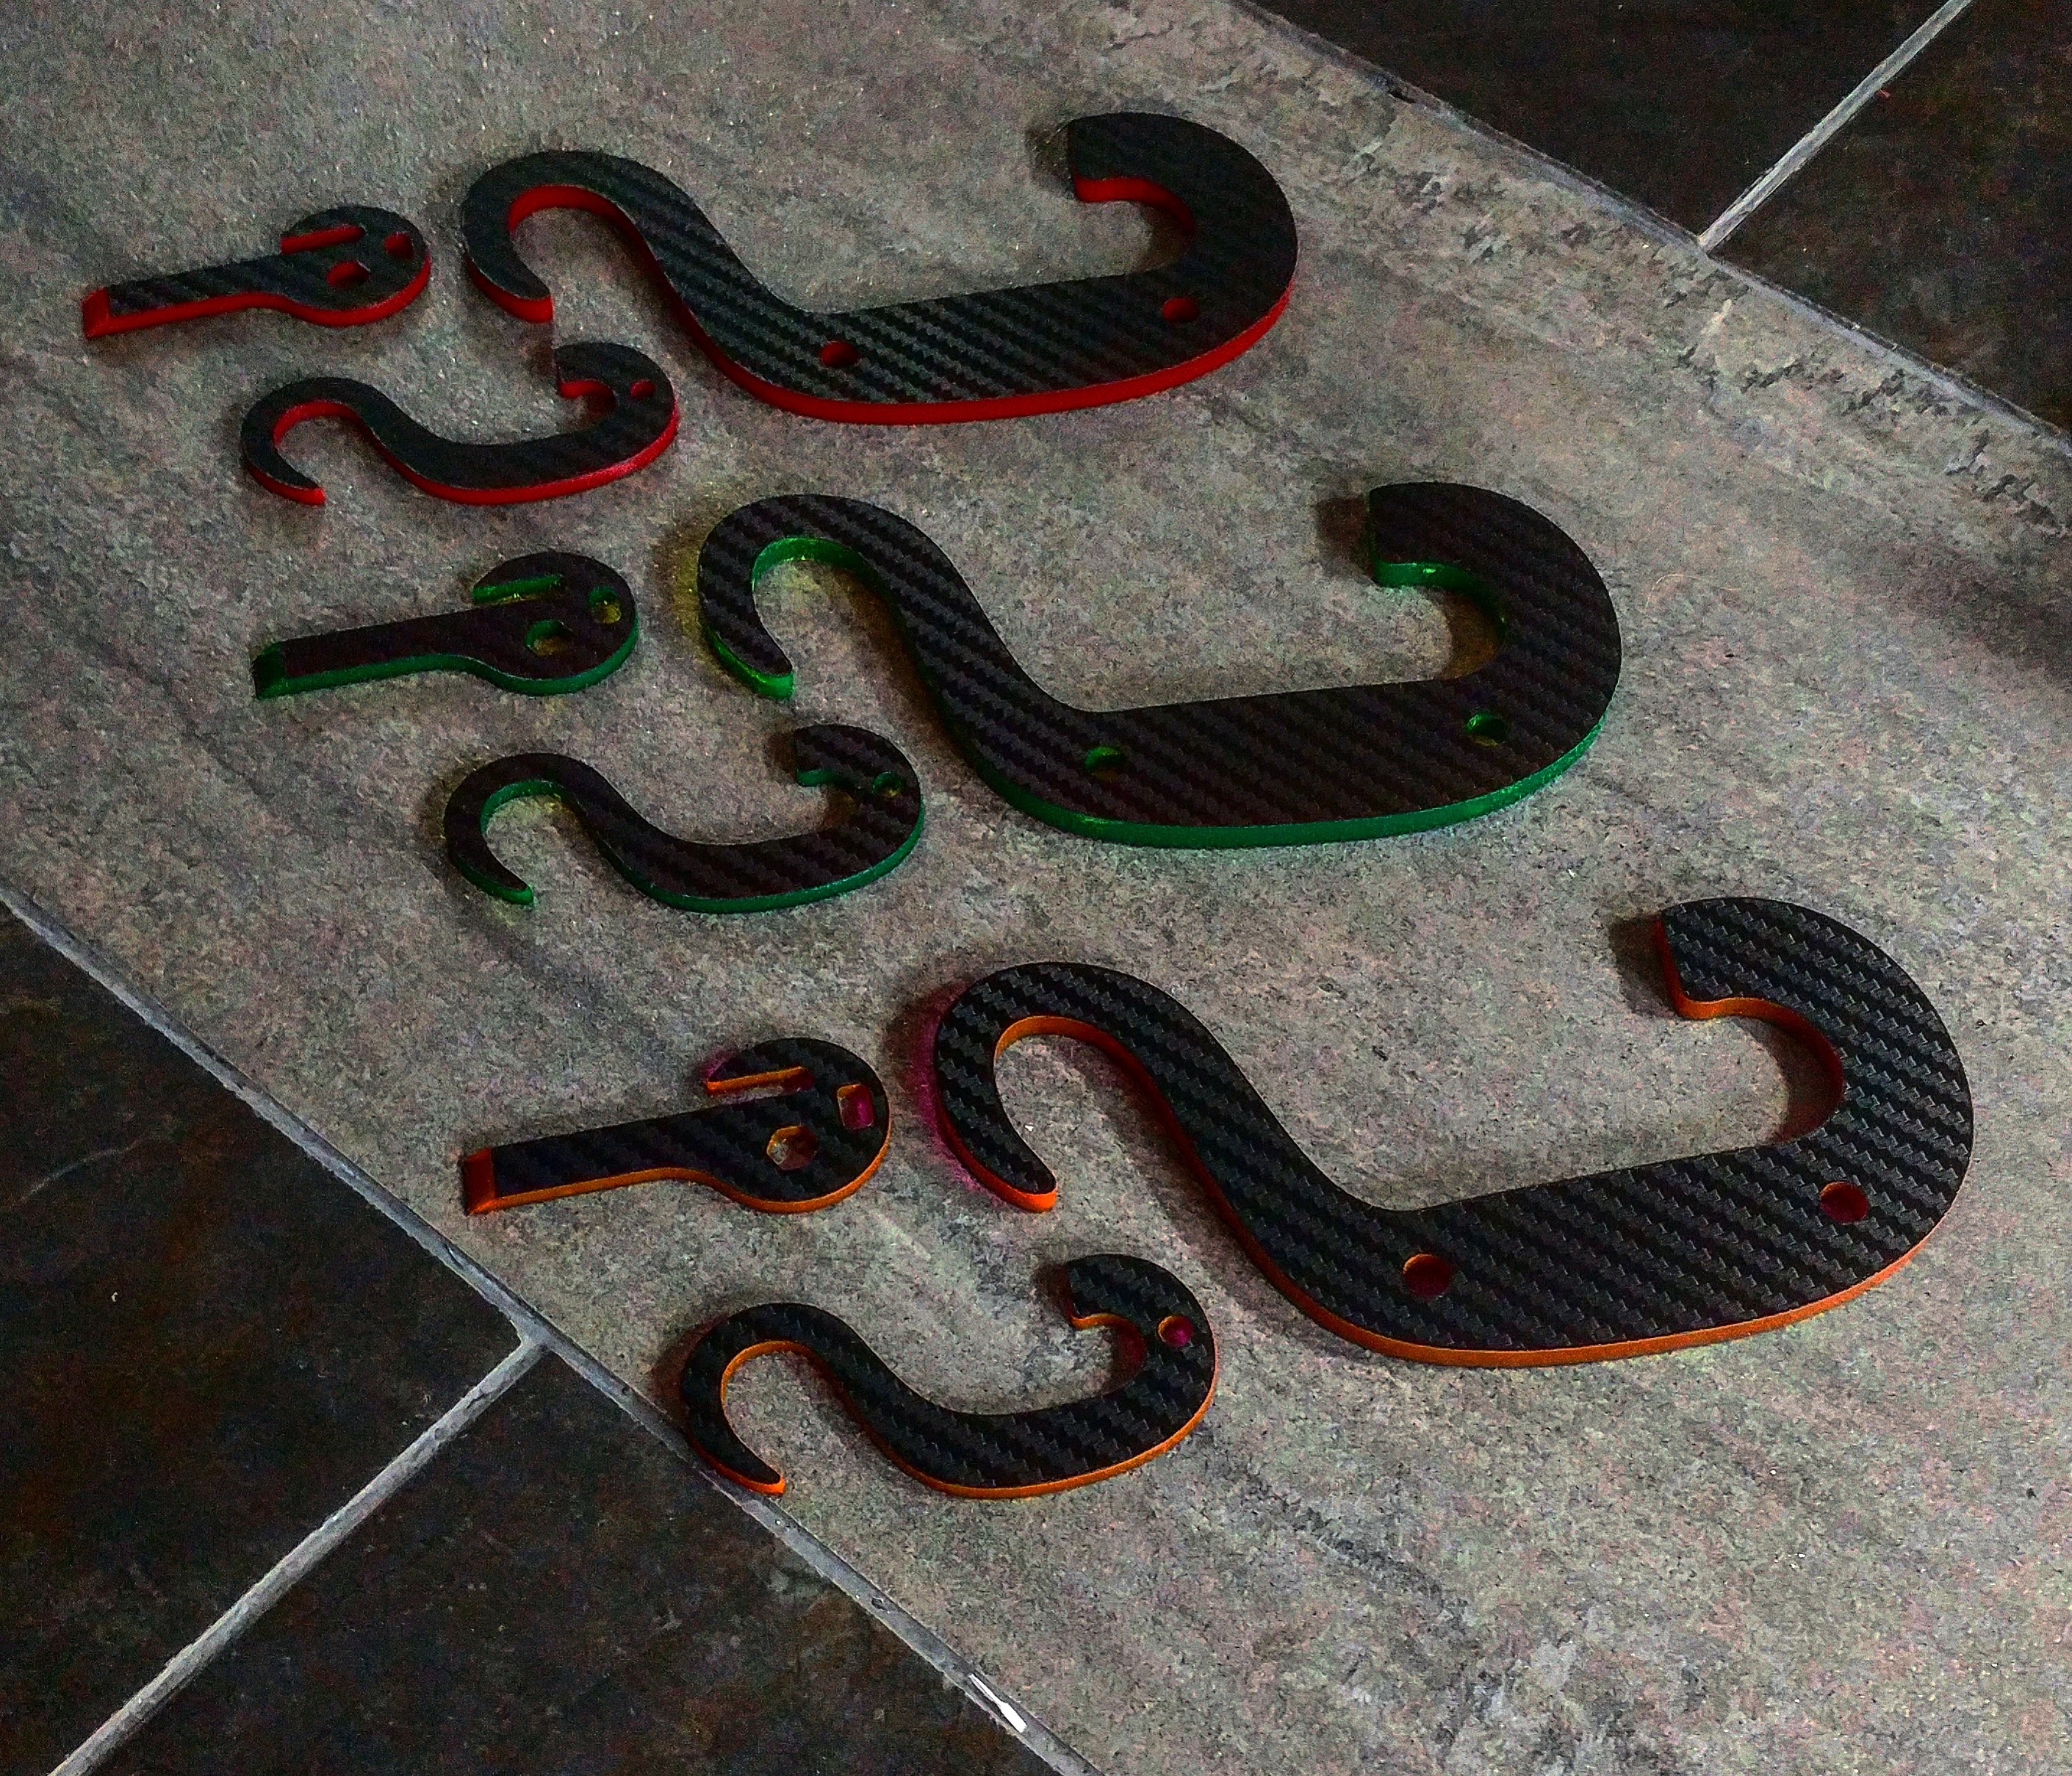
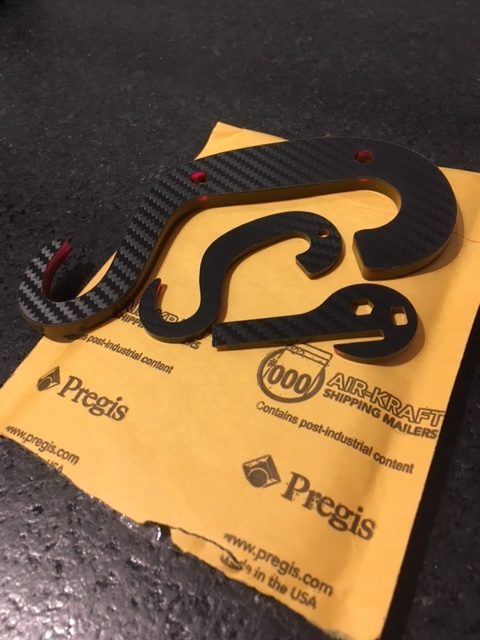
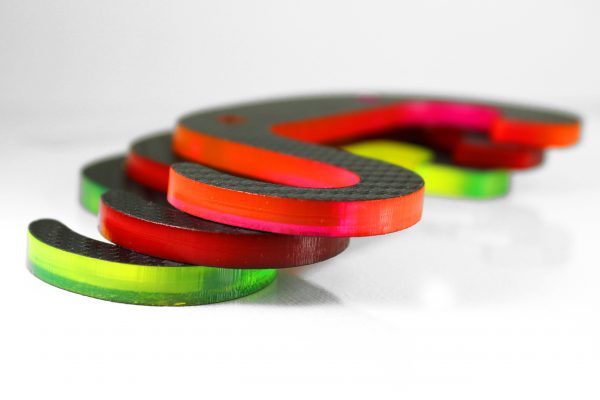
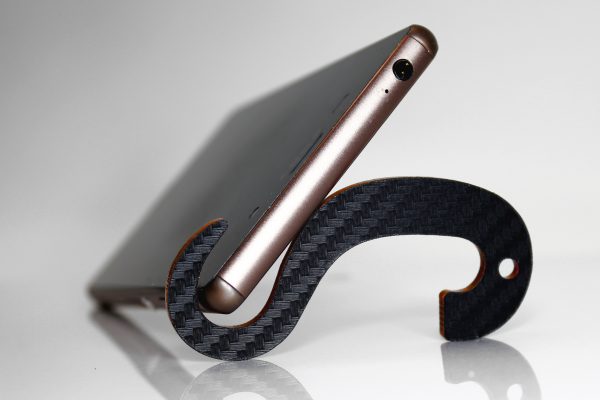
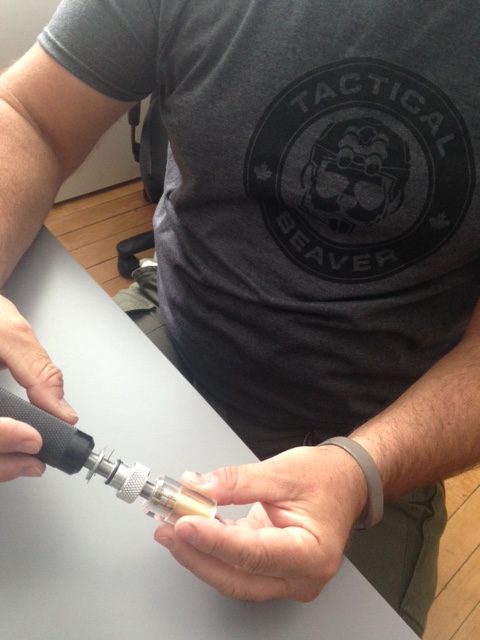
A little while ago I received a mail call containing a sample of the Accent Series from Delta2Alpha Design. To read my review of the previous generation of tools, go here.
Happiness in a parcel!
The Accent Series is their newest offering of upgraded versions of The MARK, The LOLLY and The MiK.
The MARK, in colours…
The new tools are delivered in three colours (crimson, blaze orange or day-glow green), clad in a robust carbon fibre skin.
Durable polymer clad in carbon fibre.
They are all incredibly versatile and even more durable than their previous versions. I found the carbon fibre skin to be more resistant to scratches and abrasions than the earlier version of polymer tools.
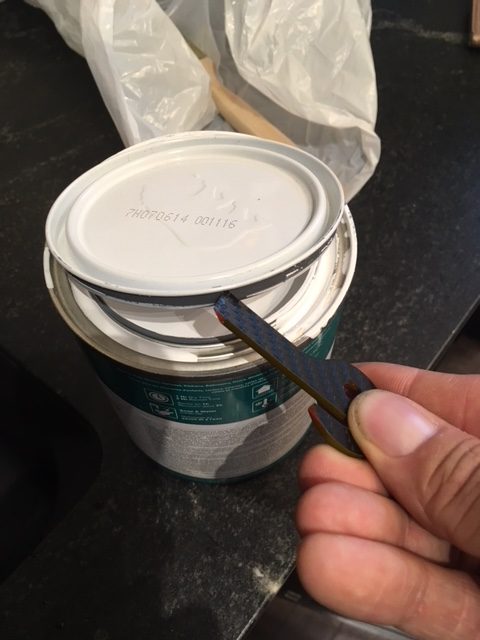
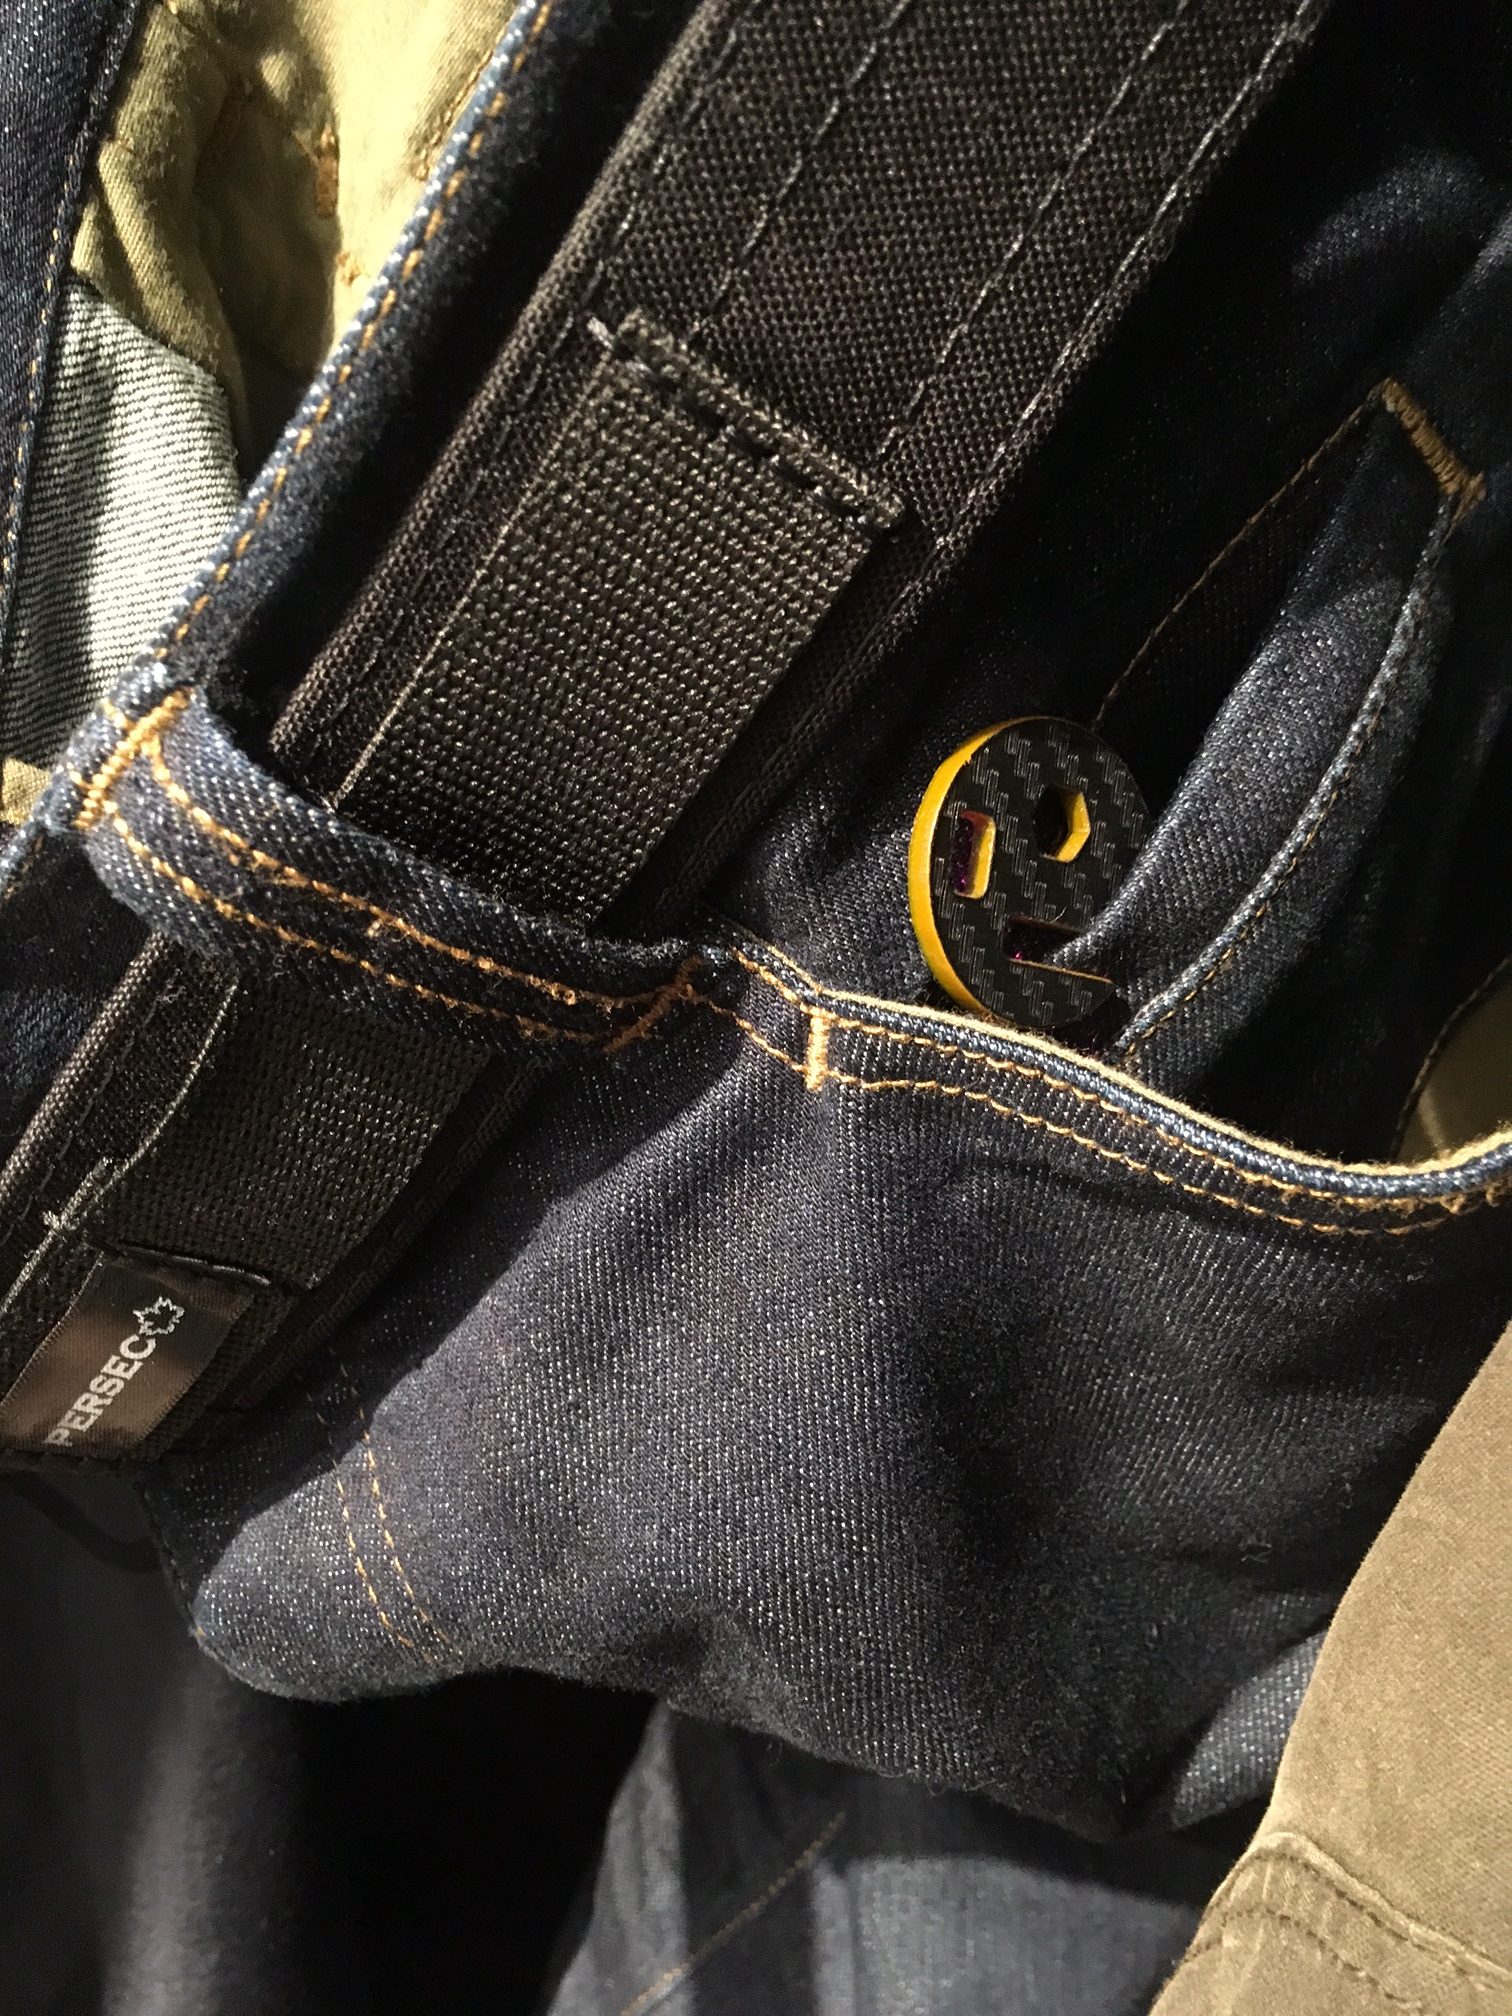
The Lolly – polymer last-ditch tool. Earlier version.Accent version of the Lolly.I have used the Lolly for opening paint cans when I find myself without a screwdriver. It’s handy to carry in my 5th jeans pocket.
On a recent visit to Ottawa, I found myself in a Tim Hortons for a morning coffee. The floor was covered in melt and slushy runoff from the recent snow. Thankfully, I had my Accent Series MARK in my bag (perfect for non-permissive environments like government buildings) and ensured my bag and its contents were well out of he muck.
No dirty, wet Tim Hortons floor for me and my stuff!
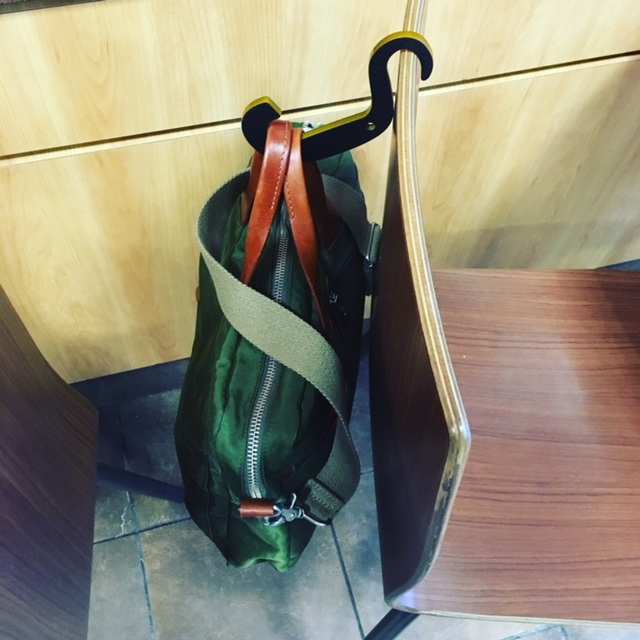
The MiK can be used as the MARK can, but with smaller applications. I do like how it can hold up your phone, hang your bag (or purse) or coat – perfect for bathrooms. It can also easily fit into the fifth pocket of your jeans for concealment and easy access.
TheMARK: Offers a convenient way to keep your jacket or bag off of the floor bathrooms when traveling (or everyday life) when there isn’t a hook. It can also be used as a tablet stand.TheMiK: Fits conveniently on your keys, and is used a hands free way to prop up your phone. This comes in handy whether you are trying to do a video chat, or just kill sometime watching cat videos (No Judgement).TheLolly: Can go right next to TheMiK on your keychain. TheLolly is a light duty pocket scraper, and prybar. It has be referred to as a “Fingernail Saver”. It also offers a ¼” bit driver and the key ring slot can be used to drive the Leatherman multi-tool brand bits.*Each package includes one (1) of TheMARK, TheMiK, and TheLolly; They are sold as matched sets*
All things considered, I feel that Delta 2 Alpha scored a big win with improving an already-sturdy and reliable design with their Accent Series of polymer tools. I’m very happy with them and equip myself with at least one on a daily basis as they are lightweight, practical and come in handy in a variety of ways.
I’ve always had a hard time taming the wild in my beard. I’ve tried, for many years, to find a product that does the following:
moisturizes
makes the hair softer and more manageable
adds a healthy shine
has an appealing scent
is easy to use and travel with (no strange looking creams and goos)
is produced locally (best option) or ethically abroad
and isn’t ridiculously expensive.
Over these past many months, I have made an effort to try several options that I would hope meet these criteria and would do what I’m looking for.
First off, my beard is a thick wire brush with swirls. This makes the dynamics of beard maintenance difficult from the start.
I used a few creams starting off to moisturize the beard, but found these mostly ineffective.
I next moved to lotions. I tried a decent product (from Comrades Barber Shop) and it was alright, but not fantastic. I think the product itself is decent, but I feel that it doest penetrate my beard quickly enough and bring softness throughout the day. This is just how my beard worked with it.
After those, I have landed on beard oil. For my beard, it seems to be the best choice.
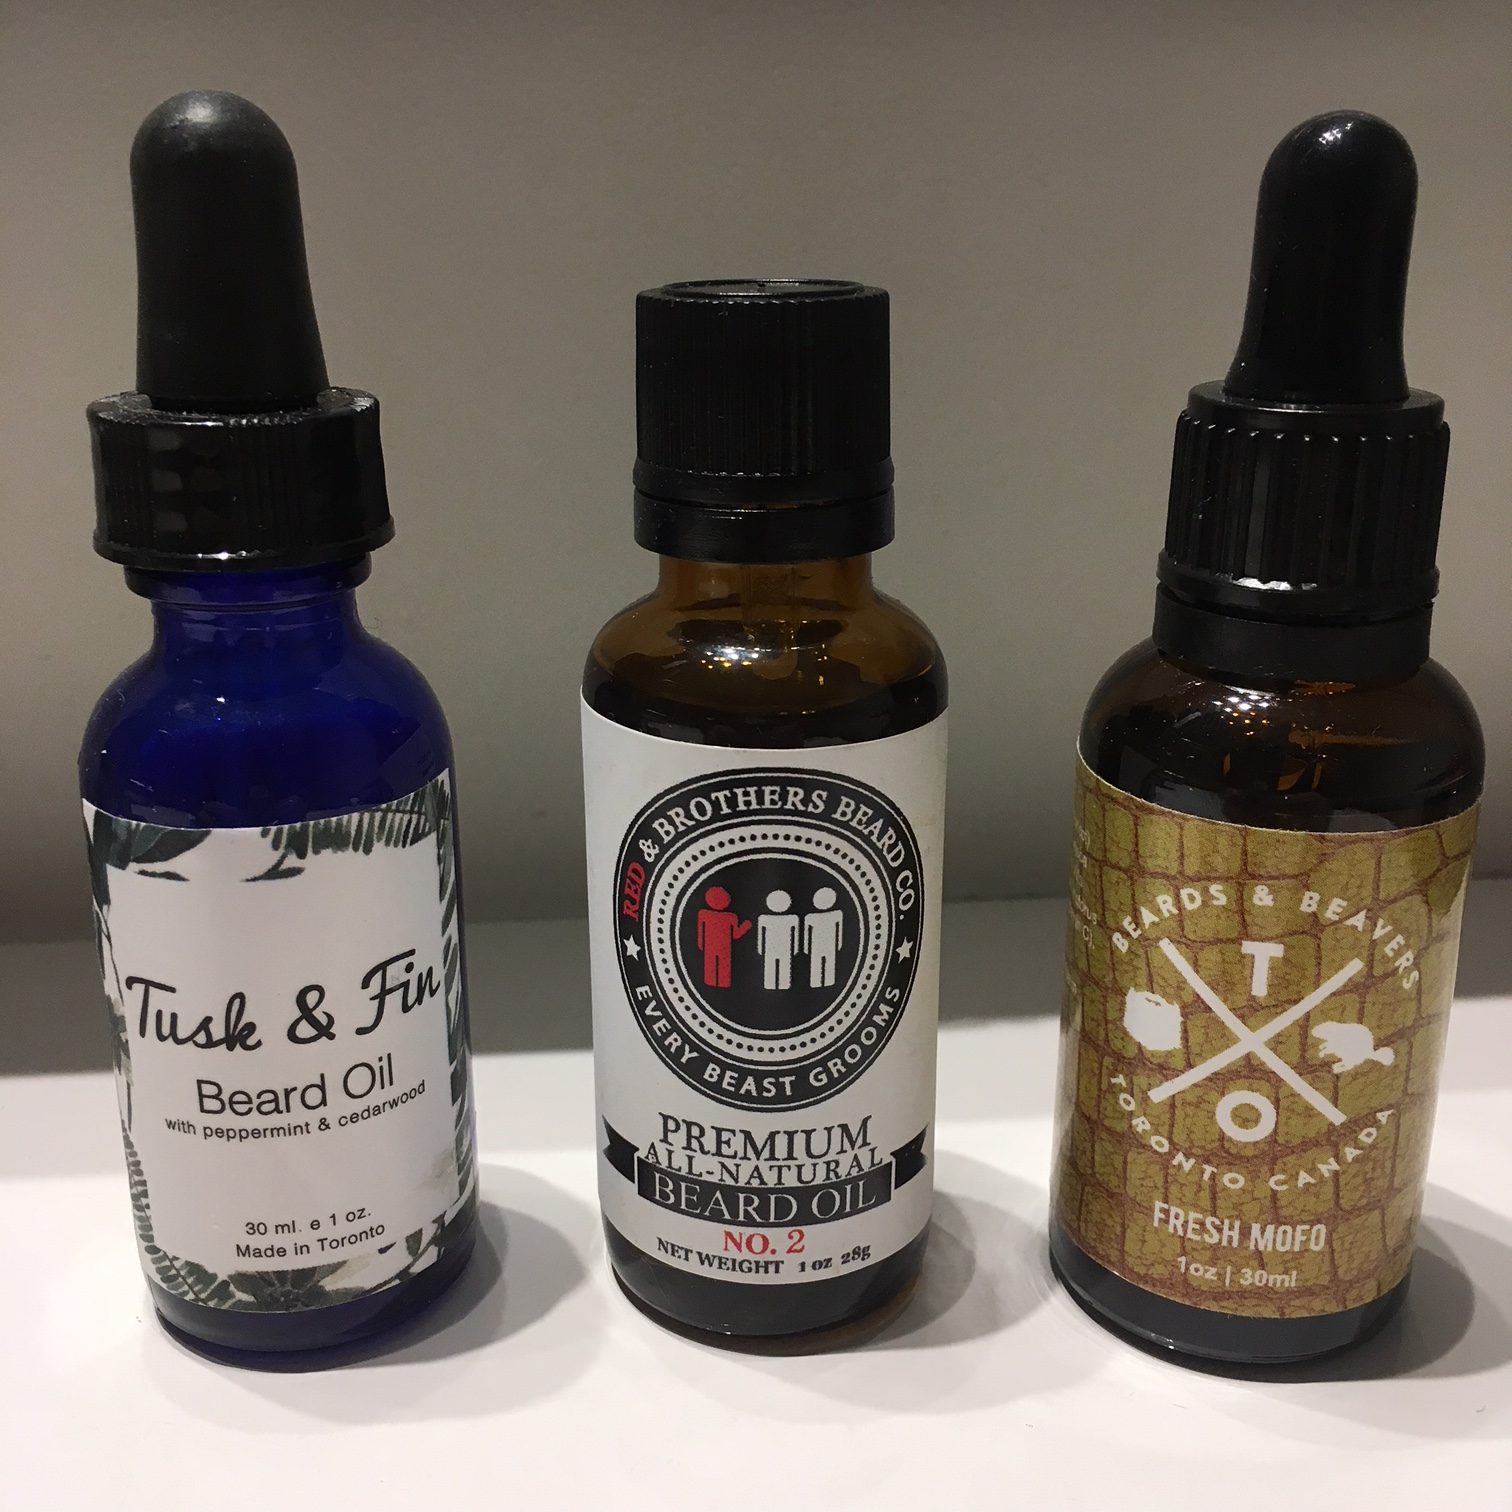
There have been 3 brands I’ve tried in this recent run that I have liked.
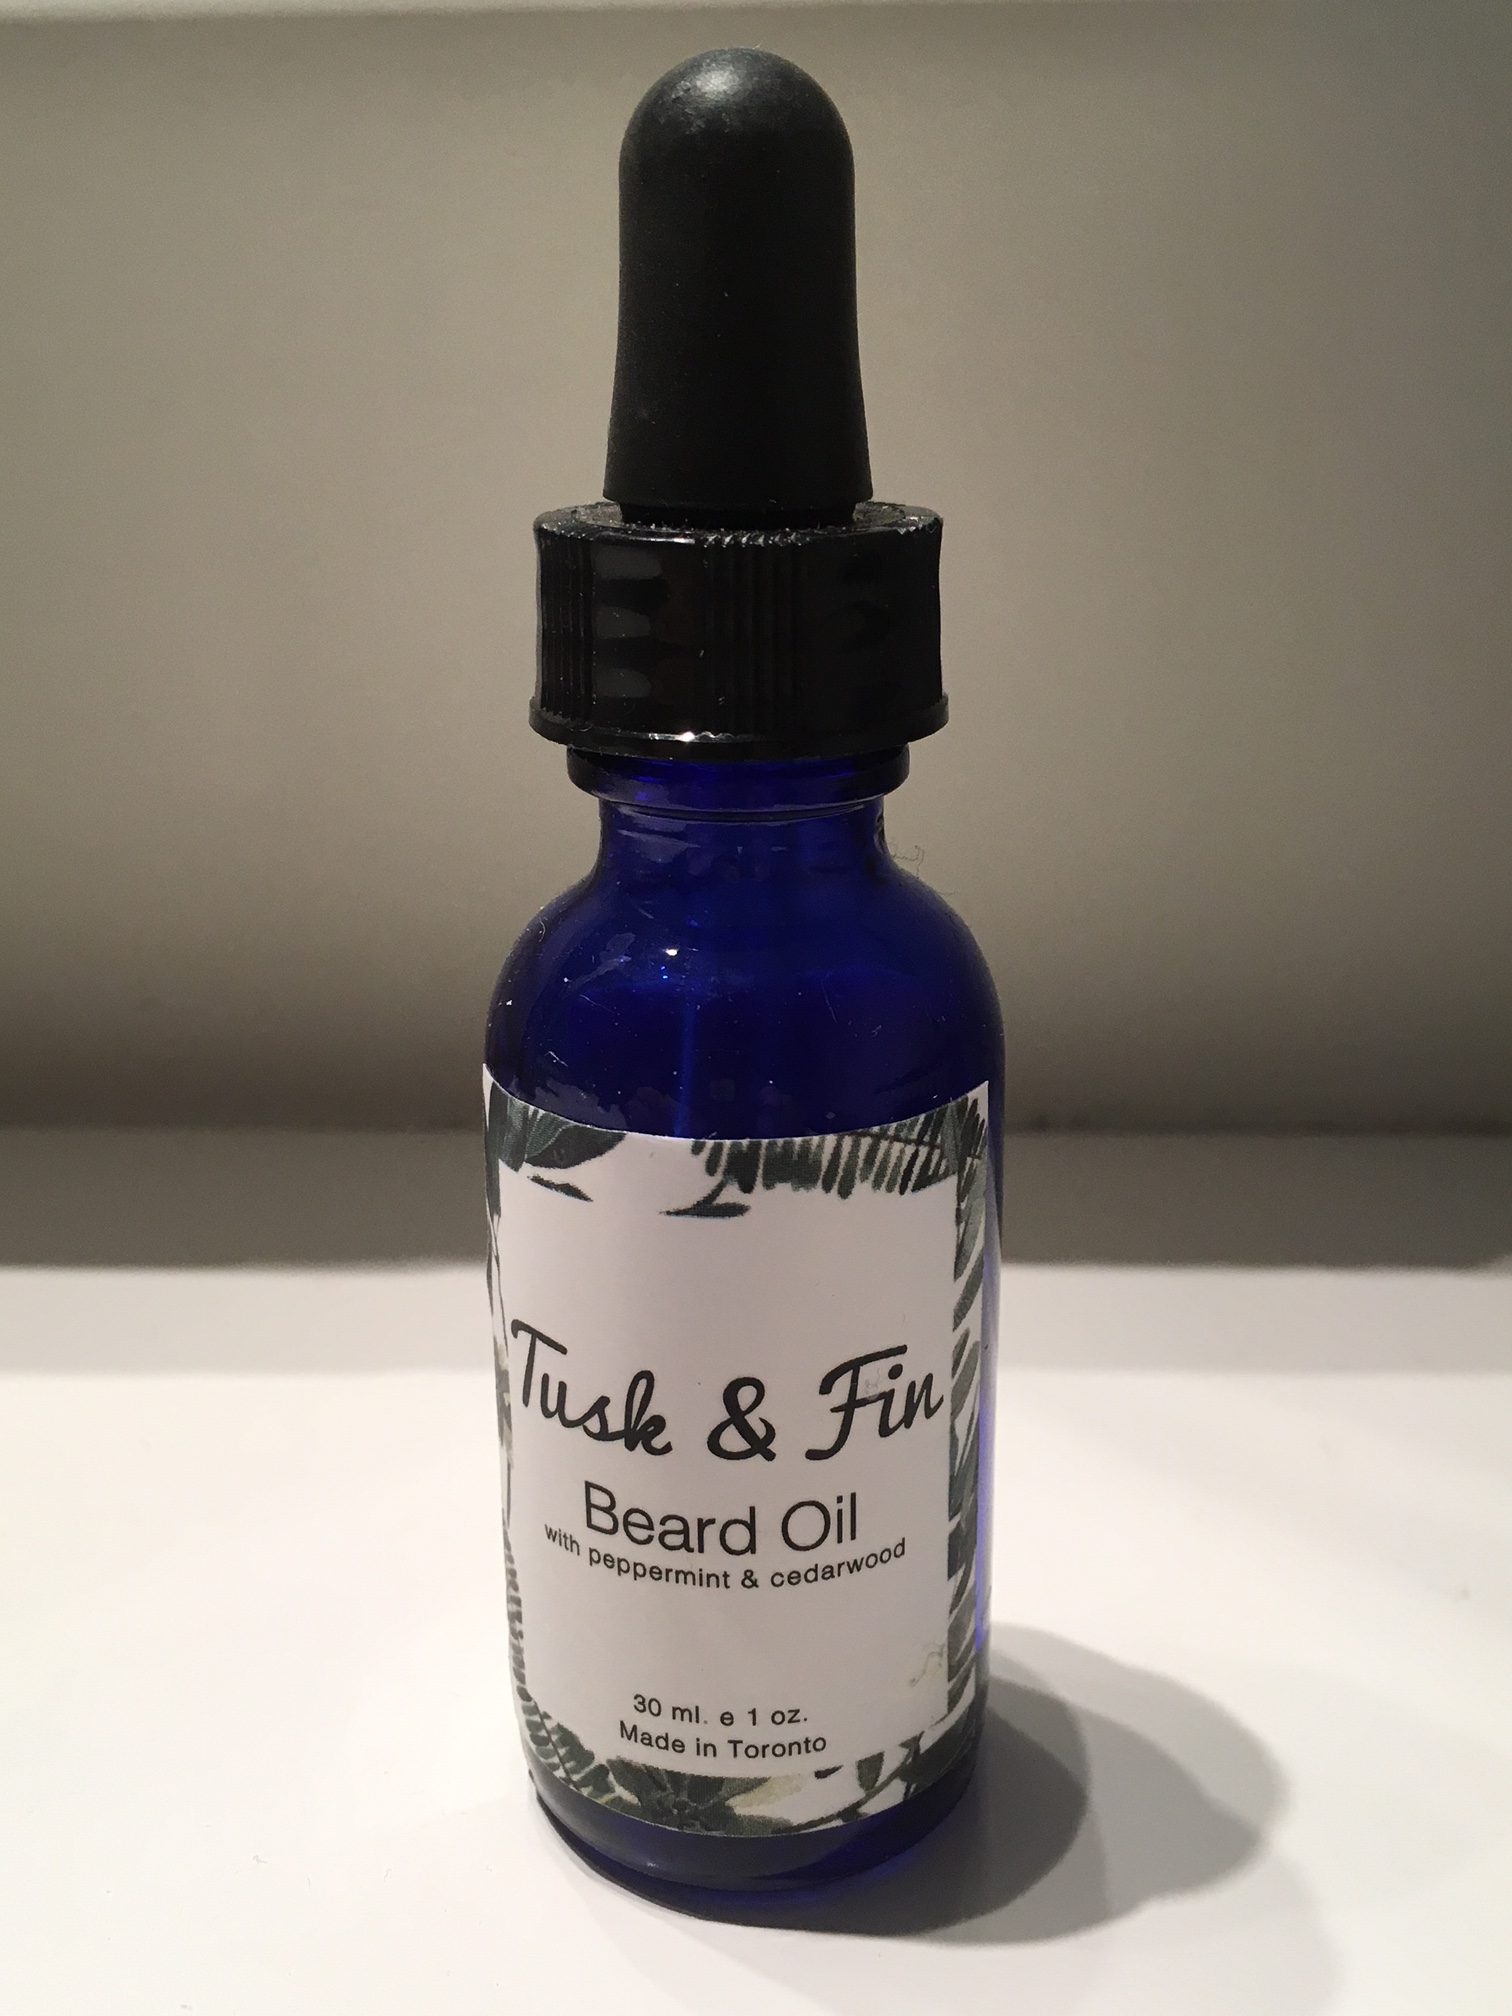
It comes in a nice, small glass bottle with a dropper. The scent is a mix of menthol and lavender. Quite nice, actually. The oil itself is of a higher viscosity (which is nice) and is readily absorbed. The result meets expectations on all the levels, but is a bit on the pricey side ($30 a bottle) but lasts well under daily use and seals well.
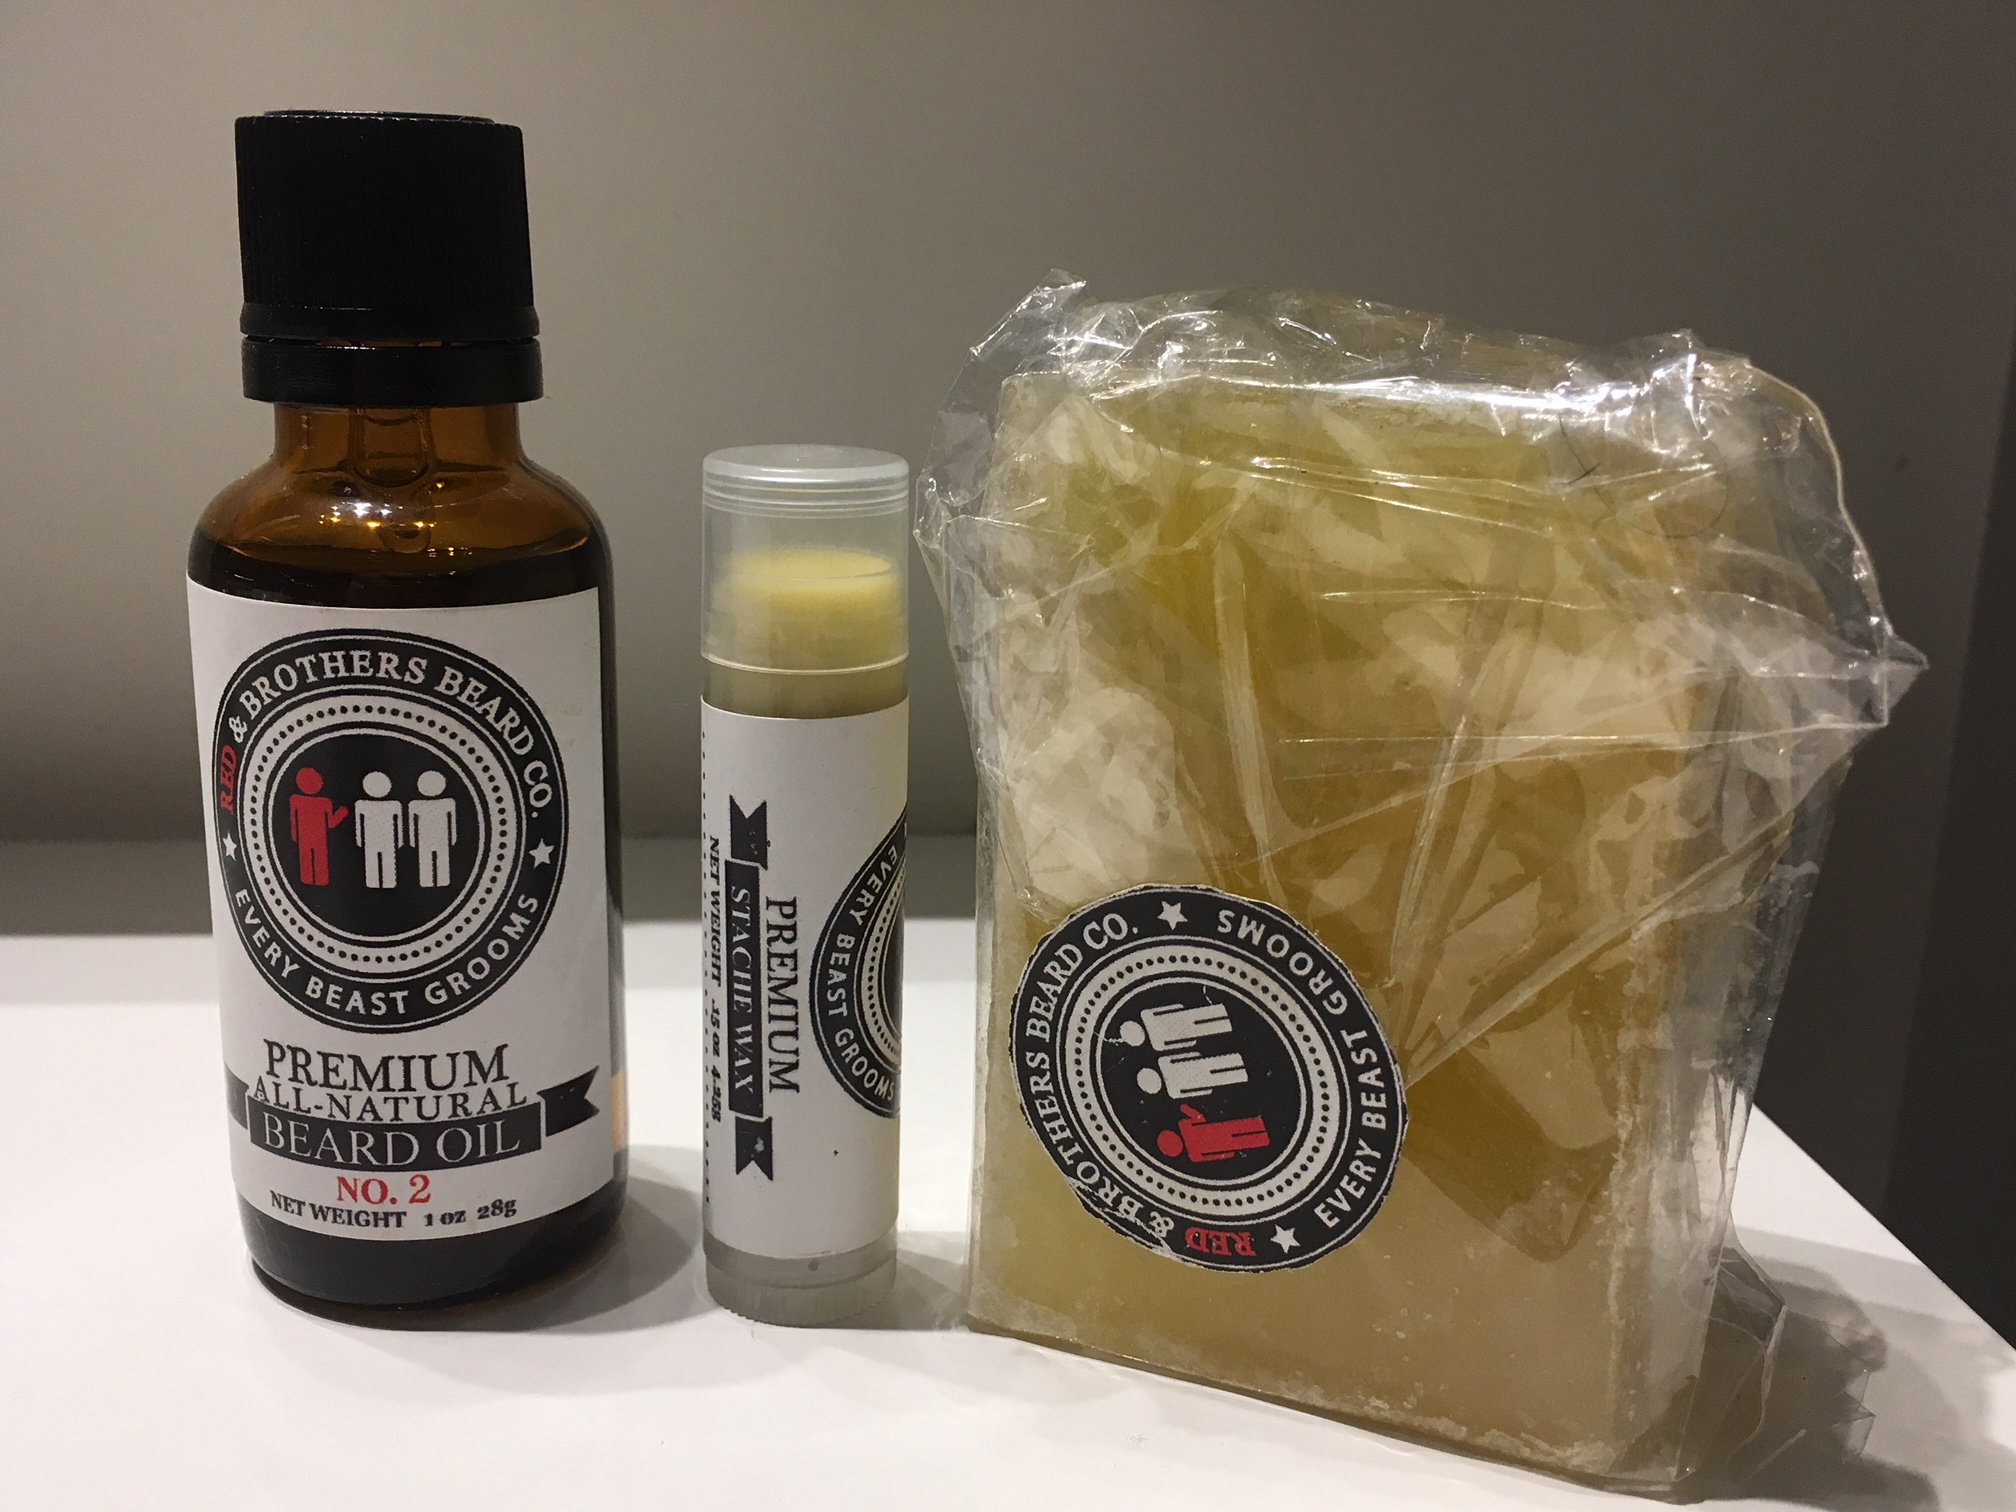
Second, is Red & Brothers Beard Company. They are a new Canadian company and despite their initial difficulty with communications (they had some technical problems with their messaging system when I was trying to place my order – now fixed) they quickly addressed it, connected with me directly and took care of it. I was very happy with the service I received and ordered a bunch of their stuff to try out.
Great shipment in from Red & Bros.
Their beard balm was good for sculpting, but for my beard, which has difficult swirls, it didn’t work for me. Their “moustache stick” (like Chapstick for your moustache) works pretty well for taming wild fliers) and is small and handy. The beard bar, a soap bar for your beard which doesn’t strip away the oils from your man-mane, also works very well for morning and evening face washing.
The main product, their beard oil, is really nice. I find it to be the right amount of everything. Viscosity, scent, effect on the beard, price ($ per bottle) and it’s also a new Canadian company from the Ottawa area. I like to support Canadian whenever I can. That said, I have one big issue with Red & Bros beard oil.
Beard oil, moustache stick and beard bar.
The bottle. More specifically, the cap and dropper insert. Once opened, I found that screwing the cap back on doesn’t seal very well and can leak. (This may be this specific bottle but I’ll only know when I open the next one). Also, the drop insert (not a medicine-dropper style like the others) takes forever to get even a few drops of oil out of the bottle. I grabbed a needle-nose plier and pulled it out because it was too frustrating. I’ve emailed them about it as they were so good in their communication with me so if it’s a manufacturing issue, and they address it, it’d really be a great product all-round.
Beard balm. Very nice product but a little too involved to use for me.
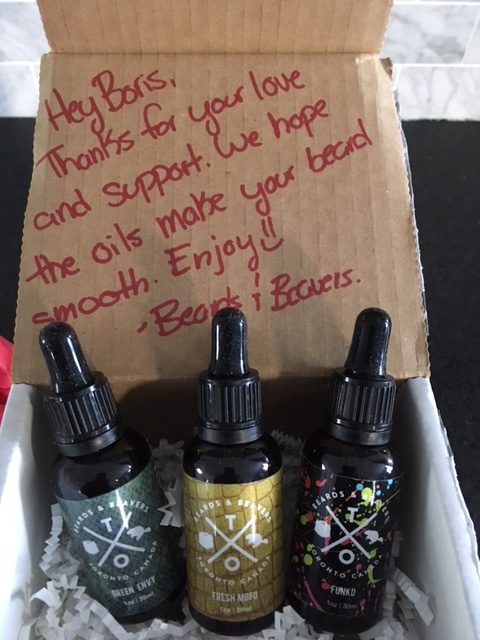
Third, I’ve come across Beards and Beavers. They are a Toronto-based company and their products are interestingly marketed. For the cost ($50/3 bottles = $16.67 ea) they are a good deal. The dropper-tops are user-friendly and the scents work well for me. The formulation of oil and other ingredients make my beard smooth, soft and feel great. The customer service is great too.
Great product. Great value. Personalized message. Cool.
I had a technical issue placing my order and after contacting them, I received a reply thanking me for bringing it to their attention and that it had been fixed. I immediately placed my order and it arrived quickly with a really nice, personalized note in the box thanking me for my purchase. I chose “Fresh Mofo” and “Green Envy” for my scents and they threw in “Funk’d” as the third surprise scent.
Cool Stamp.Made in Canada. Nice.
I’m happy with how they smell and how they make my beard much more manageable.
In all, I’m an adherent to beard oil for beard maintenance over the lotions, potions, creams or what have you. Though it is very much a subjective and personal preference depending on what works best for your particular beard, I would recommend taking a look at Tusk & Fin, Red & Bros and Beards and Beavers for your beard care needs. They are all great products and work well to meet the six points listed at the beginning. Check them out.
Buy Canadian and find something to maintain your operator man-mane.
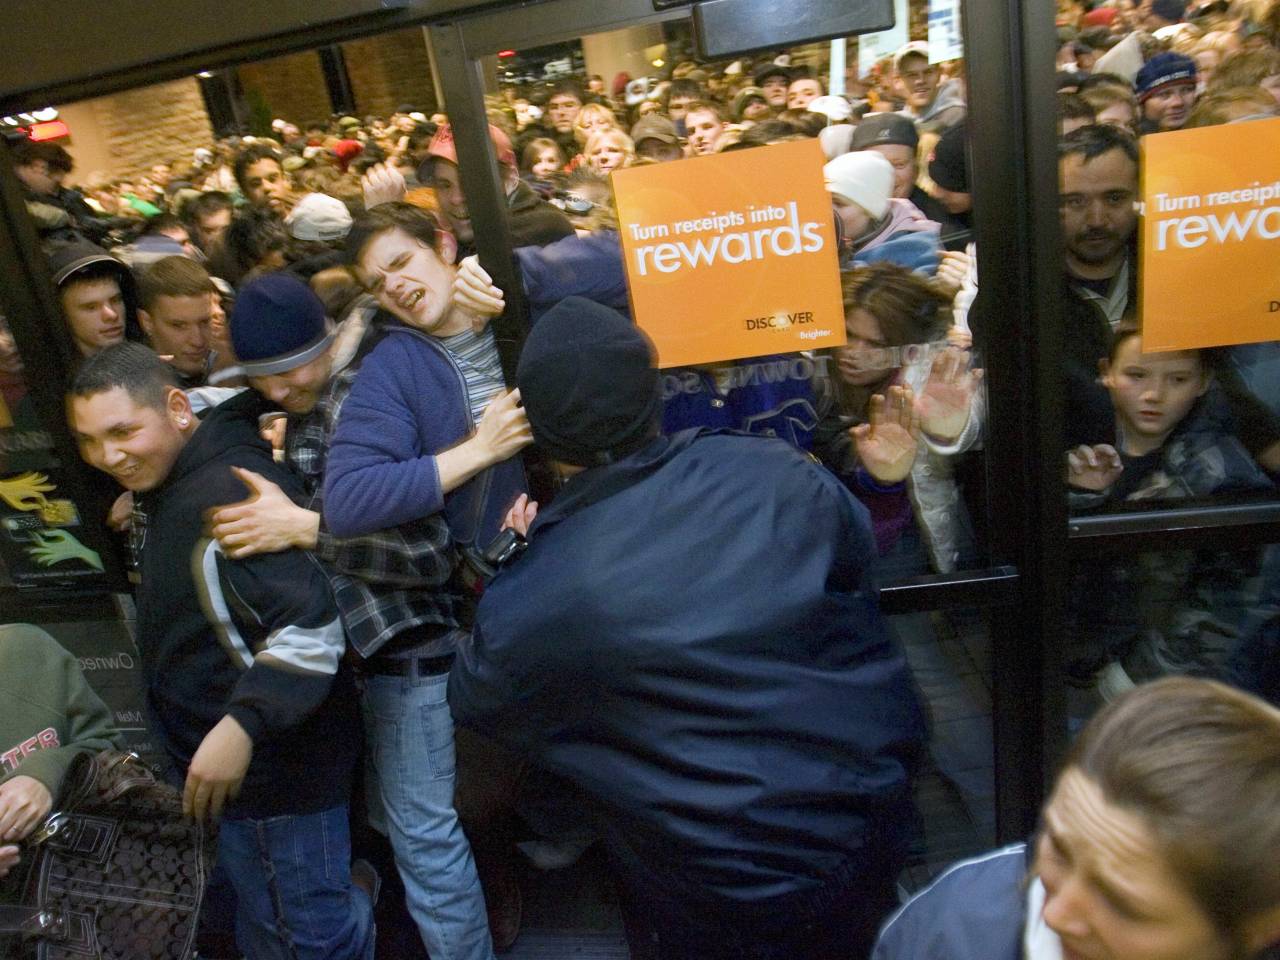
As the holiday season approaches, we will invariably be heading out more often to places rife with people. Be it for shopping, get-togethers, enjoying a crisp winter walk or seeing a festive event, the holiday season brings more and more people out for all these reasons and more.
Large groups of people gathered together tend to cause problems relating to safety and security. They increase the risk of conflict between people in those large groups, they make inviting targets for those who would wish to cause harm (i.e. bad guys) and the larger the group of people in a building, the more difficult and time-consuming it is to get those people out safely, especially under panic.
Violent crowds. Dangerous times.
Examples of these would be as follows: anytime there is one last toy of a particular kind and a fight breaks out; fights over parking spots at malls, etc. These types of events may or may not be directly involving you, but have the potential to rope you in if you’re not paying attention. Another is an active shooter (such as the Jane Creba shooting in Toronto) where something like gang violence occurs and innocent bystanders are caught in the middle. And then there are times when a machete-wielding lunatic attacks random shoppers, or some fanatic decides to plough down people walking down the street with a truck. And then there’s fire. Nothing nefarious, but deadly nonetheless. They happen. Use all your senses to stay aware. None of these are predictable in a useful sense for someone heading out for a day of shopping at the mall. They just happen.
For the interactions that escalate, I would recommend to let it go. Is some hot-head nut case really worth that parking spot? Likely not. However, this doesn’t mean I advocate not protecting yourself if someone attacks you.
George knows. It’s not worth it.
For the rest, they are “black swan events” which you have to deal with as they unfold.
Here are my thoughts on how to increase your chances of survival in crowded locations in times of danger.
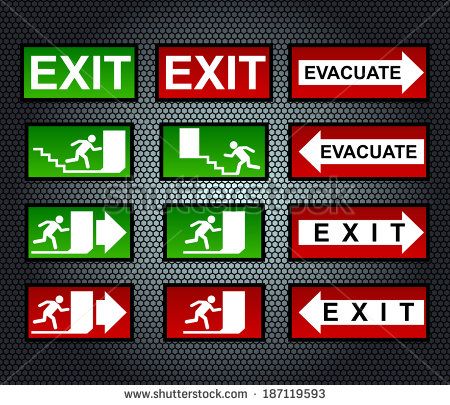
Keep an eye open for viable exits: as you enter malls, concert halls or crowded public spaces, keep an eye on ways out. Be it a fire or an attack, having a pre-planned escape route can save valuable seconds getting out and saving yourself and likely others. Better yet, if you’re there a while, hang out near the exits. You’ll be better positioned to get out should something happen. Also, if in a mall, take the stairs instead of the escalators. If you have to move in a hurry you have a better position to move from as those on the escalator are trapped in the chute.
Exits, exits everywhere! Keep an eye open.
Keep moving: Staying still doesn’t help you much in a time of crisis. If you’re still, you’re an easy target, you’re not moving away from danger and you’re not able to affect change to your circumstance, thus handing all the control to others (i.e. bad guys). Move towards an exit, move to cover, move to a fire extinguisher…just MOVE! Be a difficult target. Movement is Life. In large crowds, most people will attempt to exit the way they came in. This can cause a stampede-like effect where people get trampled and crushed. A wave of humanity which is large and panicked cannot be forced. Instead, take the better approach and aim for one of your pre-scouted exits instead.
In the case of an active shooter – TAKE COVER: That’s right. as you move, move from one place of cover to another until you exit and create time and distance between you and the threat. Cover is something that offers ballistic protection (i.e. protection from bullets). This is cement and concrete. Furniture, vehicles and the like don’t provide adequate protection from bullets. Stone, rock, thick steel and cement do. Look for pillars, walls and the like to save you.
Hide behind concrete.
Be aware of your surroundings: Use all of your senses. If a fire breaks out, you’ll likely have an indication before you see it because of smell. Move to an exit. When in a crowd, get a sense of the general “feel” of the environment. Stay at the edges of crowds. Look for people who don’t look or “feel” like they belong in the same group. Situational Awareness is your early warning system for something bad happening. It’s not meant to cultivate paranoia, it’s meant to cultivate awareness for whats going on around you so you have a chance to ACT before being acted upon.
Keep your head on a swivel.
Keep Essentials on you: Your personal Every-Day-Carry should be on you at all times. A small knife, multi-tool, lock picks, lighter, cash, cell phone (charged), mini flashlight, some cordage, etc. can help you get out of a tough situation should you need it.
To sum up remember these key points:
Be Aware (of your environment)
Be prepared (with a viable EDC setup)
Identify Exits (note escape routes)
Keep Moving (movement is life)
Take Cover (behind concrete or stone)
Better yet, order online and stay home.
In closing, before you head out, switch on. Enjoy yourself and have fun, but always remember that by being aware you are fore-warned and fore-armed. Always have an escape plan.
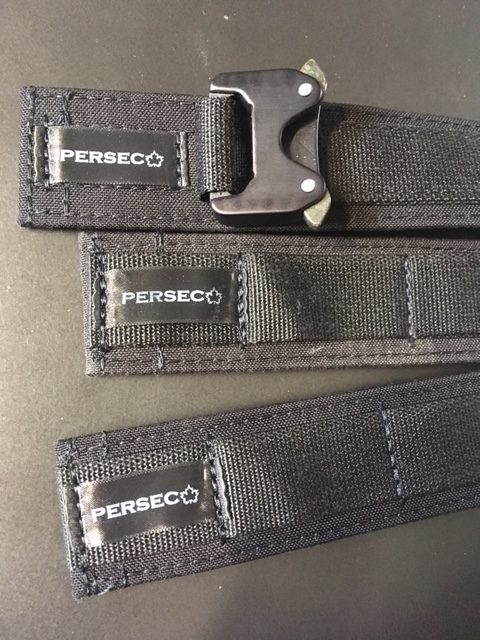
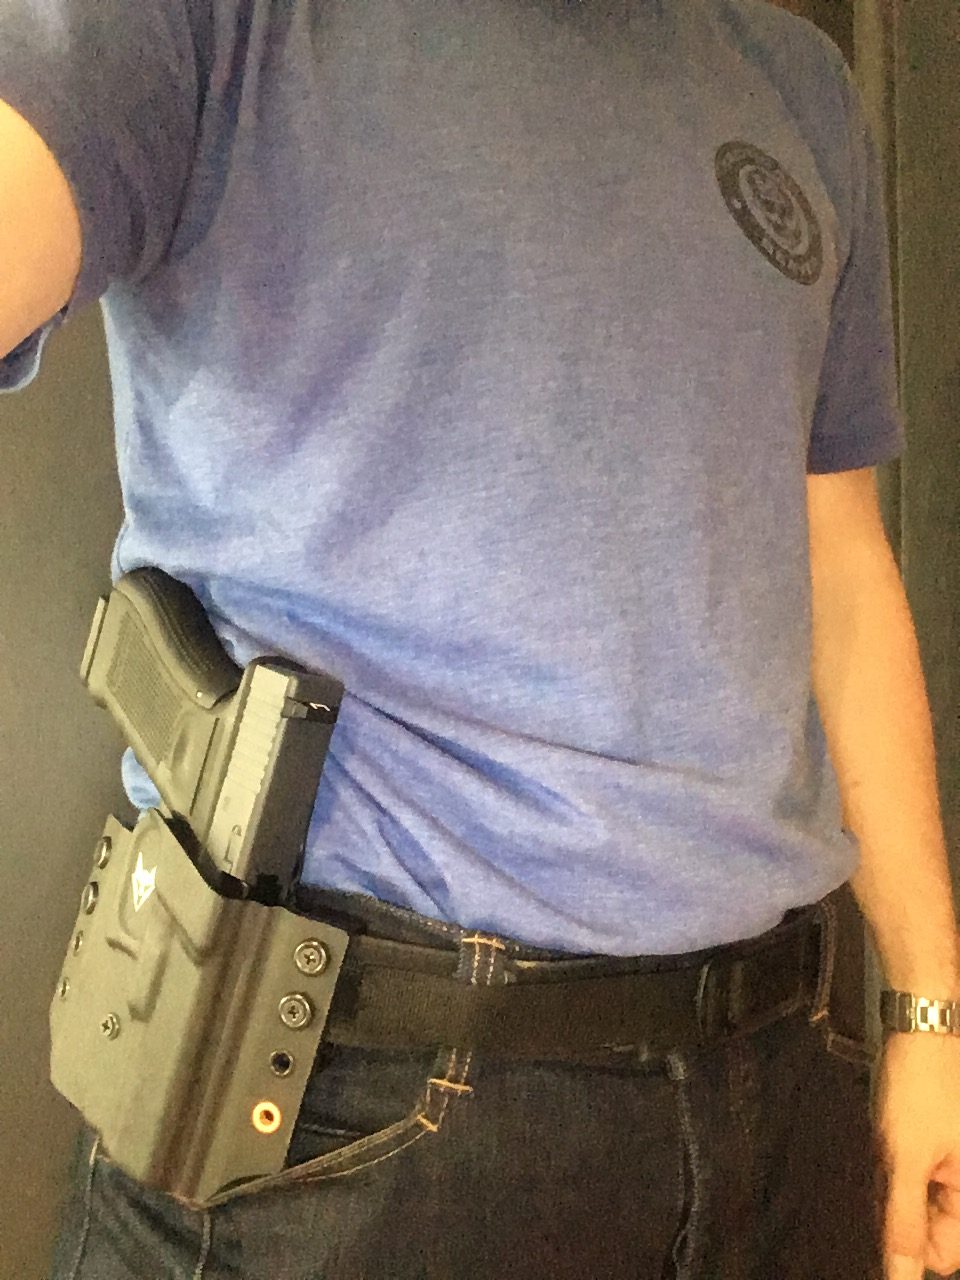
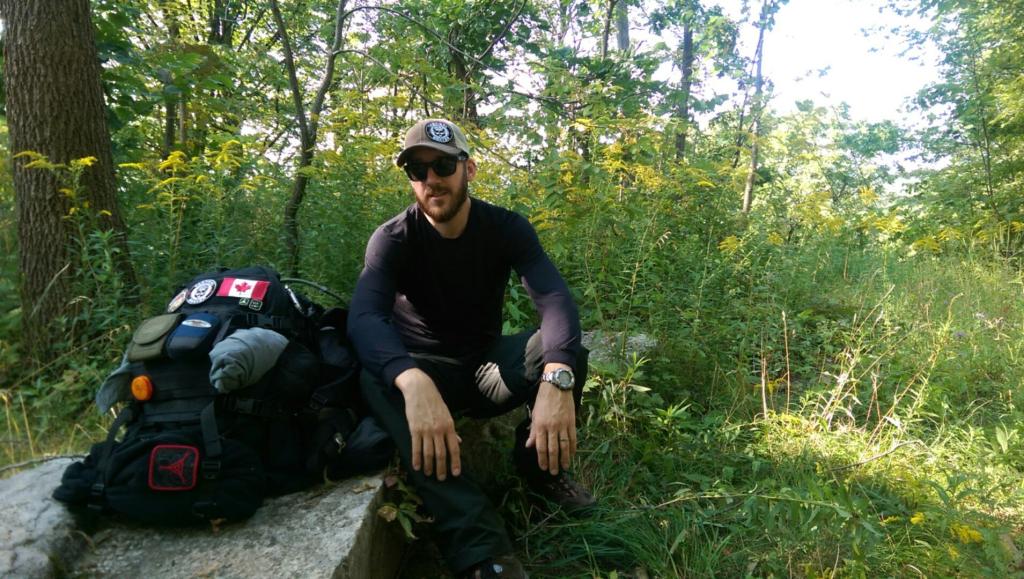
For years, I’ve been on the lookout for a solid belt. When I say solid, I include in that definition fit, style, strength, durability, functionality and dependability. Almost two months ago, I think I hit pay dirt with that.
While I was planning my Bruce Trail outing, (read about it here) I found that I was missing a key piece of gear: a “solid” belt. Sure, there are a load of well-known commercial companies that offer quality belts, but I was looking for something specific. I wanted what they offer, something I considered “solid”, not ridiculously over-priced and, if possible, Canadian-made.
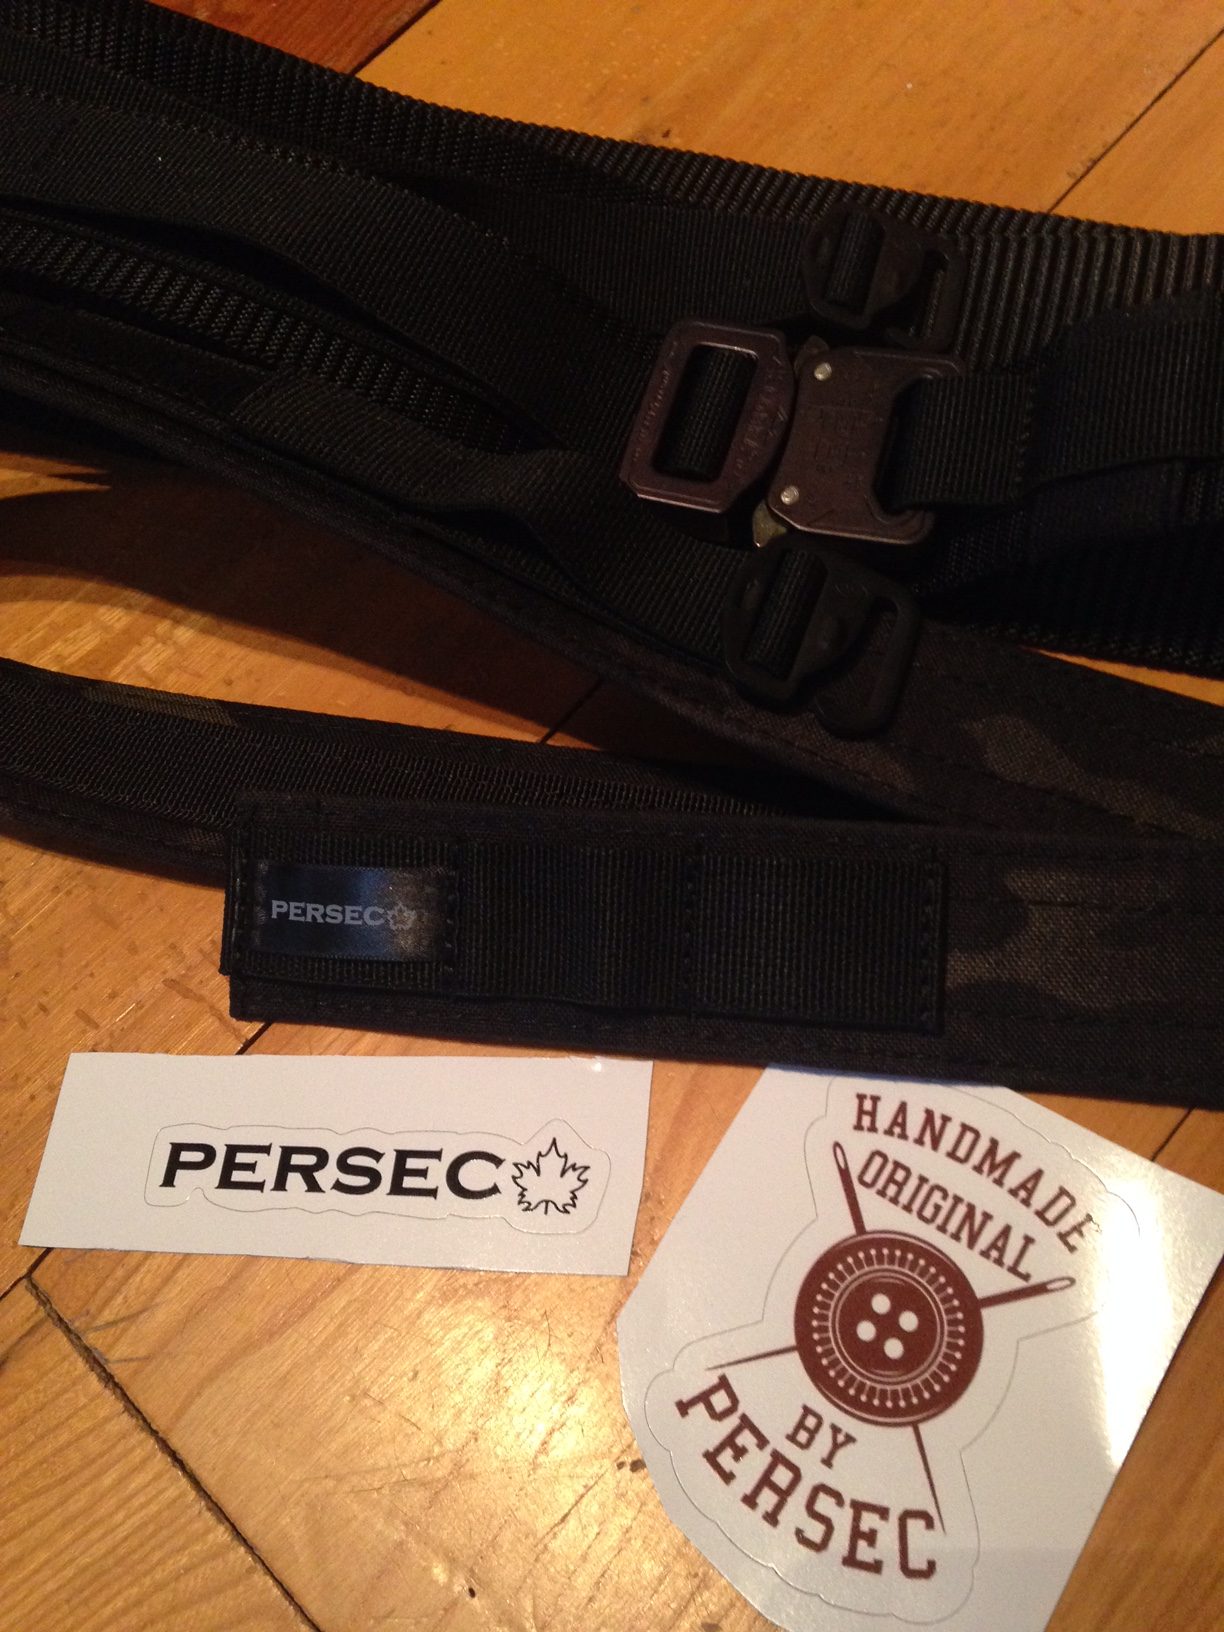
Enter Persec. We had followed each other on Instagram and I reached out asking some questions about their products, their hardware, colours and the like. Not only was I happy with the answers, but also the questions I was asked. Custom work, apparently, is even better when the one making the product has a better understanding of the customer’s intentions and requirements.
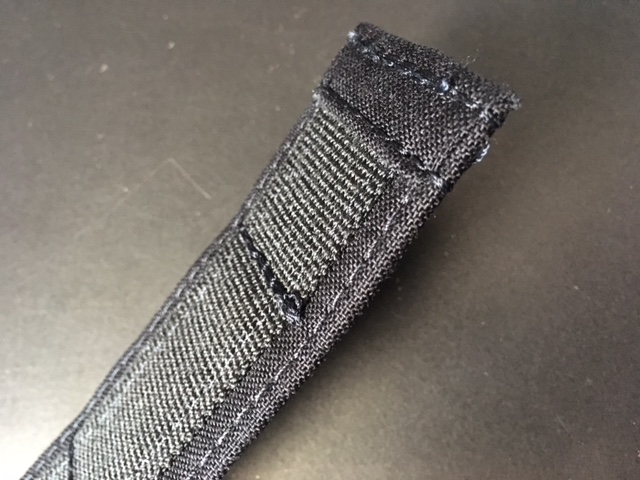
Extra stitching, clean and tight cuts. Quality materials.
Some fast-facts about the belts offered by Persec:
They offer 3 widths – 1.5″, 1.75″ and 2″
Several colours (black, ODG, camp, coyote, etc)
Built from a combination of high-strength webbing and Codura for rigidity
Available in a variety of stiffnesses, strengths;
All are custom-lengths;
Every belt is made by hand, in Toronto, Canada, and with incredible attention to detail that is immediately apparent.
All manner of customization is available – contact them directly for more details.
Like a belt-Christmas!
As I received my order of belts, I was immediately relieved with my decision to go with Persec and try them out.
The belts were custom-sized. Exactly what I had requested. The shipping was very fast (they are located in Toronto). When I held them, I could feel the quality of construction in the materials but also, when examining them closely, could tell the attention to detail in the craftsmanship. Most consumer goods made in bulk have loose stitching, imperfect cuts and the like, but not these. Every detail was exacting. I was impressed.
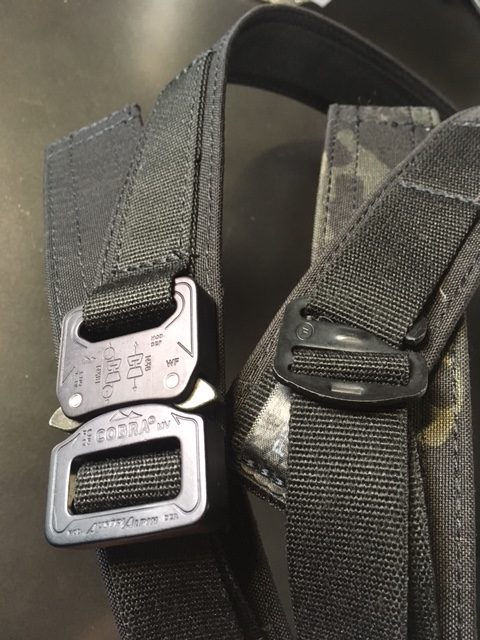
What I had requested was a belt which would cross-over easily from the trail to the urban jungle, in black, with semi-rigidity, custom-length, with both buckle options (hook and Cobra Buckle, respectively). Persec did not disappoint.
The Cobra buckle (left) and hook buckle (right) options on Persec belts.
The semi-rigidity of the belts, as well as the widths (they recommended 1.5″ as opposed to 1.75″ as I was interested in the cross-comparability of daily wear as well. The 1.75″ would be more appropriate for a duty or gun belt setup). I was happy for the choice as it easily works with jeans as well as hiking or tactical pants.
Persec belt works well as a daily wear belt in the urban wilderness as well as on the trail. Also, the Lolly in my pocket (from Delta2Alpha’s Accent Series) compliments the belt in more ways than one.
The adjustment options for the belts work very well. The hook buckles have three attachment points which, in harmony with the velcro hook & loop patch on the opposite side, allow for a perfect fit every time. With the Cobra buckle, you have only the velcro strip opposite the buckle, but this too works very well as the cam cinched down reliably.
Hook buckle. Once attached is very strong and secure.
I equipped myself with two of these belts (one with the Cobra buckle, in black, the other with a hook buckle in black subdued camouflage) for the miles of hiking and have been wearing one almost every day out since returning. They have become my daily wear.
After almost 2 months of wear, use and some abuse, my conclusions are as follows:
The custom fit is great. Better than regular commercial products, I find;
Each piece is made with great attention to detail, high quality materials and much pride. In my correspondence, this was very apparent.
Both belts are “solid” by my standards. I have no doubt that they will last a long time.
There has been barely any warping – this tends to happen, especially when I load the belt up – but despite this, it has been minimal.
The black of the material has not faded at all, despite long periods in the sun, water and dirt. It’s still pitch-black.
The semi-rigidity of the belts allow for ease of movement without digging in to me at any point, even when equipping with clip pouches or anything “in-the-waistband” (This includes a holster. No concerns, even for the range).
I have even worn it with my uniform in a training environment and like it far better than the “rigger’s belt” I’ve worn for years. I have switched them out and feel good about it, though I’ll likely order another in OD Green so that no one gets bent out of shape about the non-issue colour.
Bottom line, I’d recommend checking out the items offered by Persec without hesitation. You can find Persec Aware on Instagram and Facebook. You won’t be disappointed.
In the beginning…at the Southern Terminus of the Trail. Let’s do this!
Every foray outside one’s home brings with it the possibility of adventure and danger. This excursion was no different.
Our journey took us from the Southern end of the Bruce Trail (in Queenston Heights Park) to just north of Hamilton, Ontario.
*Note, due to personal circumstances beyond our control, we were forced to delay the completion of our trip and return home. We are, however, going to complete the rest in shorter blocks to ensure that our responsibilities at home are maintained in our absences.*
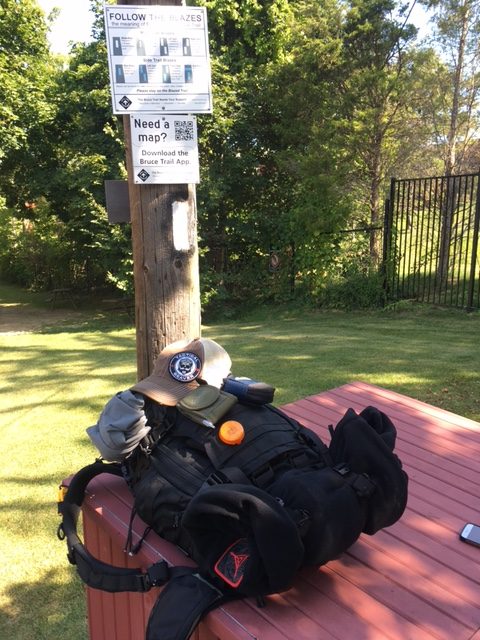
During our time on the trail, I managed to field test several items of kit (to be reviewed in separate posts) and streamline my hiking kit for better efficacy and efficiency. I found that several things I had planned out, thought I might need, or were “essentials”, were not.
Depending on the context and profile of your outdoor adventure, your needs will change.
Here is a list of things that added weight, added bulk or were otherwise not needed given the profile of where we were going:
Teva sandals
shorts
second belt
short-bladed machete
small forest axe
expanded first-aid kit
water purification filter
extra sweater
fleece gloves
second dry bag
This stuff, though individually very useful in the right circumstance, became a hinderance. It added unnecessary weight and made it difficult to move swiftly along the trail. It also had the added unpleasantness of adding soreness to feet, shoulders and knees without any added benefit. The other tools and clothing that I had more than covered for the loss of the above-listed items. After ditching this stuff (at our accommodations at the end of day one) things got much better and our progress improved greatly.
Taking a much-needed break on the trail. This version of my pack was MUCH improved after I ditched some heavy redundant gear.
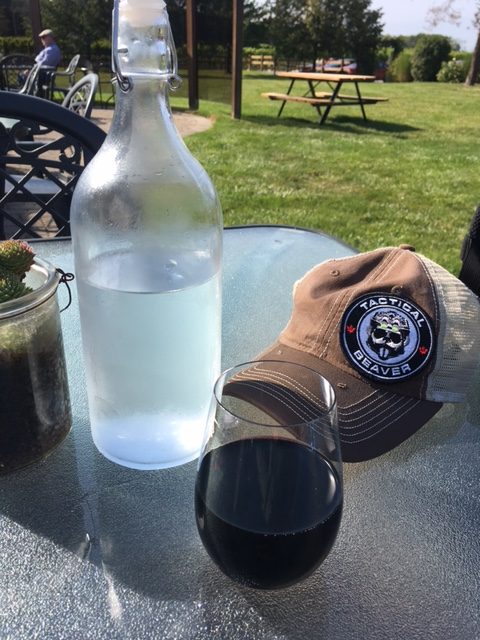
The trail itself was well marked and maintained (for the most part) and allowed for unimpeded movement. The weather was warm and clear. The terrain a never-ending series of up-and-down, so the quads and hams got a good workout every day. Hydration was maintained through the 3-litre bladder I filled-up every morning and I found that I never even got through the entire thing despite drinking almost-continuously through the day. It especially helped to have lunch and “hydrate” at a local winery along the way, just off the trail.
Henry of Pelham Winery. “Hydration” at its finest!
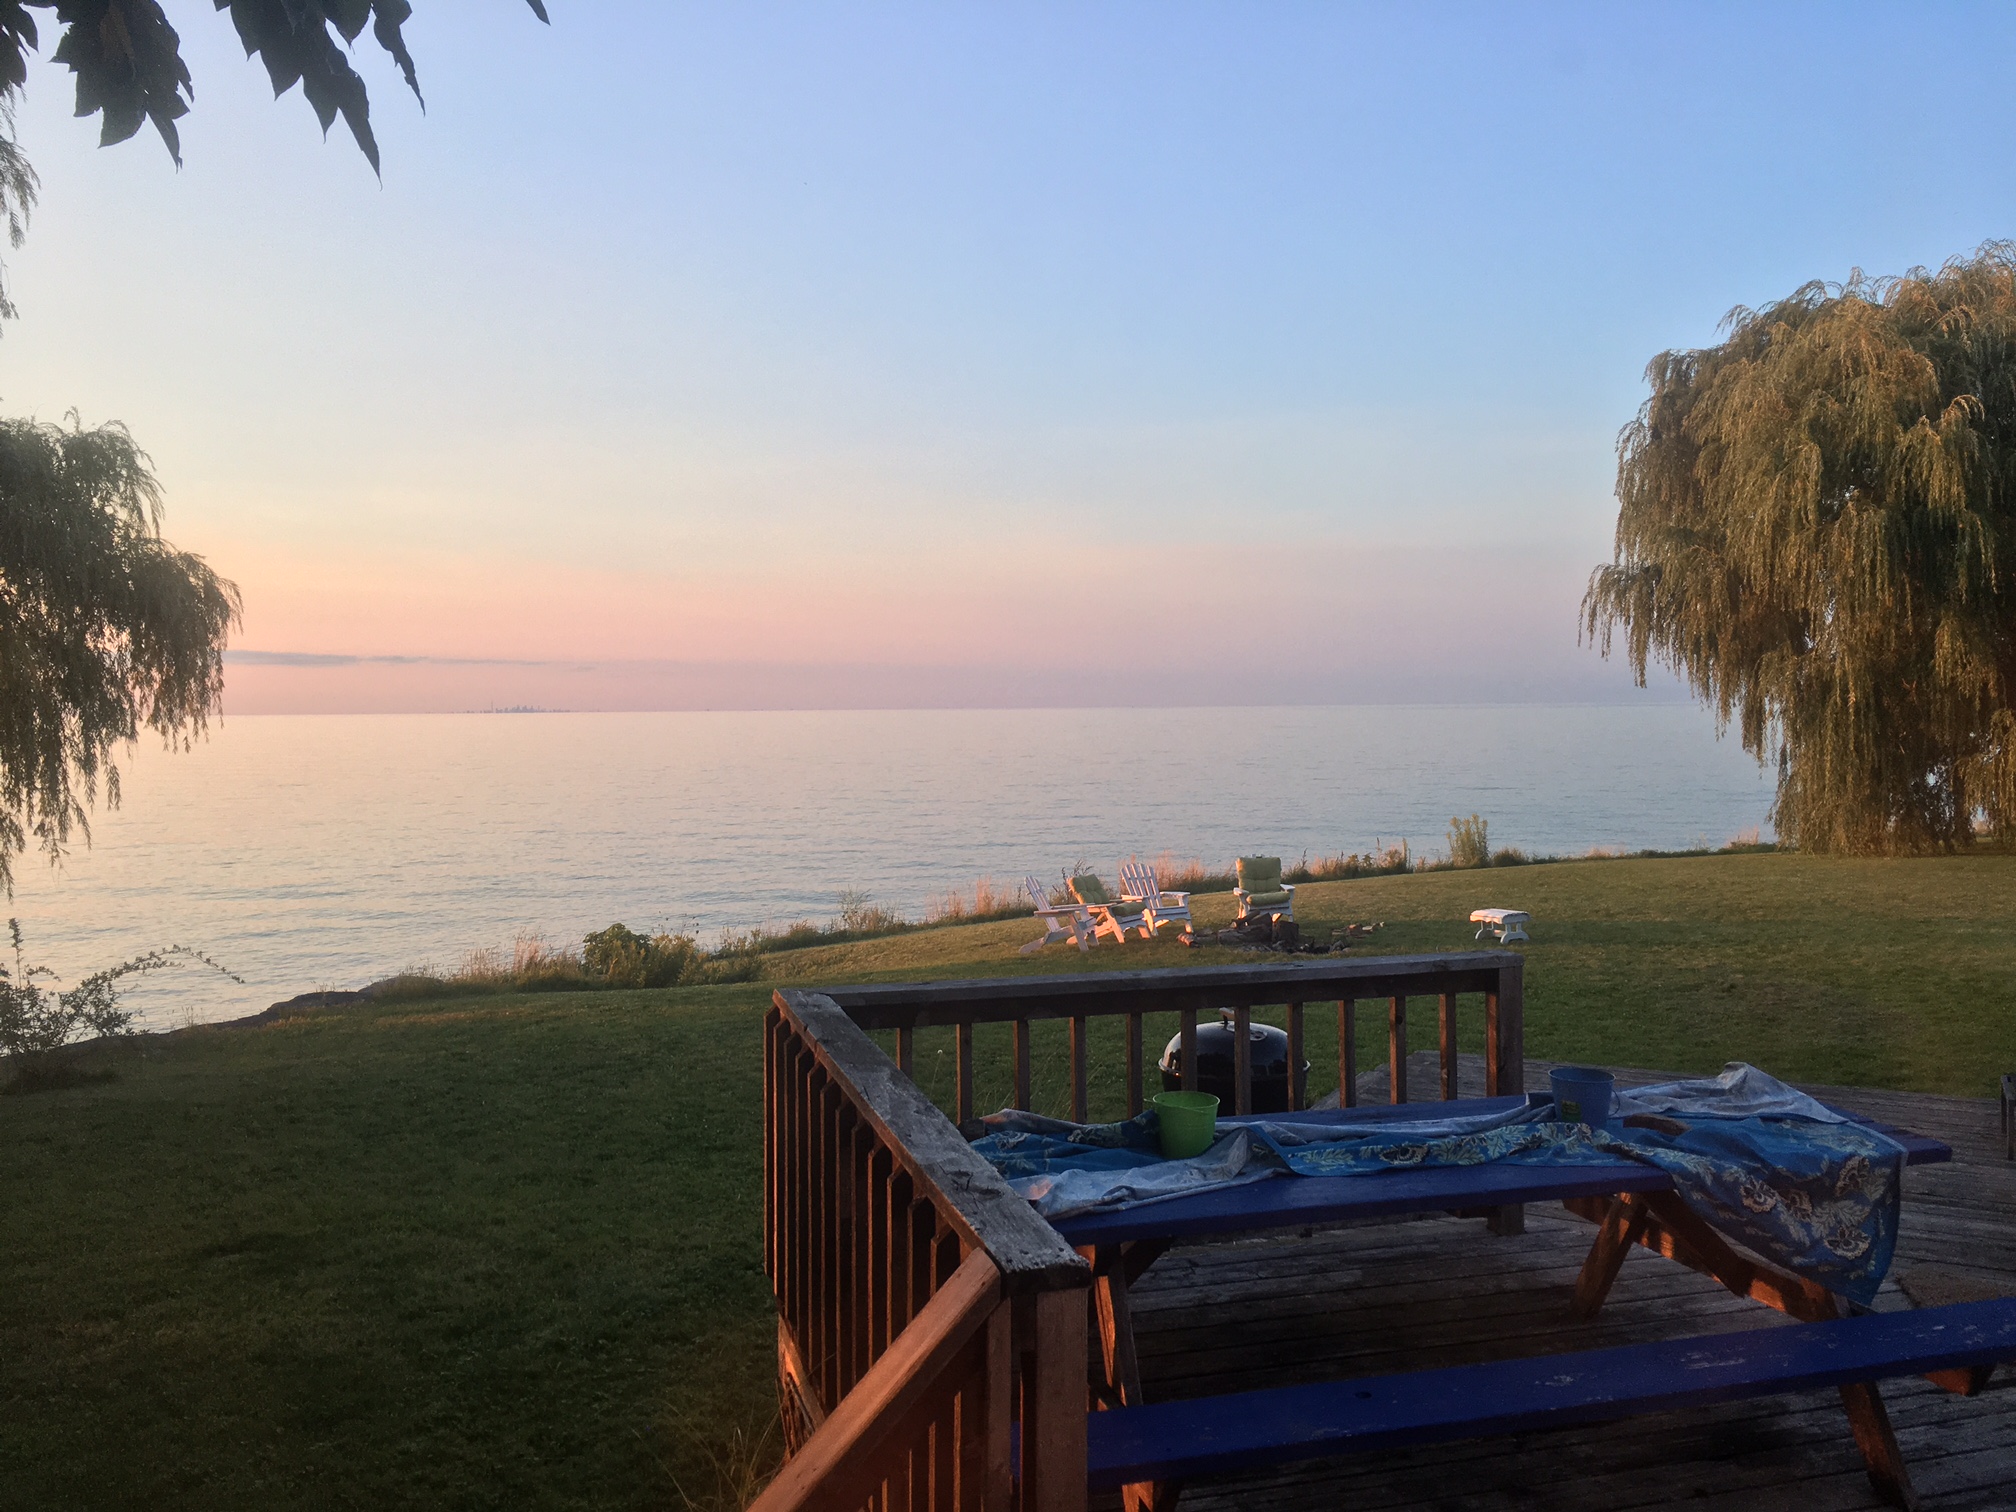
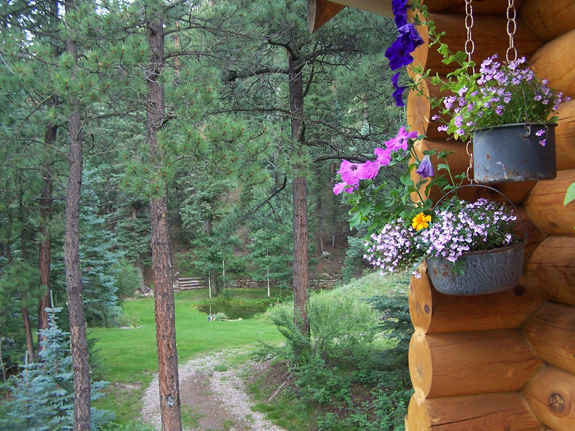
The topography of the Niagara Escarpment and the Niagara Region in general is beautiful and rugged. The views from the tops of the cliffs were open for miles – all the way to lake miles below. As strange as it was to be completely enveloped in the woods and still hearing cars sometime, the peace and calm from such immersion was restorative and calming. Even my evenings were great. Staying at various accommodations along the way made for a recovery treat!
The view from the cottage was just wonderful and the cottage itself was so well appointed it made all the difference at the end of the day. I have already made plans to go back.
So, with all the positives that came along during this trek, there were also some negatives as well. As mentioned previously, the overage in clothing and equipment made for a more difficult first day. Also, the topography of the area and higher elevations reduced our daily distance from 30km per day average to 20-25km per day. Despite the reduced trail coverage, we still made good progress. The weather held, the bugs were barely there, and we made good use of water and breaks to not fatigue ourselves too much.
We saw a whole host of animals, interesting natural and man-made things and got a feel for some of the history and landscape in a rich area so close to home which we’d hardly get to explore had we not gone and done this. I’m very happy I had.
Like a nomadic hobo.
While walking along, I would think about how our context will change as we make our way farther north and farther away from civilization. Those sandals still won’t have a place, but the axe and possibly more first-aid components due to a greater removal from access to emergency medical care. As we continue this journey piecemeal, I’ll be constantly re-evaluating my set-up. With that in mind, to anyone thinking about traversing the Bruce Trail I would humbly suggest that you invest in the Bruce Trail Guidebook. It’s very well laid-out, full of detailed topographical maps and chock-full of useful information. Well worth the $40. Also, ensure you have your compass and separate topographical map of the area. There were a few times where I had to shoot a bearing off a distant tree across an open field with no markings to ensure I crossed to the next trail marker and not on a side trail (or worse, off the path all together).
One step at a time…till you’ve made many, many steps.
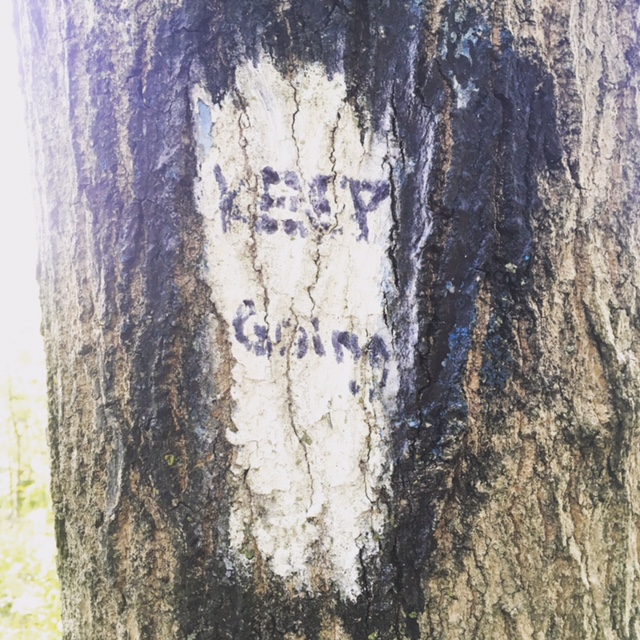
As we left the trail to get back home, one of the last things I saw on the trail gave me inspiration for not only continuing, but also for life in general. “Keep Going” it said. I guess that’s really it in the end. Don’t give up. Hustle and persevere and go for it.
Keep Going. No shit, a good mantra to have. A good form of resilience.
Later this month, I will be hiking the Southern half of the Bruce Trail (Queenston to Collingwood) covering ~450km in about 2 weeks.
To that end, I have been making lists, assembling gear, organizing and planning things through to ensure the fewest amount of screw-ups on the trail.
Proper Previous Planning Prevents Piss-Poor Performance. The 7 Ps.
Planning in this context is simply Risk Management. The basic principles of risk management are the identification of things that are possible (hazards), how devastating they would be if they happened (impact) and the probability of those things happening. The combination of those two (what is possible to happen, combined with their likelihood of happening) equals the level of RISK. When you have looked at your situation through risk-coloured glasses, you will be better equipped to gauge your level of RISK to a certain situation and plan accordingly.
Im my planning process for this particular adventure I have taken several things into account for my planning process:
Distance
Terrain
Access to re-supply (food & water)
Logistics
Navigation
Communications
Shelter & sleeping
Access to coffee (VERY important!)
Weather & environmental factors
Possible hazards on trail during hike
Likelihood of encountering said hazards
Possible impact of hazards if encountered
Volume of gear
Weight of gear
Emergency considerations and procedures (personal safety & survival -gear and immediate actions)
Now, the premise of this hike wasn’t mine initially. My darling wife wanted to cross-off “Hiking the Bruce Trail, End-to-End” off her bucket list for her upcoming birthday. The first half this year, the second, next Fall. Who wouldn’t jump at that?
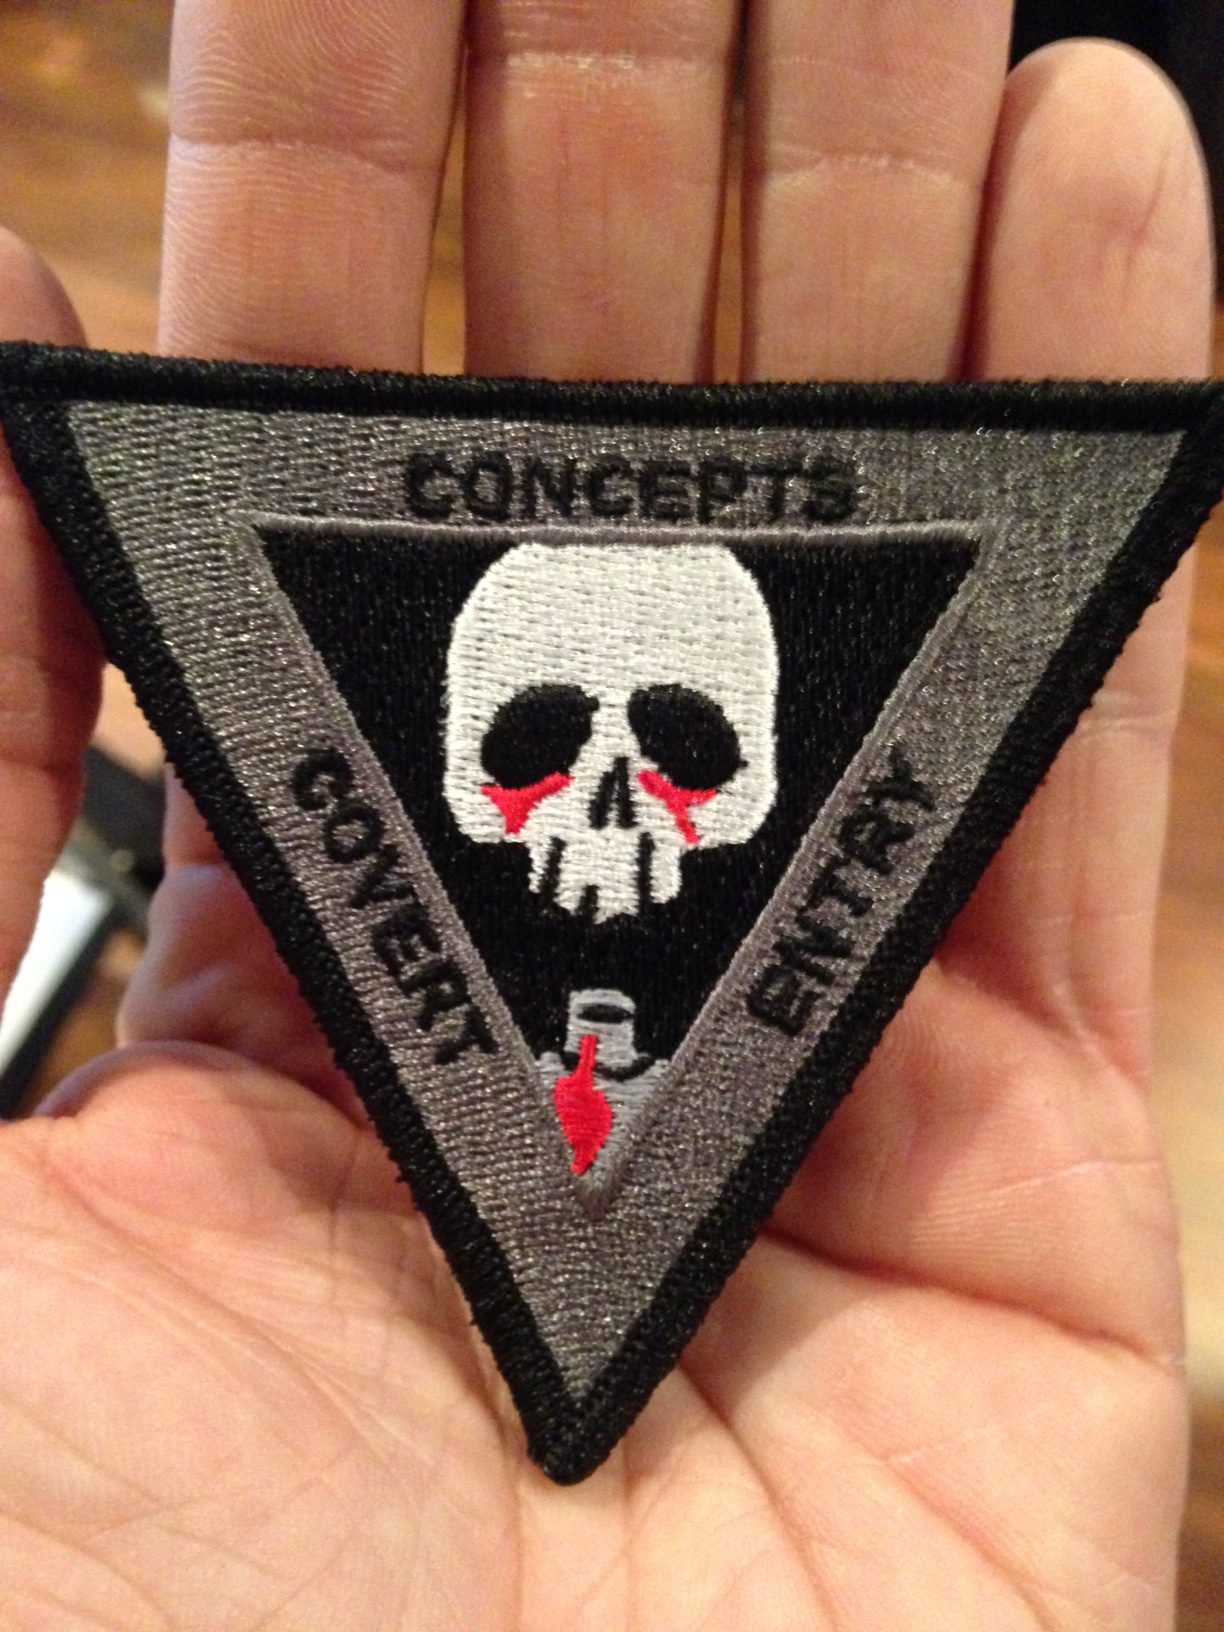
If you complete all ~900km of the Bruce Trail, you can get this cool patch. I want. I will have.
For me, I am not only looking forward to the hike itself with my wife, but also of taking the opportunity to field-test some of my newer gear and review some things recently acquired. I’m also keen to tighten up my lightweight backpacking game and sharpen my level of fitness too. The one thing we will be taking out of the hiking equation is camping. As we traverse the Southern half of the Bruce Trail, our accommodations plan will be Bed & Breakfasts and Air BnB along the way.
Hike-in to some luxury.
This does two things: keeps me alive and married, and, allows for a level of serendipity every day. This is meant to be a fun time, not overly gruelling. She likes to hike in style, and who am I to argue on her birthday?
The peace of a hike in the woods. Like the Infantry, but without the weapons.
So aside from the up-scale hike camping we will be doing, we are still aiming for a pace of 32-45km per day. I have assembled the following set-up for the trip. I will be breaking it all down over the coming weeks and months, as I can, to discuss it all in further detail.
All my stuff ready to go (minus a full water bladder and water bottle).
As we make our way along, I will post reviews of gear and trip reports when I can and when I have connectivity.
Stay tuned for more posts leading up to my departure.
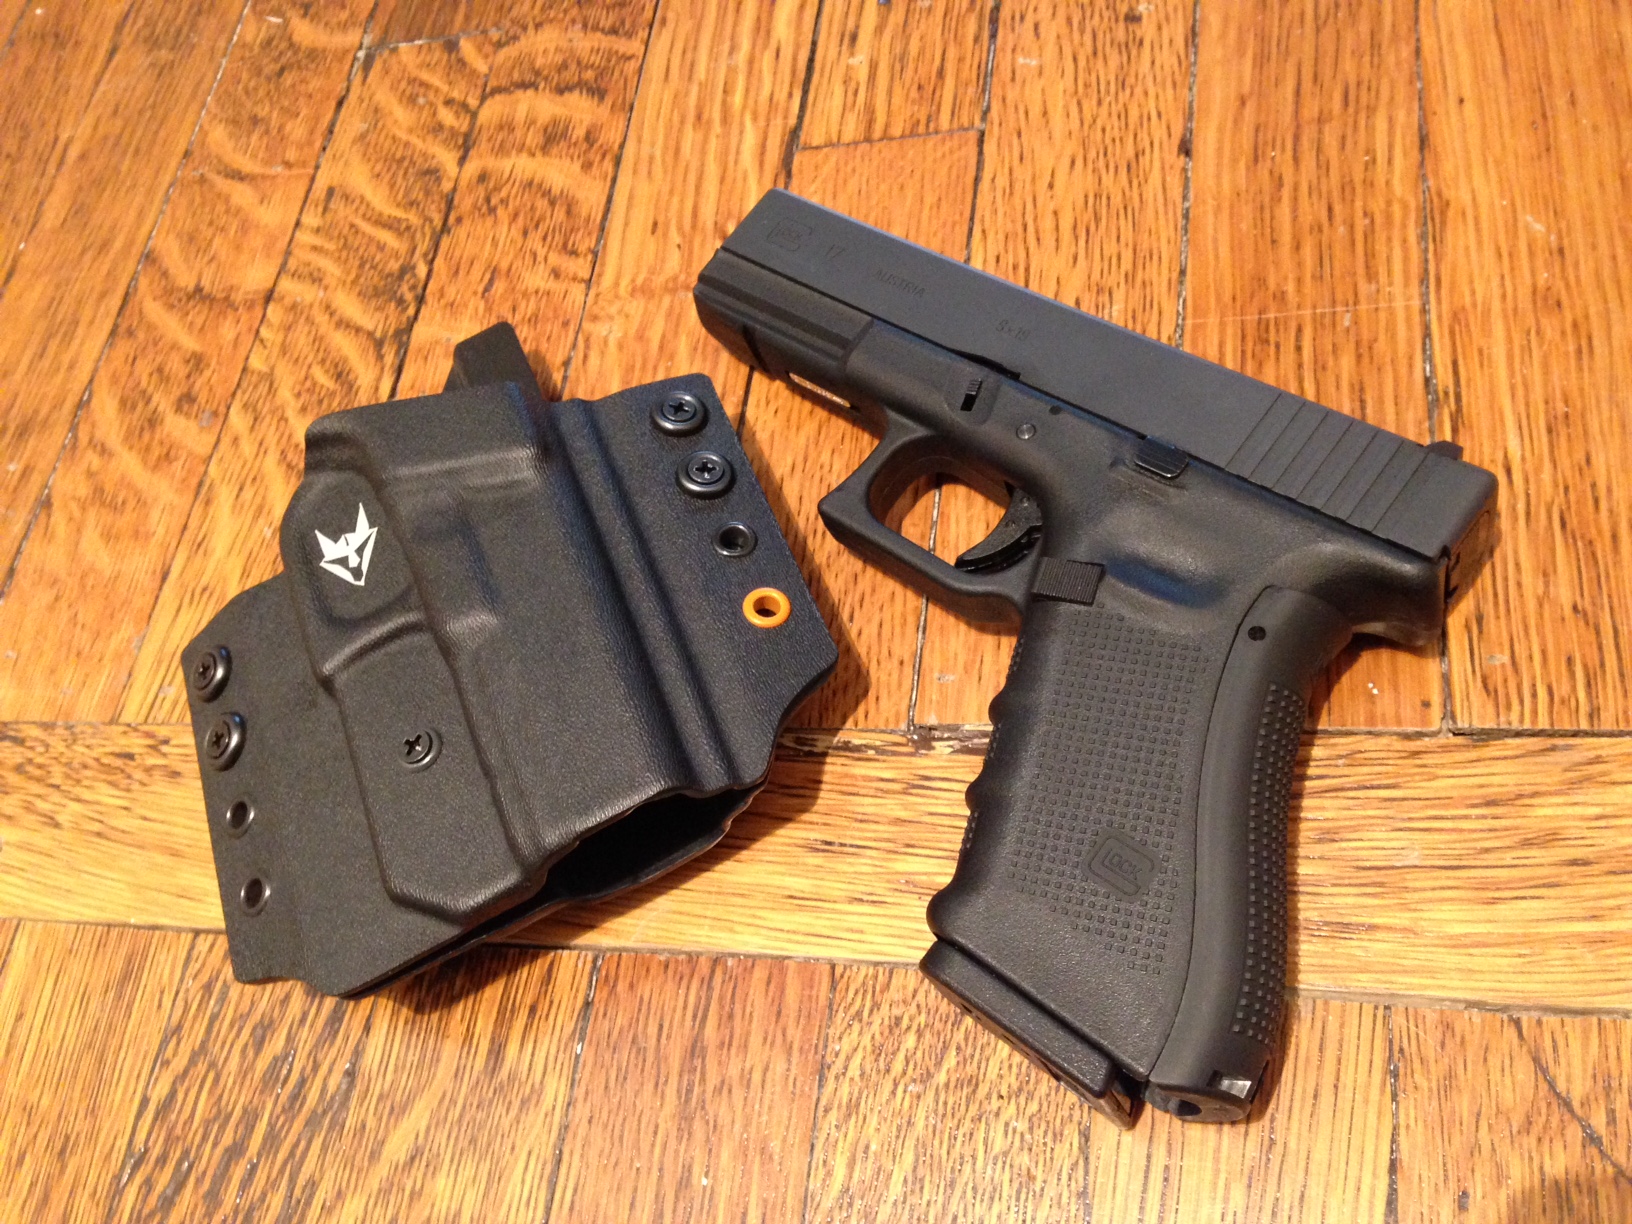
Eric makes Kydex. Good Kydex. Solid Kydex. Holsters, sheaths, mag holders, wallets, accessories. You name it, he makes a quality product to hold your quality gear, and he’s a swell guy to boot!
I recently upgraded the holster to my Glock (17, Gen 4) and a mag holder for my AR platform from Gray Fox and am VERY happy with the result. After my initial fumbling and messing around with adjustments, I finally got it just right. My Glock fit like a glove. Fantastic. With the included Allen key I was able to make it work perfectly.
Arriving in the mail. Gryphon Glock holster and Gargoyle 5.56 mag holder.Fully unpacked. Thanks for the decals!Ready for action. Fitting and adjustments done.
Same thing goes with the AR mag holder. Compared to some of the other Kydex things I’ve tested, used and seen, Gray Fox does a solid job of producing quality products.
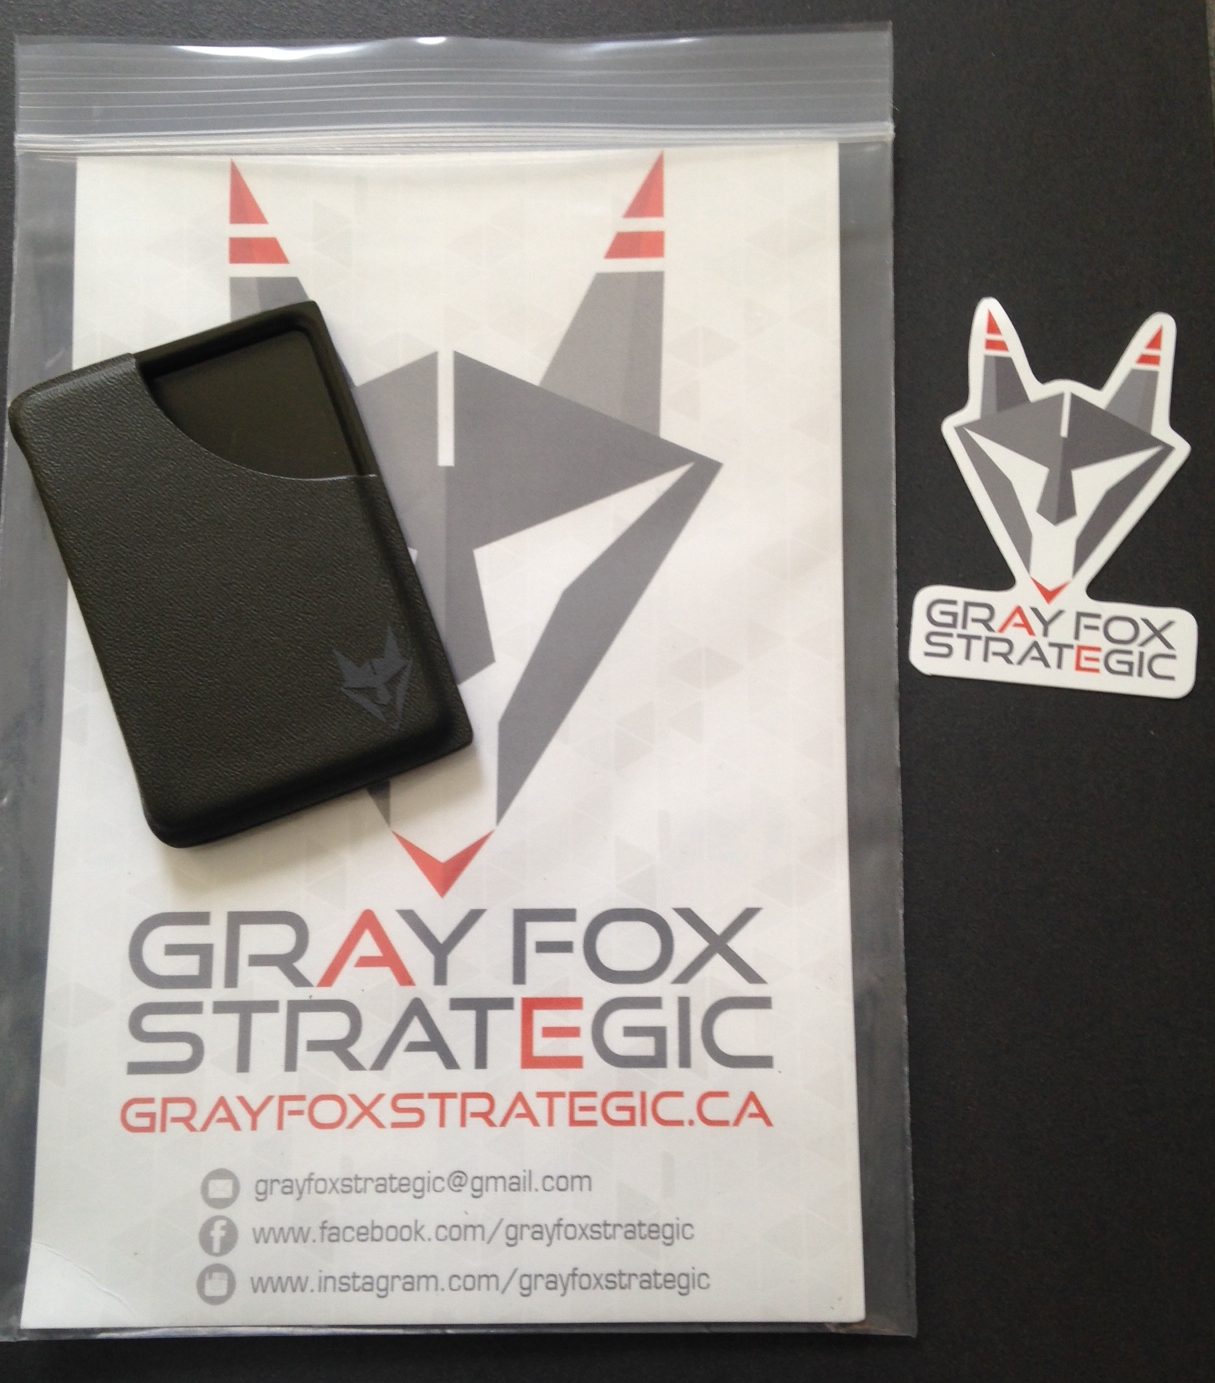
There is also the accessories category of the Gray Fox lineup.
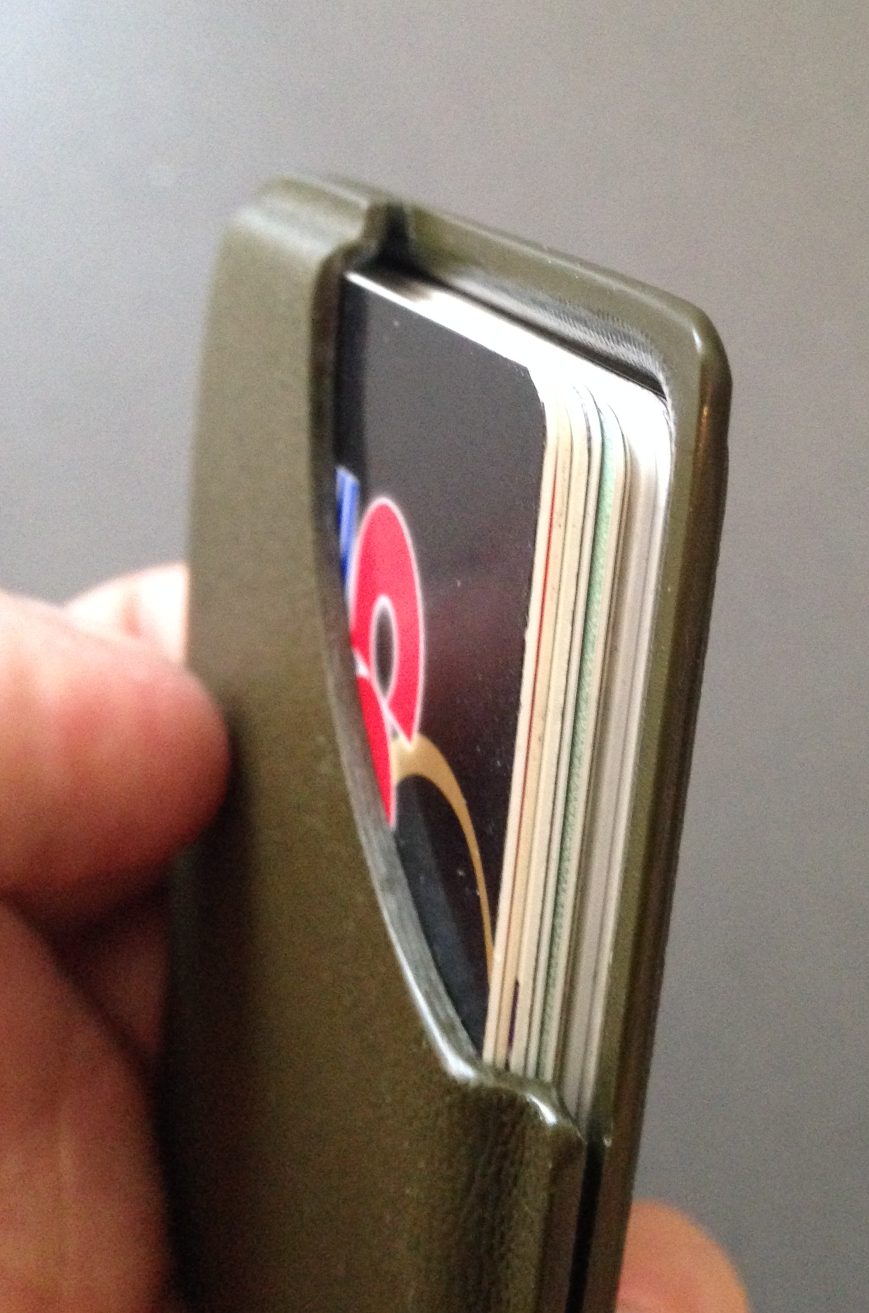
The Leprechaun clamshell wallet, for instance, is also a great edition to my Every Day Carry (EDC). It comfortably holds up to nine (9) credit card-sized cards and, after an initial break-in period, becomes easily accessible and usable.
After break-in, the wallet will hold around 9 cards comfortably.
Pros:
Quality material;
Solid construction and attention to detail;
Hard-use capable for everyone from operators to hobbyists;
Adjustable for a custom precise fit;
Competitively priced;
Canadian made.
Cons (not many):
Lead time for custom work (but then again, that’s how it goes, so just a fact rather than a con.);
Decal can wear off (this happened to the older generation of Gray Fox’s stuff). It has since been remedied by a new application process and the new stuff is solid throughout.
Medium-sized product line. I’d love to buy a boat-load of kydex for everything, but as it is a small operation, Gray Fox is obviously not Safariland or other massive producers. That said, the attention to detail and construction quality more than makes up for it. If they don’t have it stock, contact them directly and they should be able to meet your needs.
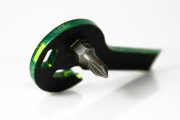
I also like the little keychain I got from Eric as well. It’s small, simple, but certainly a nice addition to the keychain collection. Lots of locks mean lots of keys, so this works for me.
Weighs nothing, holds keys, looks cool.
Though I haven’t had the privilege of testing out the entire lineup of Gray Fox’s, however I do look forward to checking out their collaboration with Delta 2 Alpha Design making kydex for their projects. Contact them directly for more details.
In closing, Gray Fox Strategic uses quality custom-shop Kydex for all of their products at very competitive prices and is made in entirely in Canada. You will never regret investing in quality gear. Nuff said.
Check them out. They will even do custom jobs by request. Give them a should directly here.
On the weekend of 28-29-30 July, 2017, True North Tradecraft hosted the first-ever offering of The CORE Group’s Covert Entry Concepts course in Toronto. We had 9 students, an excellent venue, great food and of course, fantastic training. (To read my review of the course I attended in Maryland, click here.)
Training materials before.Training materials, after.
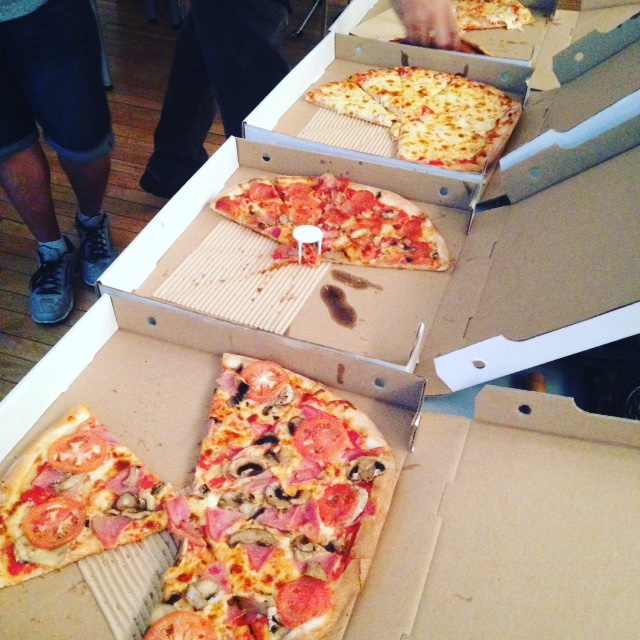
Friday evening saw the group meet up, make introductions and immerse themselves in Street Thief, a mockumentary based on a thief. Though not “real”, it did accurately illustrate how an actual thief does what they do, ideas for protecting against such things and using the same methodologies in conducting security assessments and Red Team-type attacks. That, coupled with some yummy pizza (no Hawaiian, you’re welcome Rob) made for a good evening.
Mmmm..pizza.
Starting bright and early on Saturday morning, we hit the ground running getting into the principles of physical security, locking mechanisms and the basics of attacking them. This was framed within the construct of proper evaluation and approach vectors for attack and assessment.
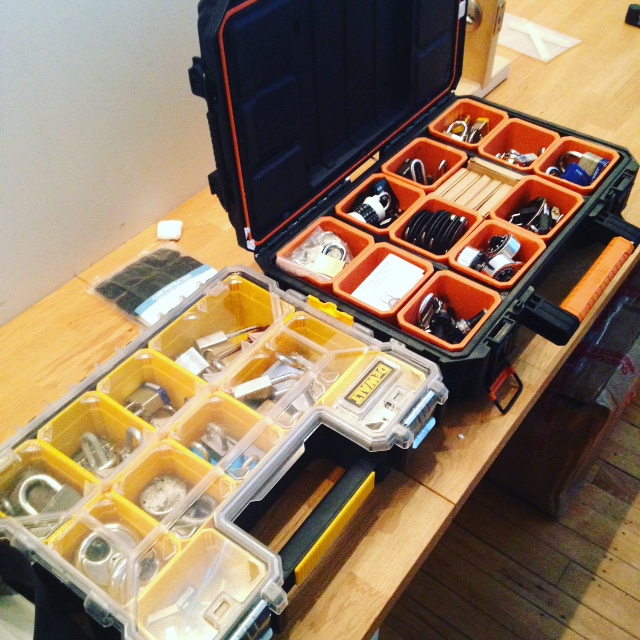
The tools.
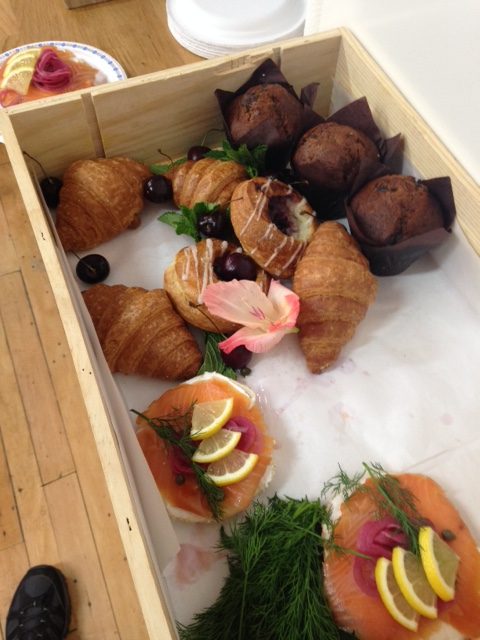
Thanks to The Lucky Penny for providing scrumptious snacks and endless coffee to get us started and keep us going.
Freshly baked and delivered food and coffee made a huge positive impact on all of us.
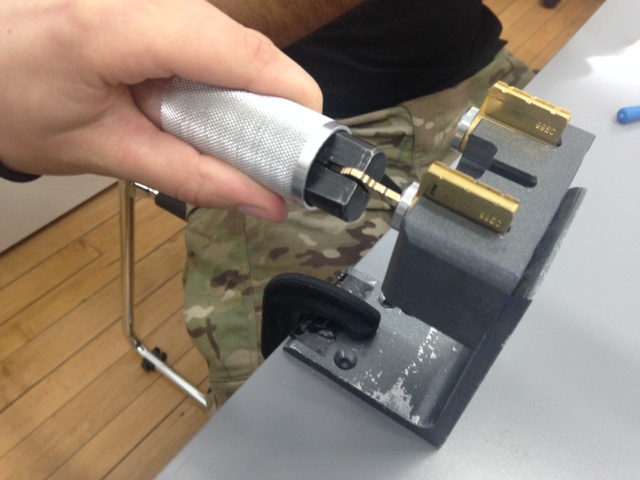
The entire day was fast and furious. We hit on a vast breadth of topics and brought it all to practice very quickly. The students were introduced to various locks and their corresponding pick and bypass tools.
Checking out a tubular lock pick.
Wafer locks, pin & tumbler, dead bolts, combination locks, padlocks, warded locks, etc. The pace was fast but students picked-up the skills quickly and began to progress through to more difficult locks. After everyone felt they were getting the hang of it, we moved right into impressioning and key casting.
Key impressioning. Money for nothing and your checks for free.Key casting. Delicate but really interesting if done correctly.
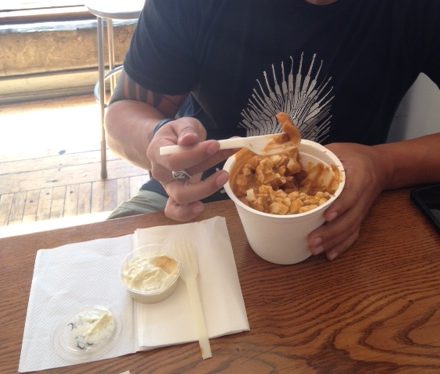
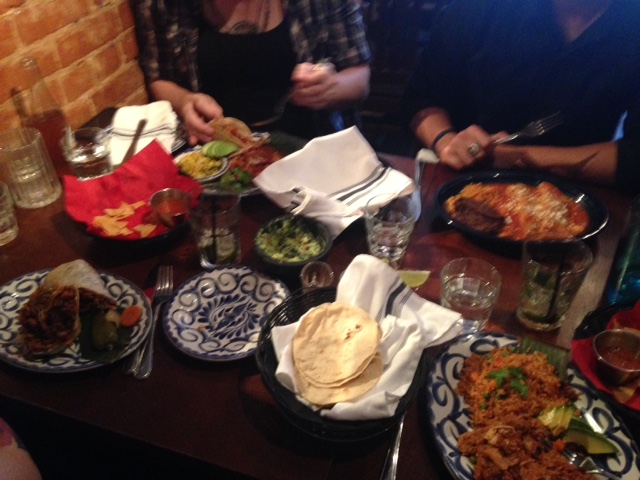
Saturday had some tasty lunch too…
Rob enjoying a fine Canadian poutine. Now he has a standard to measure all others by.
The rest of the day was spent discussing elevators and their uses in Red Team operations and physical security, safes and other miscellaneous related content.
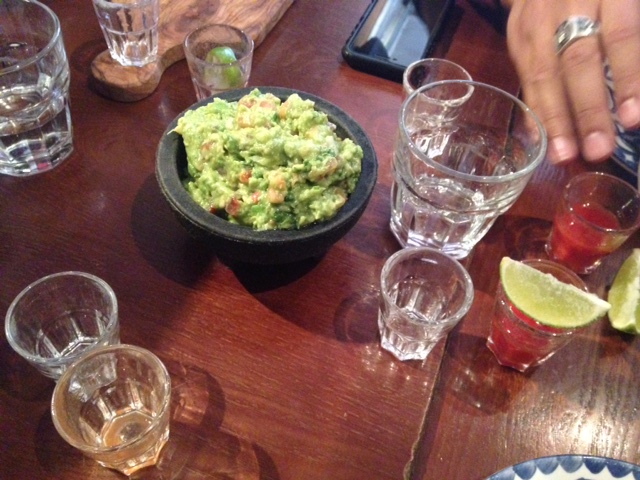
We finished off the evening as a group at a fantastic nearby Mexican restaurant where the food was excellent and the tequila and mojitos flowed.
Mmmm…guac and tequila.So much food. So good. Cheers all!
Sunday, though rough for some more than others, continued the same high tempo. We dove right into more elevator stuff and more impressioning challenges.
One challenge was who could impression a key properly before anyone else.
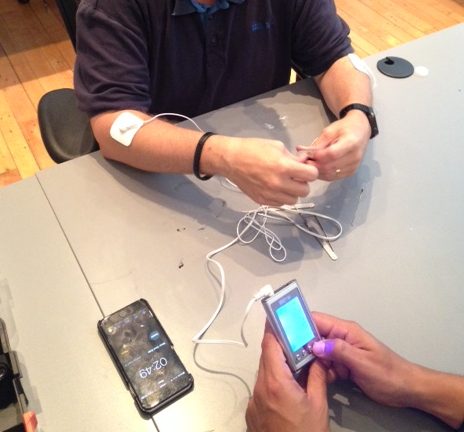
The second was the T-Rex Challenge. Picking a lock while a electronic muscle stimulator is hooked-up to one’s forearms. It’s a laugh for all.
Those arms are shaking. Doesn’t matter how tough you are, it was crazy.
That winners of each challenge got some stuff from our friends at Delta 2 Alpha Design (The Lolly and The Mark, and stickers, each.)
After we all stopped laughing and got feeling back in our arms, we carried on to lock bypassing, familiarization with various tools and techniques associated with it and giving them a trial run.
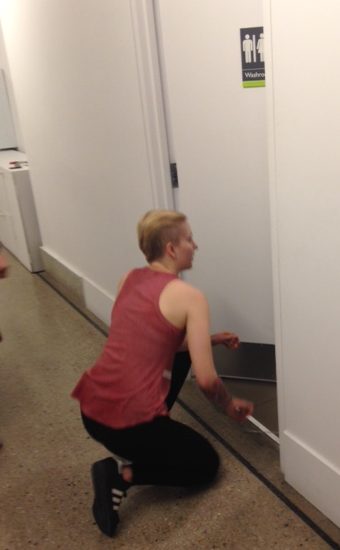
One of the students using an Under Door Tool to rescue someone (Rob and another student) from the bathroom.
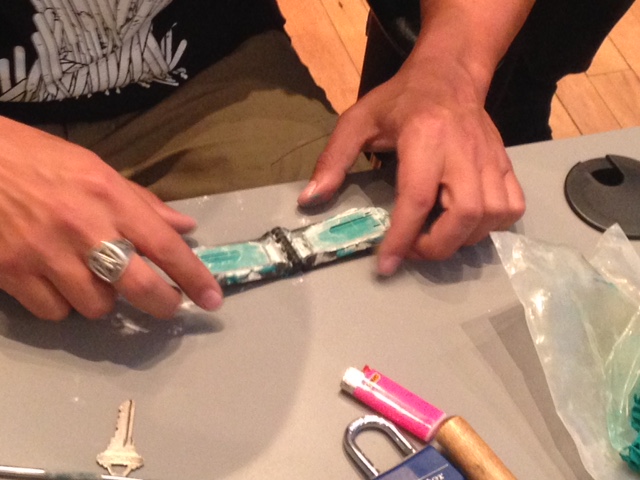
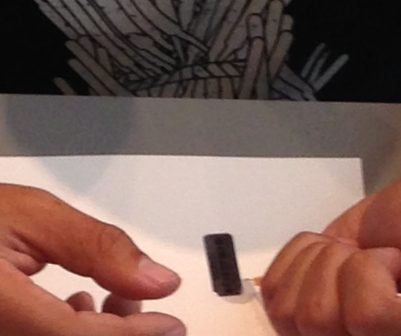
We then transitioned to removing/replacing tamper-evident seals. A very delicate operation to say the least, this portion of the day was slow-going and painstakingly irritating when impatience wrecked it all. That said, it was very interesting in its method and application. We also discussed security posturing, use, strength and limitations of seals and tamper-evident devices along with best practices.
Making tamper-evident not-so-evident. Steady hands.
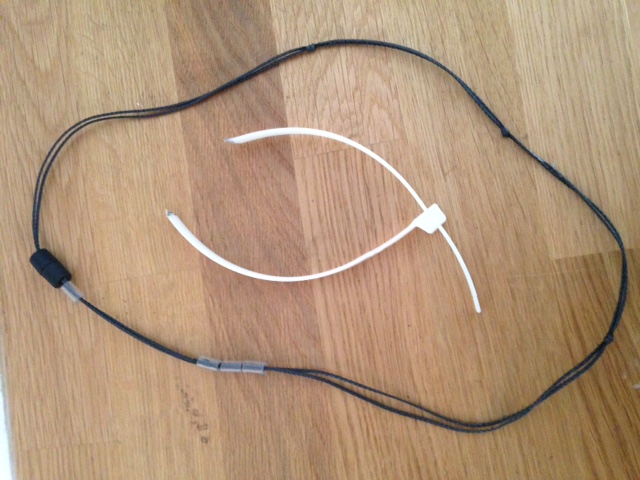
To round out the weekend, we finished on a high note with restraint escapes. Dealing in escaping unlawful custody while restrained by handcuffs, nylon zip ties, duct tape and cord. The more you know, the better prepared you will be.
Aftermath of zip tie escape.Tools of the trade.
One of the most important parts of the learning was the manner in which it was delivered. Rob’s easy-going and humorous nature, coupled with his expansive knowledge and professionalism made for a relaxed yet powerful learning environment. He is an exemplary instructor and trainer and is so giving of himself and his knowledge. That and he couldn’t get over how no one carried guns. Yay Canada. It all makes a huge positive difference.
As with all experiences of this kind, there was so much more we covered and were exposed to that it simply wouldn’t do it justice to speak to here. There is only so much you can read about or learn from on YouTube before you hit a wall. Well-delivered, quality, in-person training has no substitute. I recommend this training to anyone interested in these skills. In the end, an excellent group made an excellent class. Congratulations to all.
Certificate. It was all worth it.
We are excited about how everything went that we are already planning our next offering. Keep tuned to the Blog (and Instagram and Facebook) for more details.
Thank you to Rob and to all others who helped make this happen and make it great (See below) and thank you to all who attended.
(*all images courtesy of Kennedy Tactical Concepts – I had my hands full) (*for more information on KTC and training, click here).
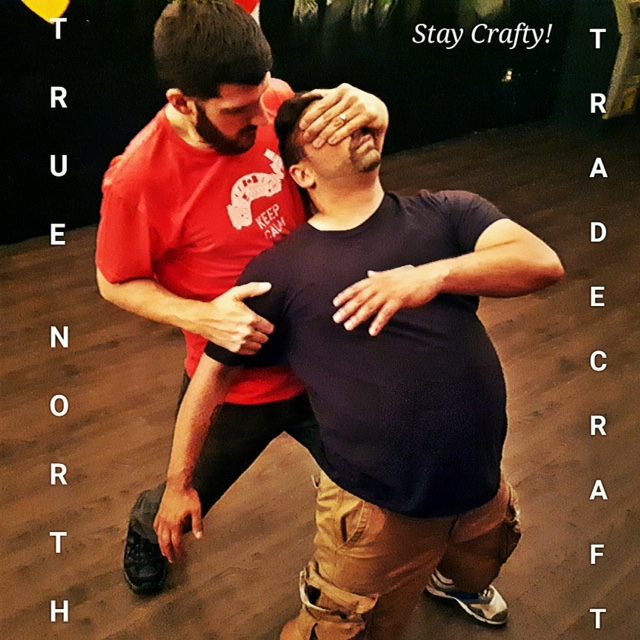
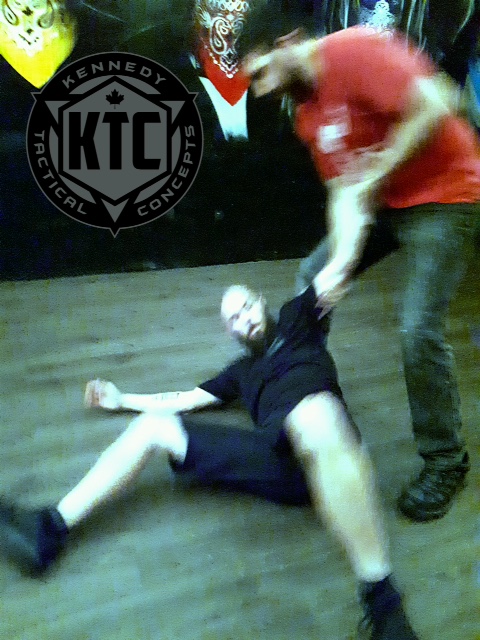
This is part 2 in a series documenting my involvement in the Kennedy Tactical Concepts Masterclass. Part 1 is available here.
Session 2 with TJ was on Wednesday July 26th at the Night Owl on College St., Toronto. (The usual spot).
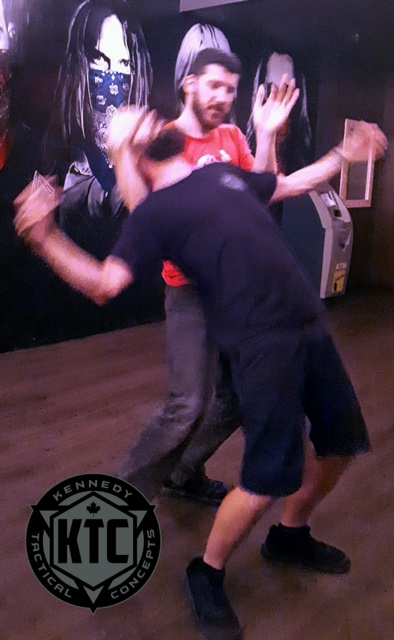
Again, the environment was pleasantly realistic as we headed to the basement level of the Night Owl. We even had a band setting up while going through the techniques.
This week’s topics of practice were as follows:
Combative Control Positions/positioning;
Combative Control Transitions and;
Takedowns (in combination with #1 & 2).
As with the previous format, TJ began with introductions, an overview of what we would be covering for the night, a warm-up, and then we got right into it.
The realistic environment makes for a better appreciation of the realities you would be facing. A bar, stools, a stage, musical instruments, concrete walls and of course, a dirty cement floor. Though the Combative Control Positions and Transitions were not striking per se, they were very dependent on speed, agility and technique. After an hour of practicing and building upon each technique, we moved on to takedowns.
Starting slowly at first, we quickly moved to full-speed with follow-throughs. The result was fluid takedowns with a high degree of comfort in executing the movements. We also worked on improvising all the techniques of the night against larger and smaller opponents as we were all of differing heights.
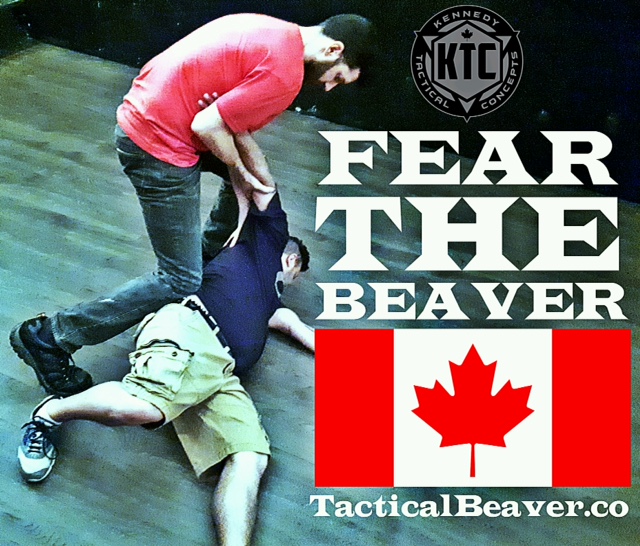
Of course, I was sporting my awesome shirt from www.tacticalbeaver.co Yes, you should Fear The Beaver.
Solid training. The next day I was sore as hell, but at least I wasn’t bleeding on a bar floor. I’ll be at the next one. Stay tuned and Stay Crafty.