Very excited to have my work featured in Tactical Solutions Magazine, the official publication of the International Tactical Training Association (ITTA) based in Chicago, IL.
The International Tactical Training Association (ITTA) is always on Mission to provide members with advanced tactical and technical programs of instruction formulated and directed by a core council who possess extensive Law Enforcement and Military experience. We seek to transform, keep you ahead of the curve, and one step ahead. Semper in ViaITTA retains a broad spectrum of instructors with Special Operations backgrounds and current post 9-11 operational and instructional experience. We are here to transform, keep you inside the loop and one step ahead with best practices, hard learned lessons, and disruptive technologies.
You can go directly to the issue and article here. Be sure to check out their entire website and read their other publications for fantastic content.
Fiser Brite Strike APALS LightsBrighten up your day with Fiser Innovative Solutions.
There are a lot of flashlights out there. When you need light, there are many varieties of portable lights from which to choose. Sometimes you need lots of light, sometimes less. Sometimes under water, sometimes they need to be small. Whatever your specific need, there are solutions.
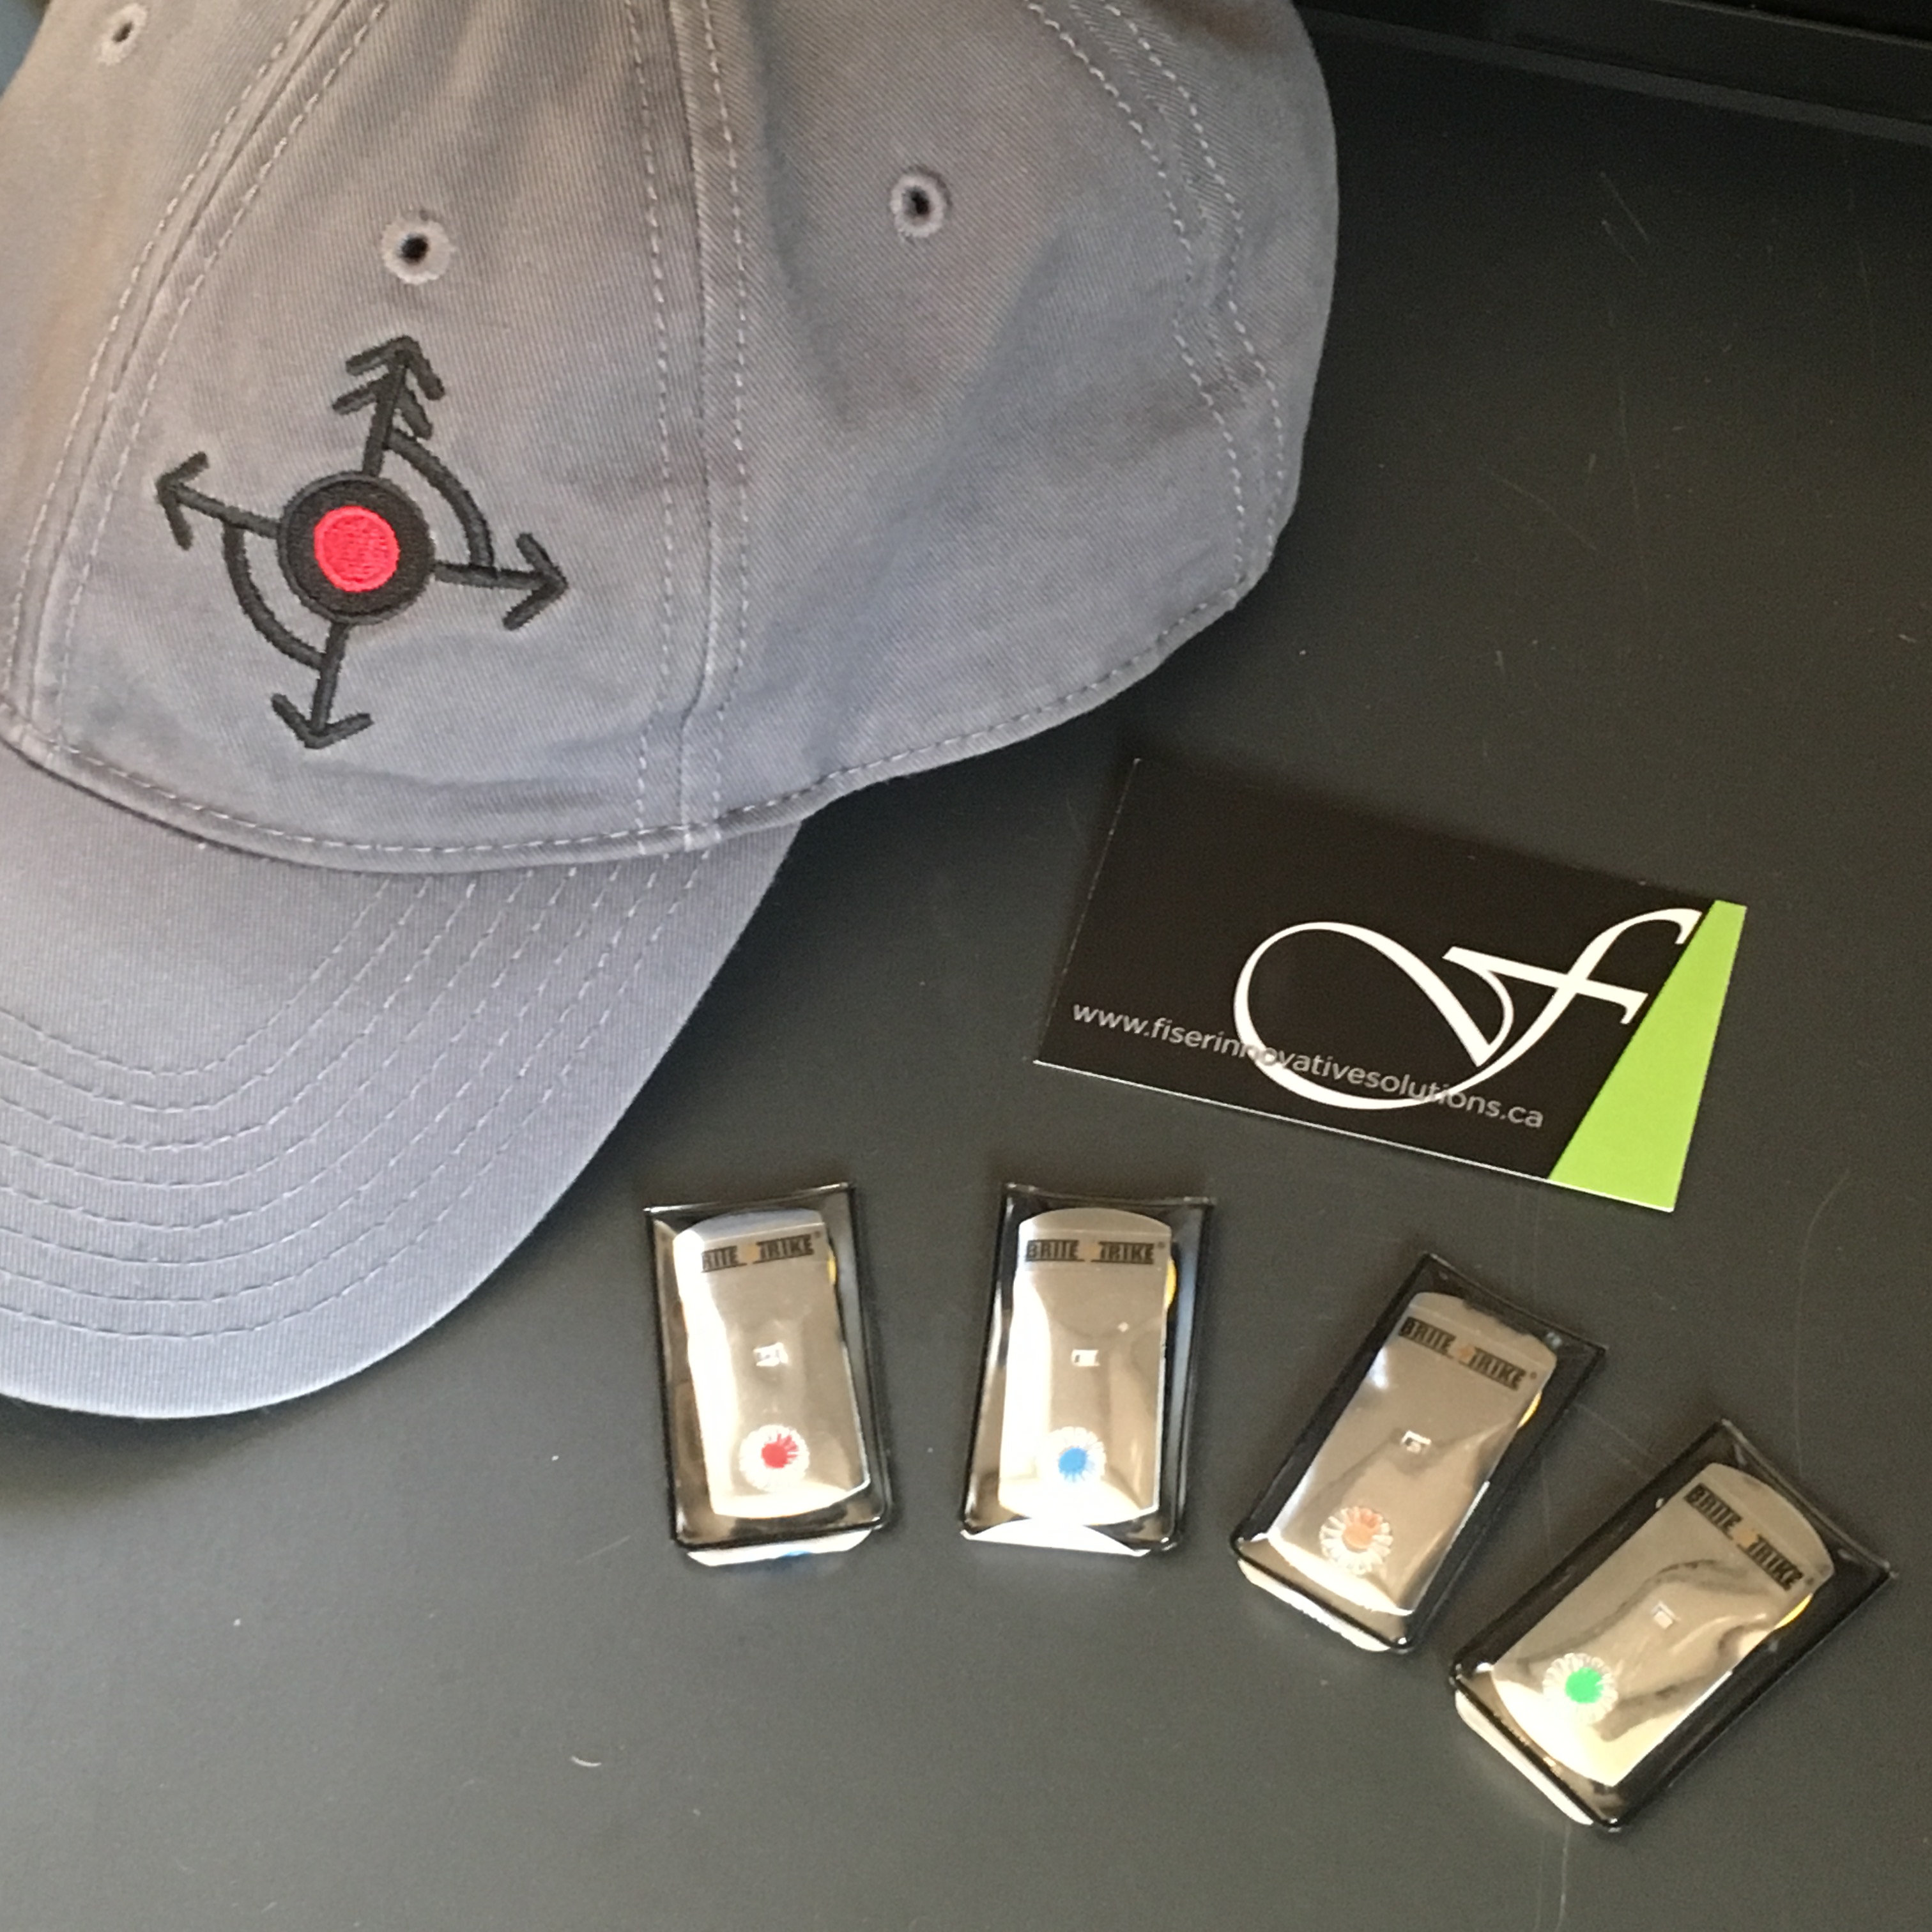
When I was introduced to the Brite Strike APALSmini LED lights distributed in Canada by Fiser Innovative Solutions, I didn’t know what to think of them. (APALS stands for All Purpose Adhesive Light Strips). They were small, I didn’t expect much but so what? Then I turned one on. BRIGHT! As I played around with the tiny light in my hand, Tom Fiser (Owner), gave me a rundown of the many technical specifications of these lights along with the ingenious uses they have integrated them into.
(Update & correction: Fiser is the Canadian distributor. Brite Strike Technologies Inc. is the manufacturer, they are made in the US.)
Here is a photo for sizing comparison:
2 Fiser lights, end-to-end, against a standard Bic lighter for size comparison. The 3M adhesive backing shown to view both sides.
They are very thin, weigh next to nothing and can stick to just about anything. Here are some technical specs:
very small, 2″ long, almost completely flat;
featherweight at less than 5g;
Visible up to 3.2km(2miles) on land, 4.8km(3miles) from the air;
Up to 200 hours or run time;
Waterproof to 200FT;
Modes: Fast Strobe/Slow Strobe/Steady On/Off;
Available in 5 colours (Red, Orange/Amber, Blue, Green, White);
Heavy Duty 3M® Adhesive Back Tape;
Easy Pull Tab;
Waterproof, Dust-proof & Shockproof.
Here is a pdf of their info sheet:
Fiser Light Info
On the Fiser website, they list several innovative and creative uses for these mini lights. They even make gloves with little sleeves for them for Police working traffic duty, police on bicycles, SCUBA divers, hunters, cycling & roller sports, outdoor adventure and even for pets! I’d feel comfortable in adding that, for such a light package with 3 modes, high-visibility and 200hrs of run time, you could throw a few in your car, home, go-bag, any emergency kits, keep one in your first aid kit. They’re so versatile. For those doing plain clothes work, members of your team can keep one in their pocket for activation for hi-viz identification by peeling off the backing and sticking it on themselves. They can be used to mark entrances, evidence, route or trail marking, bike light, land or water recovery…the possibilities are quite vast.
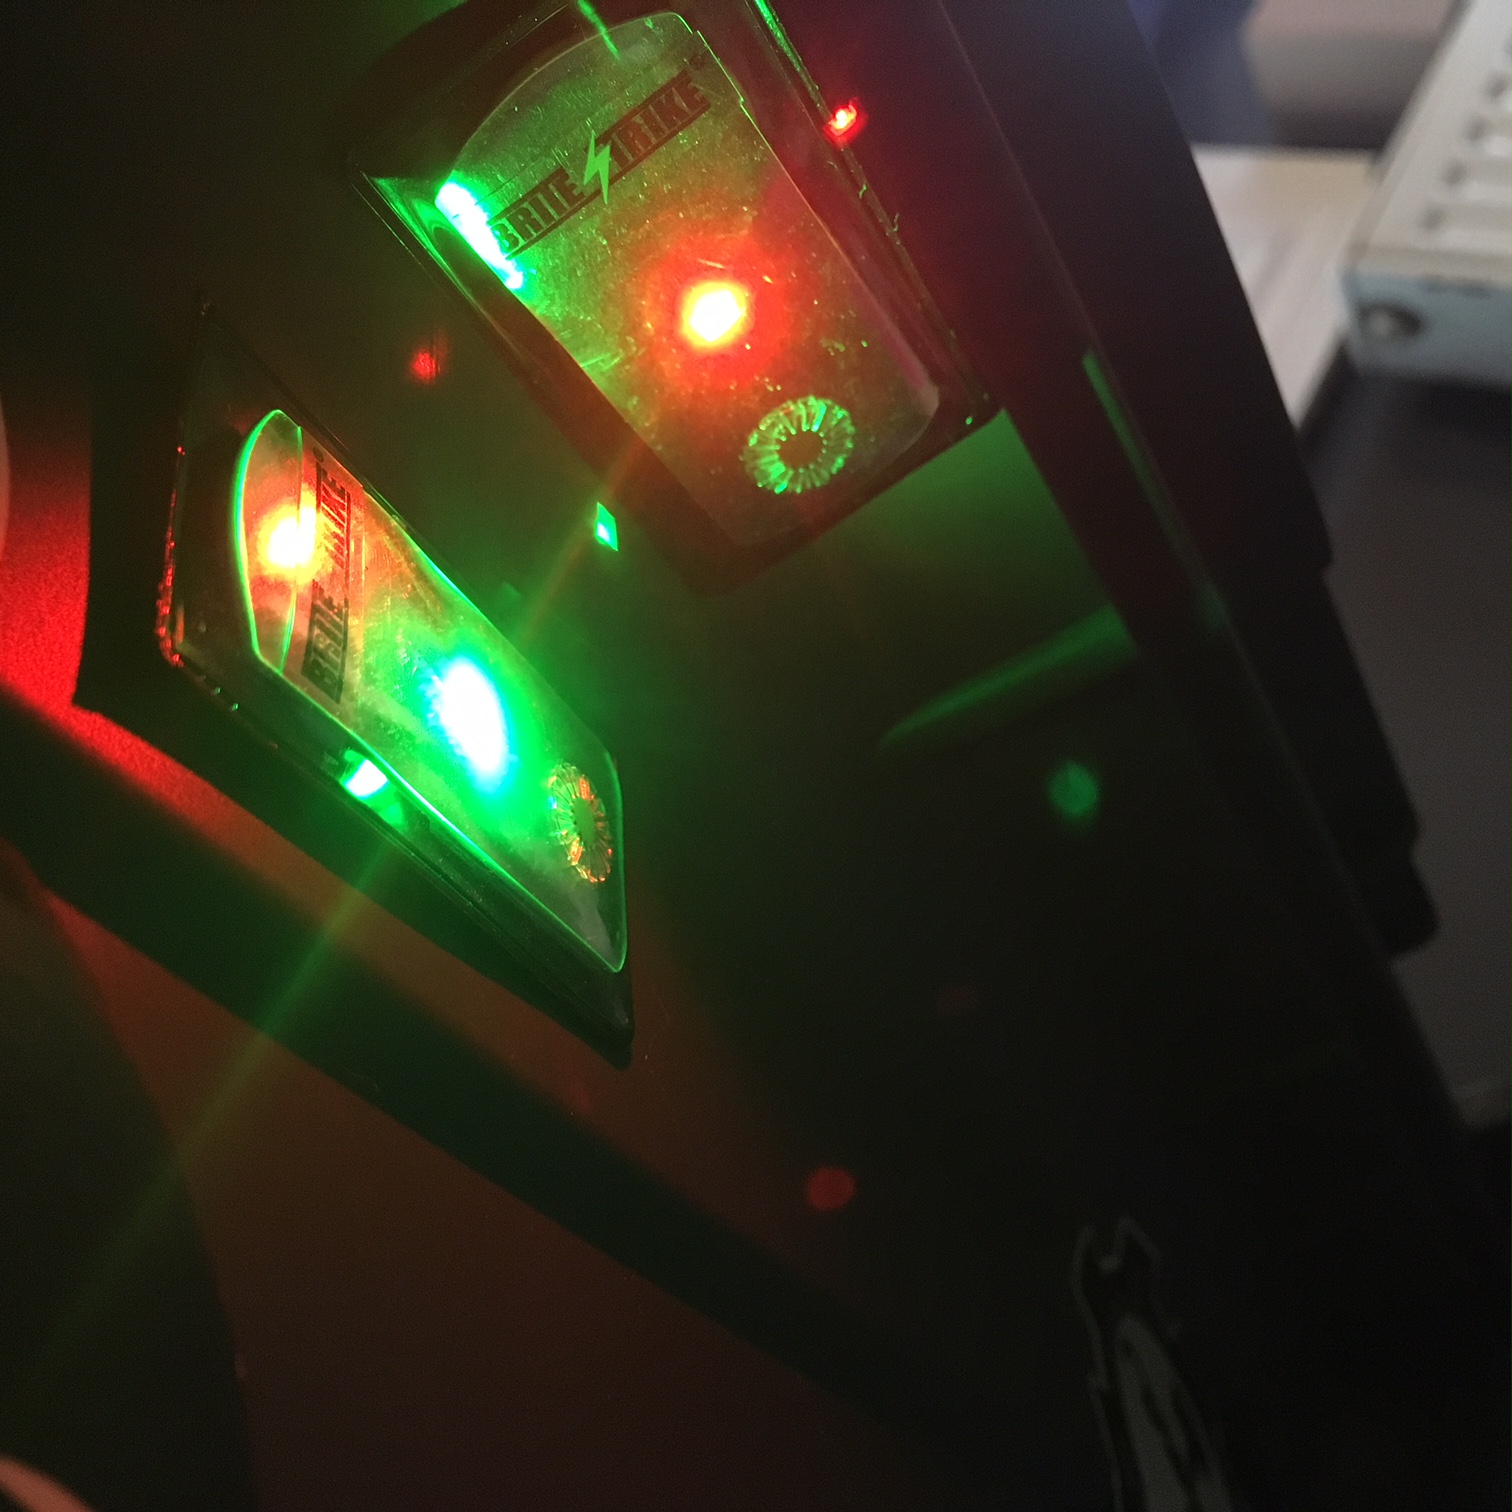
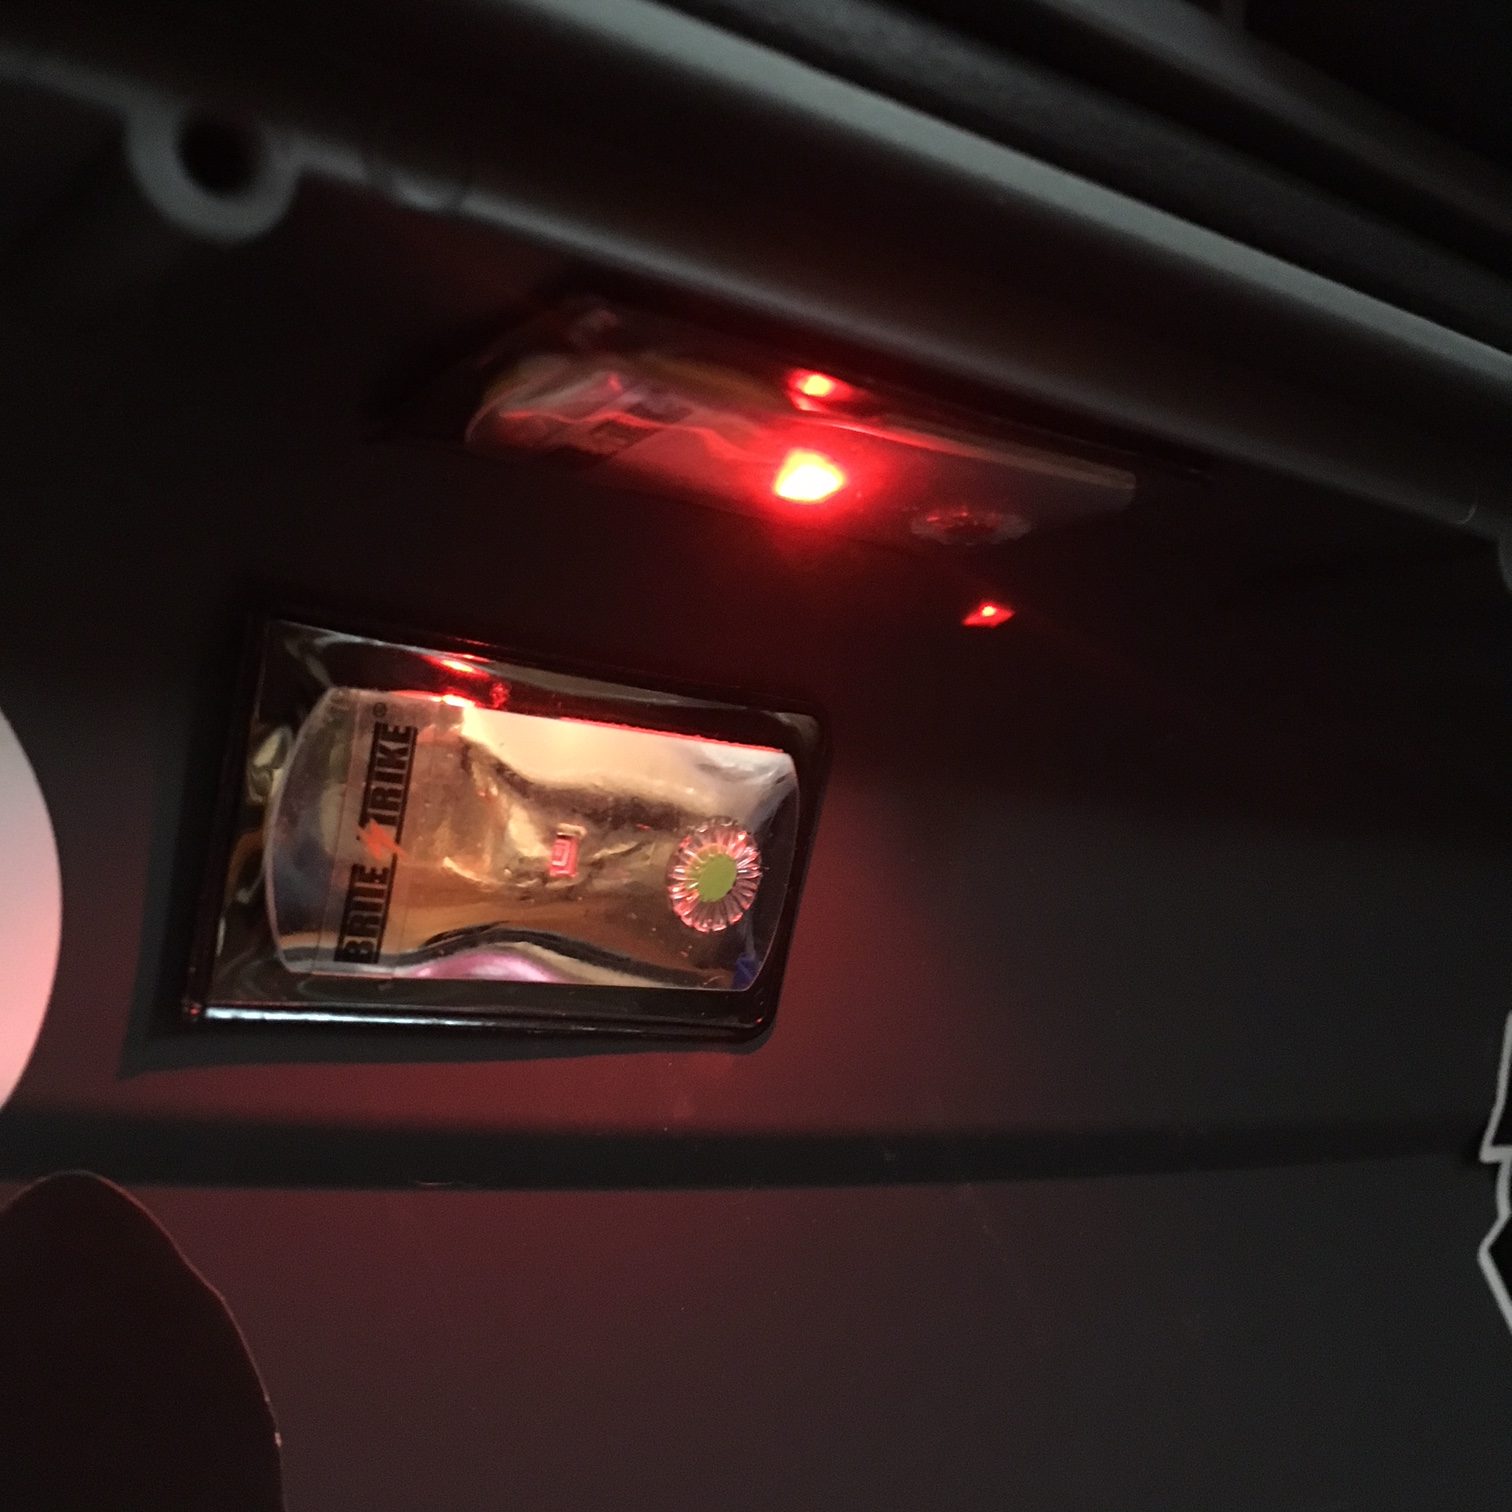
I’ve even put 2 in my Nanuk935 roller case (both red and green) for backup light and low-pro options. They stick to the lid and do not obstruct anything and are almost invisible (see below):
Green light turned off because it was too bright for the photos head-on.This kind of setup can be adapted to closets, cabinets, safes, gun safes, medicine cabinets, suitcases, etc as a back-up in case you need it, especially during a power outage.
I also popped one into a glass of water for a half-hour to see how it did:
Overall, I’m very impressed with these little lights. They last longer and are brighter than glow sticks and are smaller too. I like the 3-mode options they have and that they are almost weightless.
They even sell them in 10-packs for expeditions or teams. Pretty great. Canadian too, from Hamilton, Ontario.
If you are looking for a different kind of light to augment your situation or if these sound useful, reach out to Fiser Innovative Solutions at their website.
Till next time, stay safe, stay visible (when you want to be), and stay crafty.
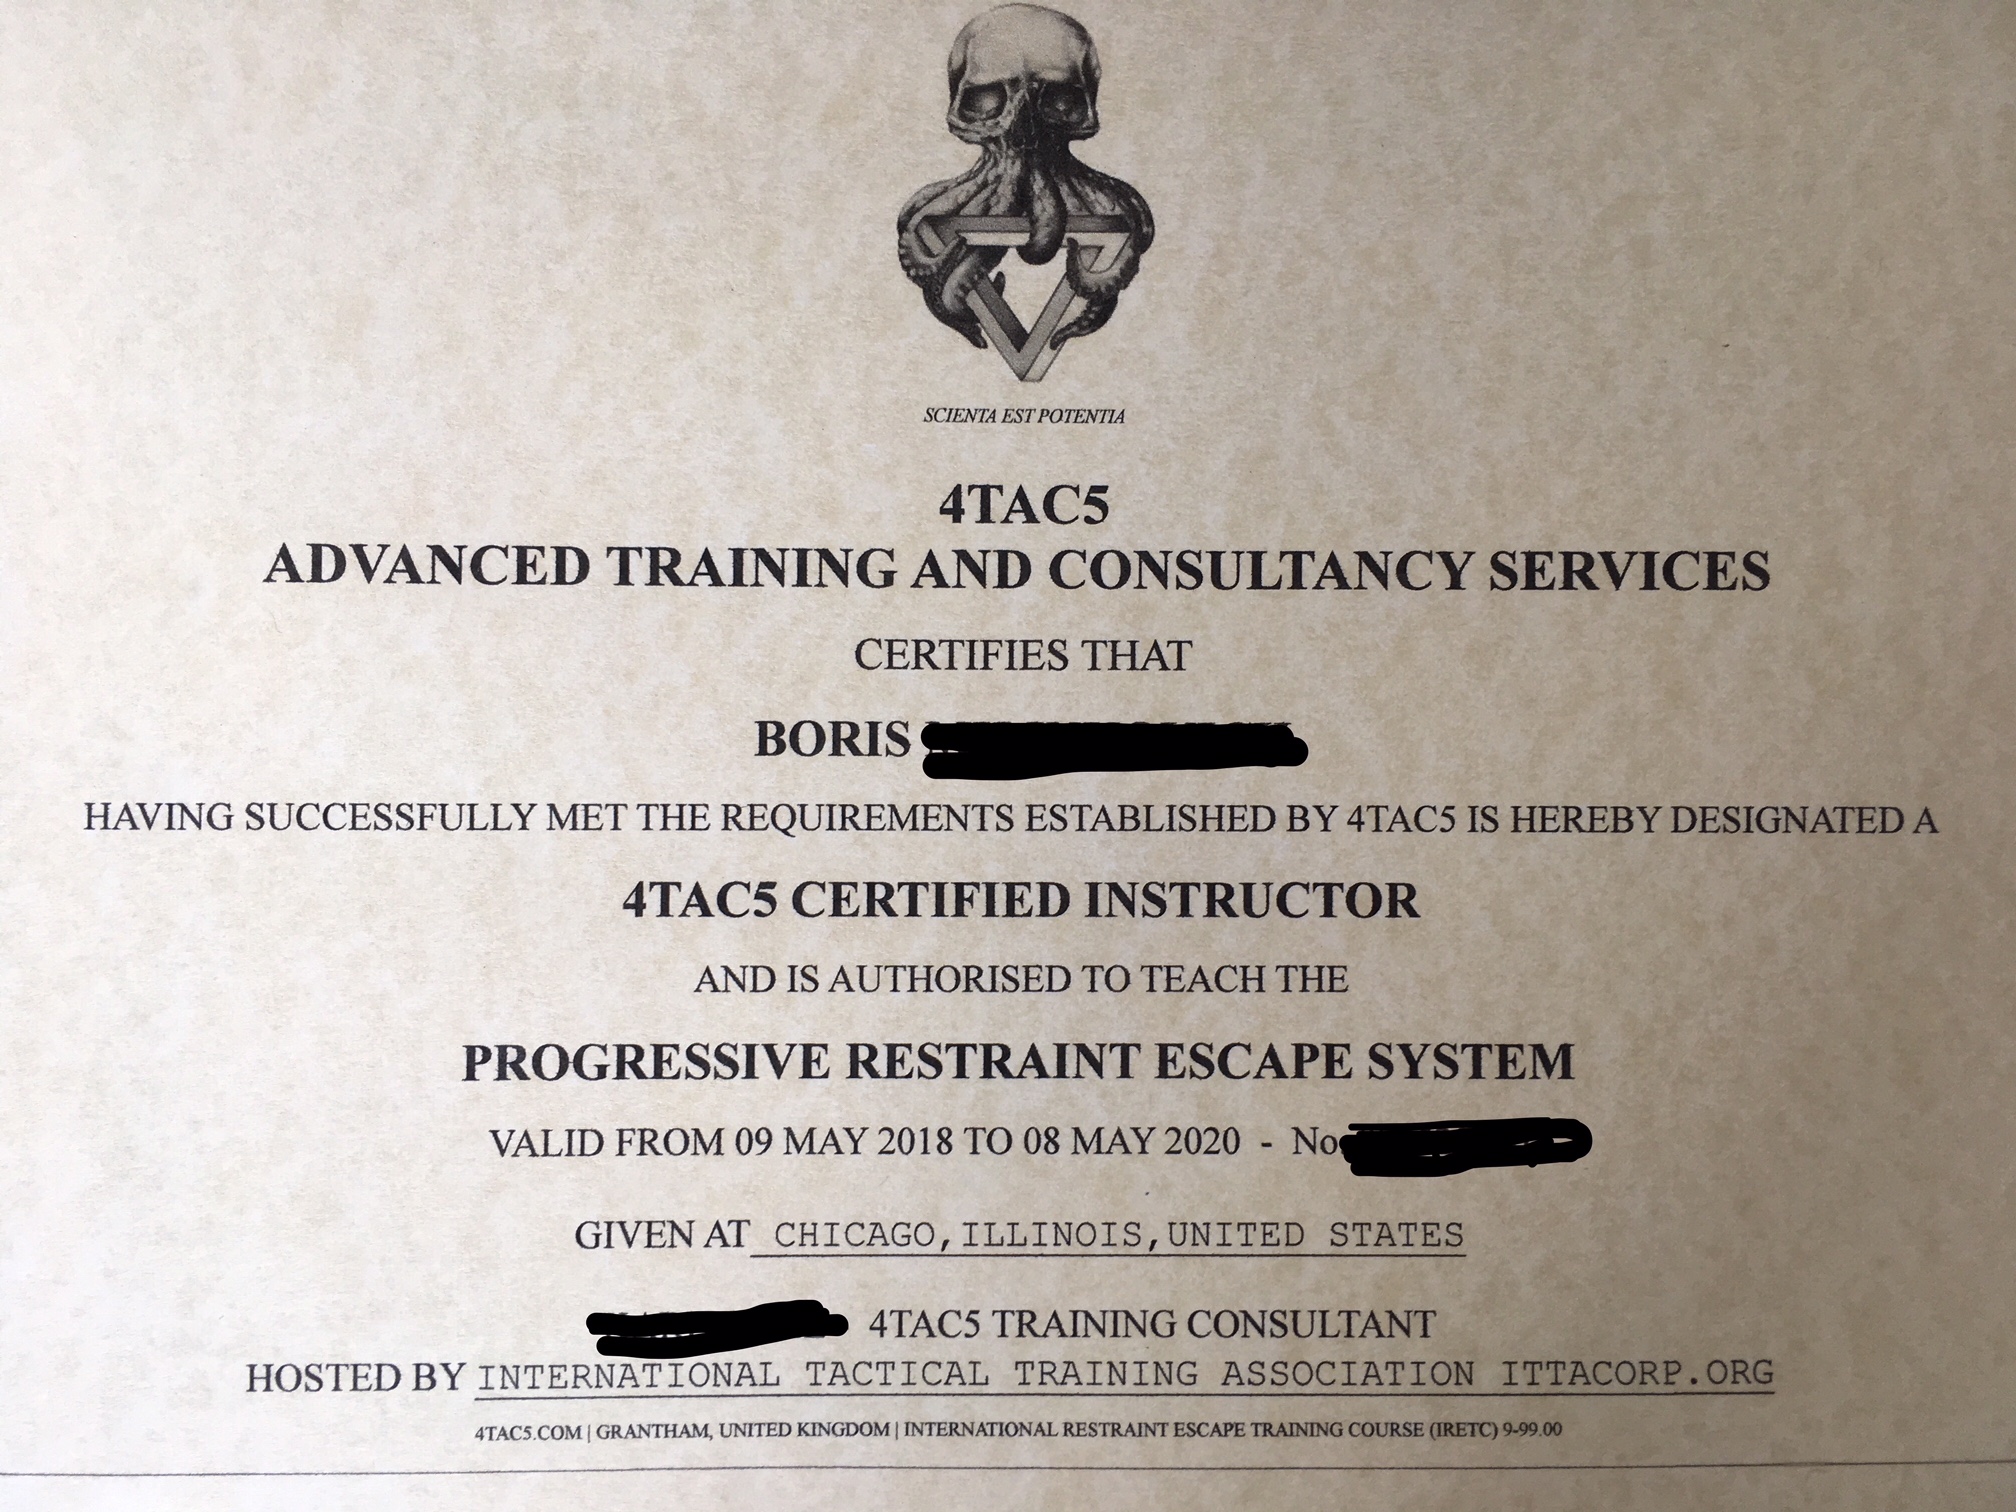
Training Review: IRETC with 4TAC5, Chicago, IL, May 2018
In May of this year (2018), I travelled to Chicago to expand my skills in the field of Counter-custody and counter-kidnapping but attending the IRETC Instructor Certification with Karl from 4TAC5.
For the longest time I had been working towards attending the counter-custody instructor certification course with 4TAC5 – IRETC (International Restraint Escape Training Course). I had tried for months to connect with them and was planning to travel to their training base in England to attend it when I was referred to Aaron Cunningham of the ITTA (International Tactical Training Association) as they were going to be hosing IRETC in Chicago. As luck would have it this made things much more convenient and less expensive.
Upon arrival I made contact with Aaron and he picked me up from the airport. I treated him to breakfast for the courtesy. As I had only had communications with him through e-mail to that point it was good to finally put a face to the name and get to know him. After breakfast, Aaron and I took a little tour around Chicago (he showed me some of the sights and gave me some background to the respective history and current situations with specific neighbourhoods we were traversing) and then we did two more circles to the airport to pick up other attendees and finally to pick up our instructor, Karl, and make our way to the training facility and our lodgings.
There were 4 of us with Karl and Aaron. A small but diverse group of LEO/MIL personnel.
***I will not speak to the identities of the others in the training as they are currently operational with their respective security services, nor will I get into specifics of the training due to it’s nature. ***
Over that first evening we all had a chance to get to know one another and discuss the upcoming week of training. Admittedly, I was very excited to get the training started and build upon my existing skills.
The next day training started and we covered a LOT of ground. The content for day 1 was vaguely as follows:
Overview of material, counter-custody principles, kidnapping & hostage survival;
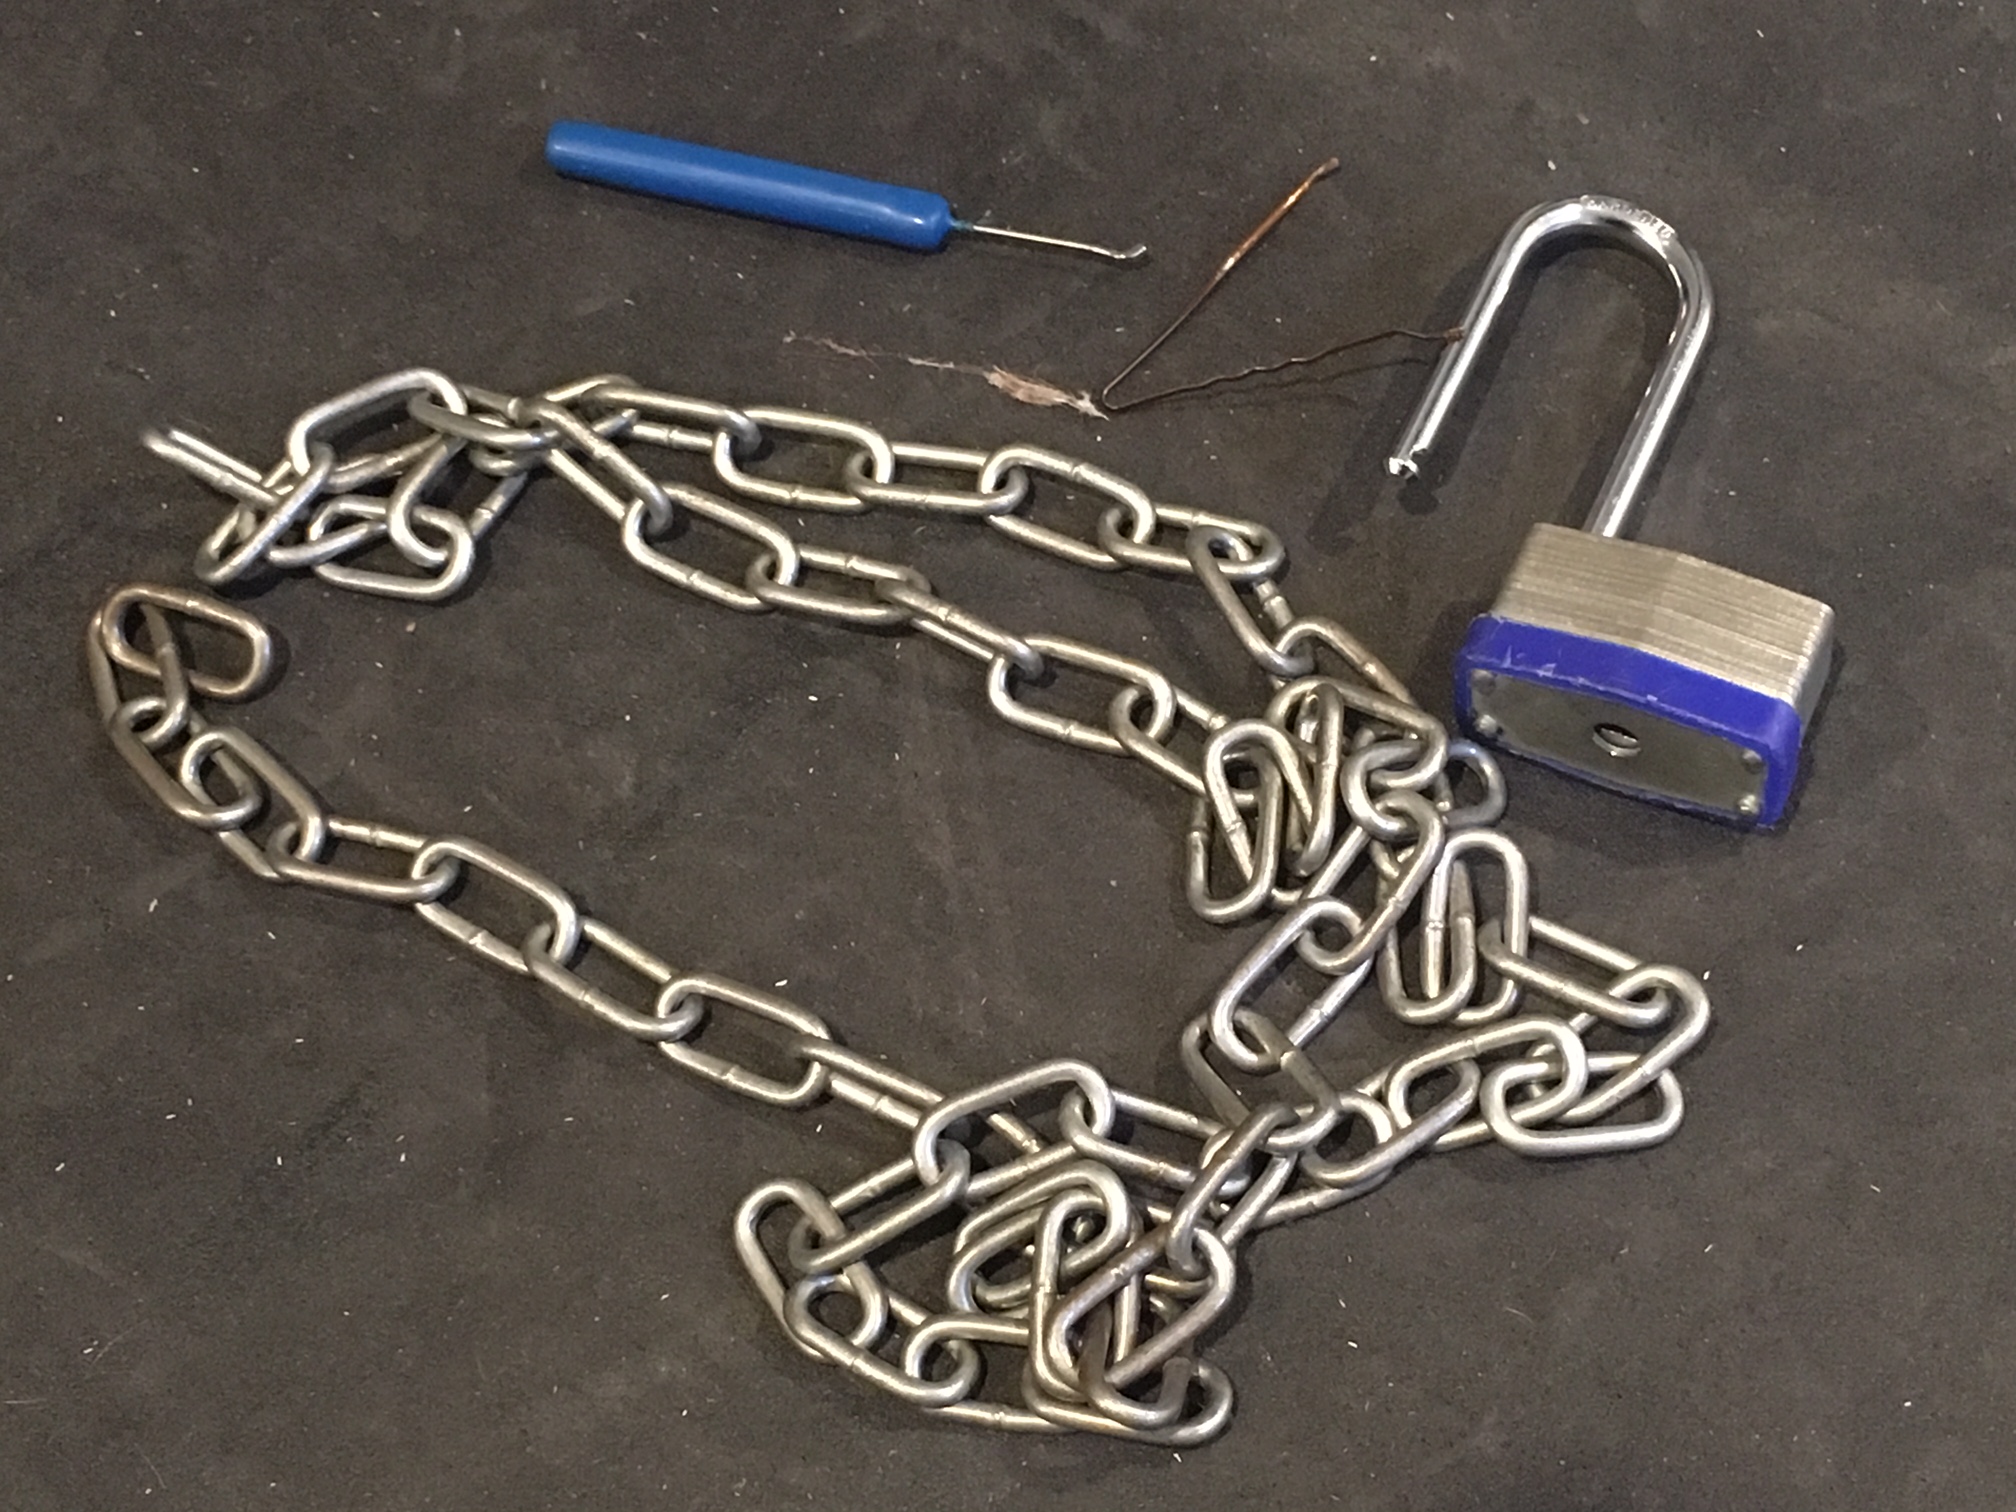
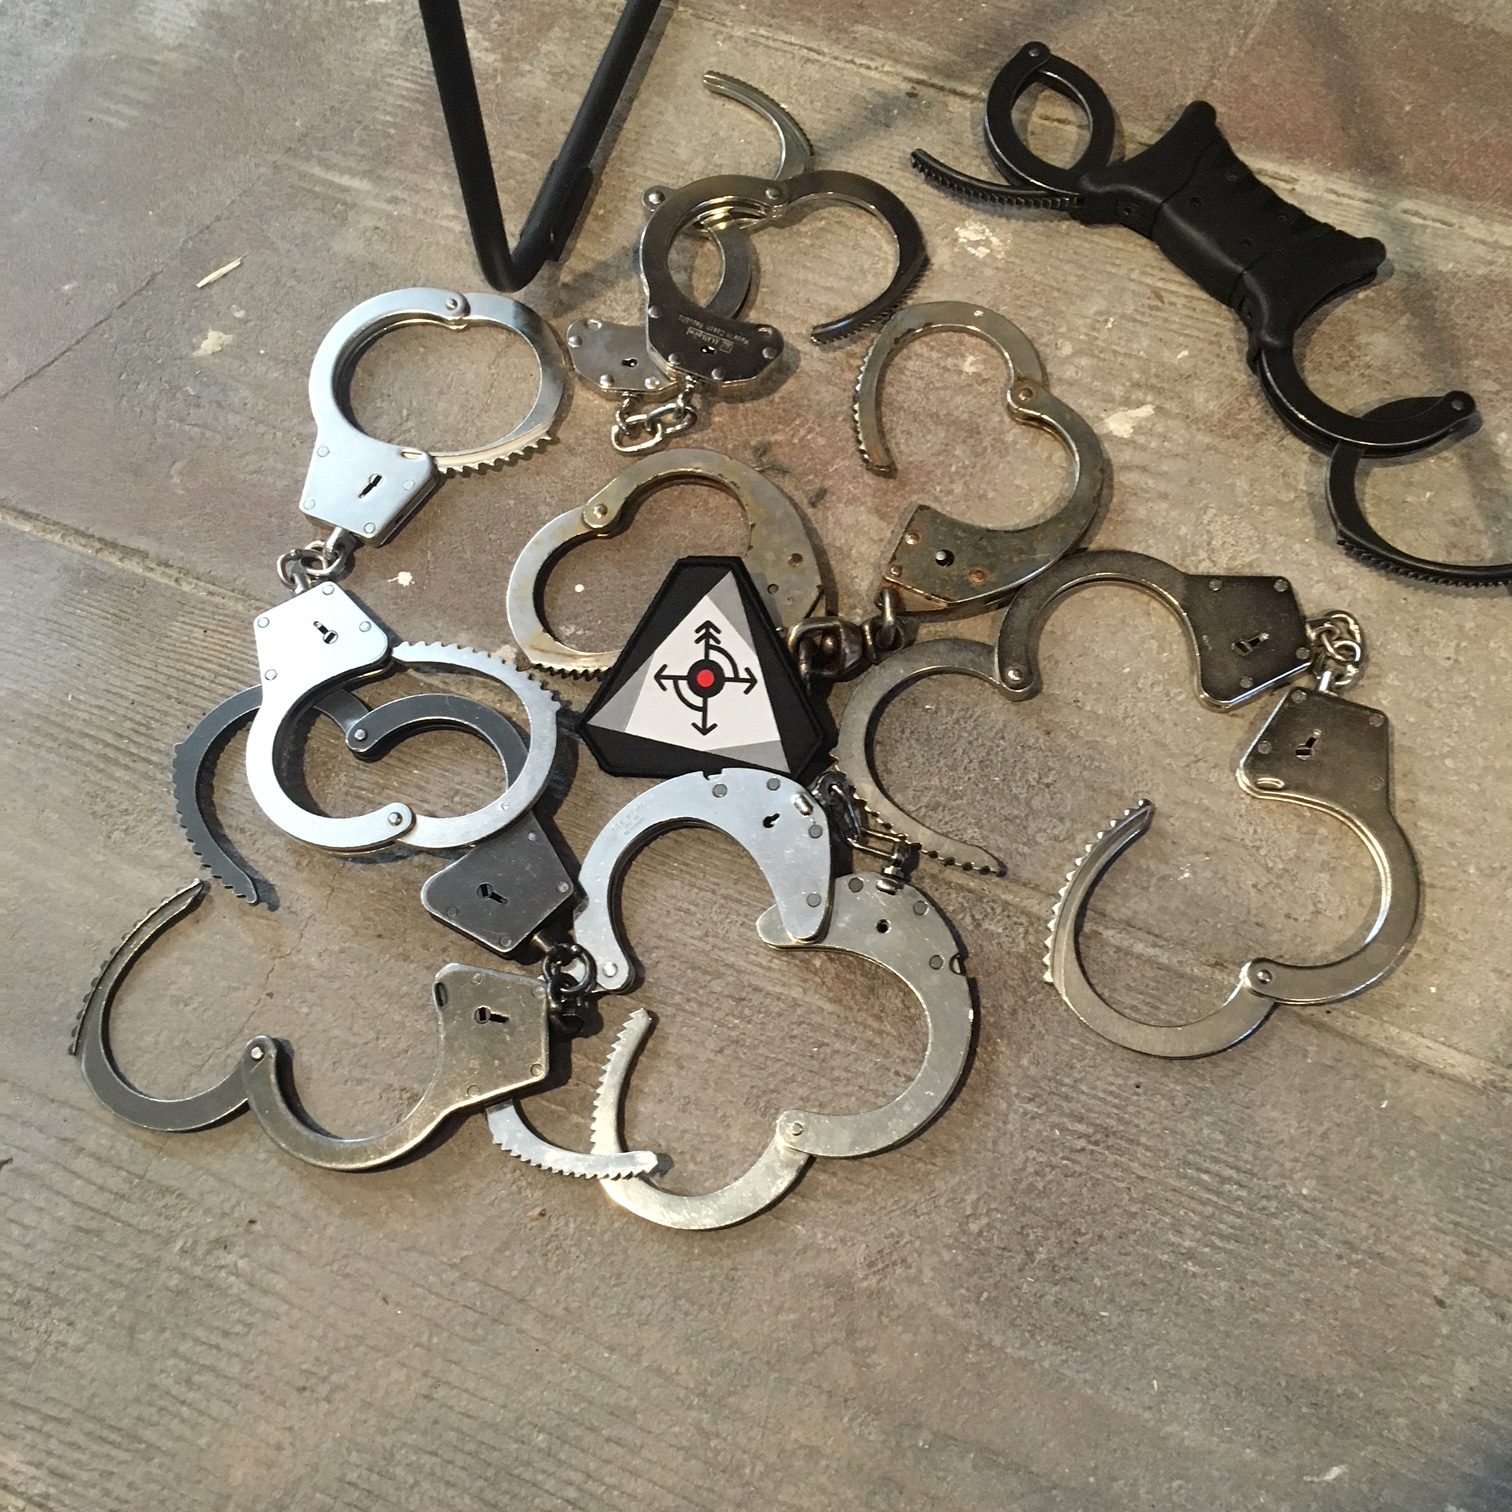
Detailed review of improvised restraints and manufactured restraints;
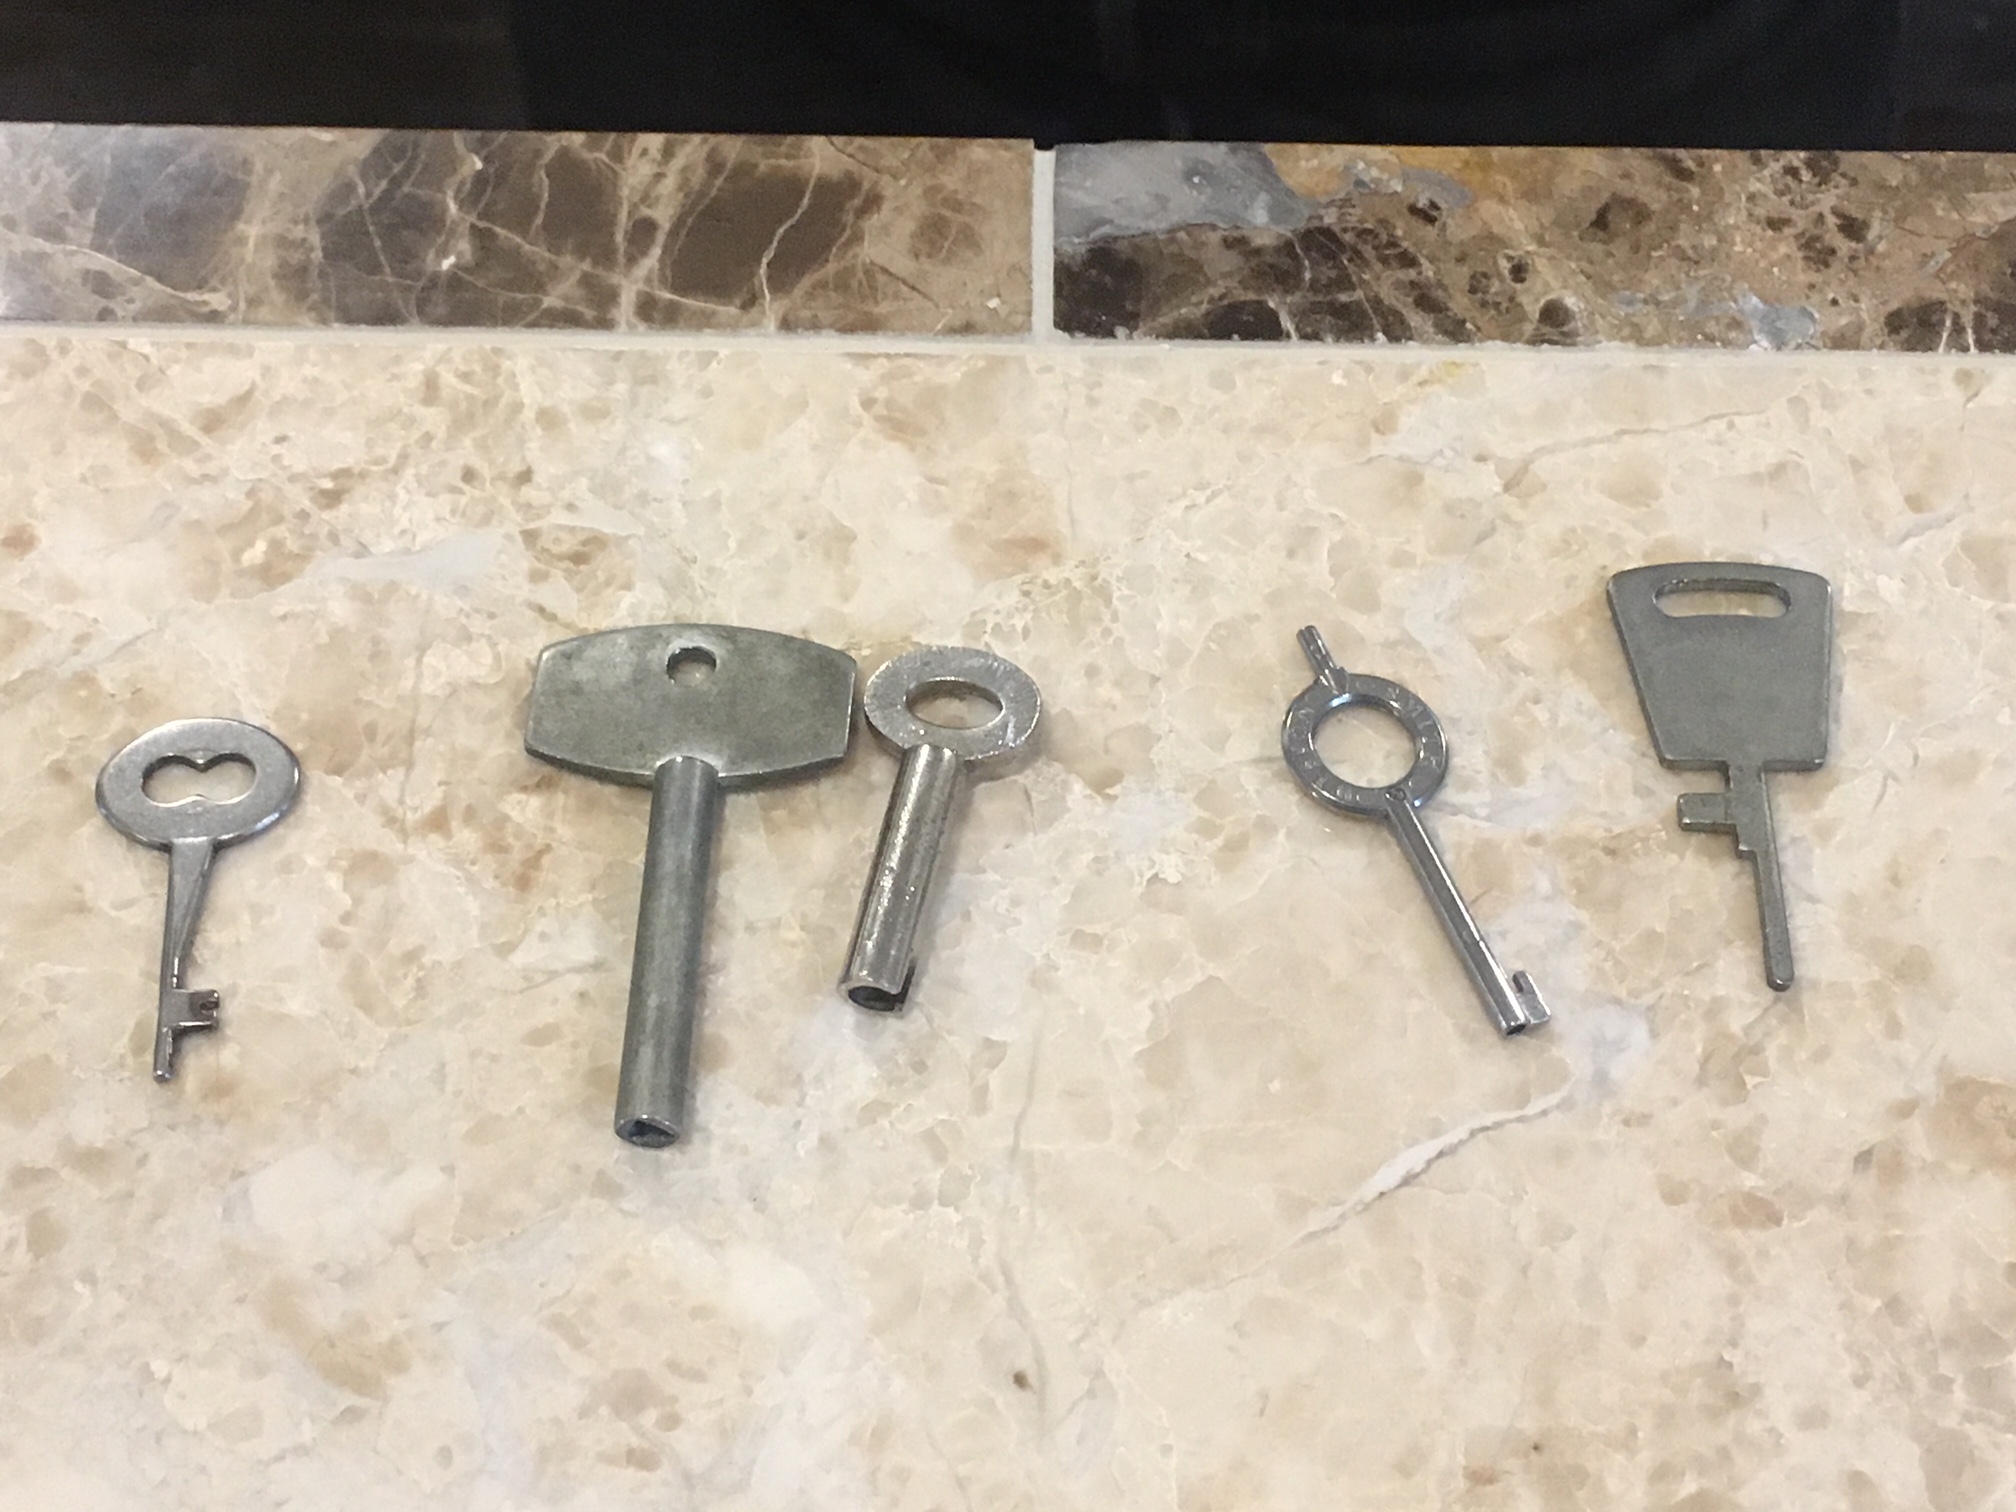
Improvised tools against restraints;
Mindset and tactics
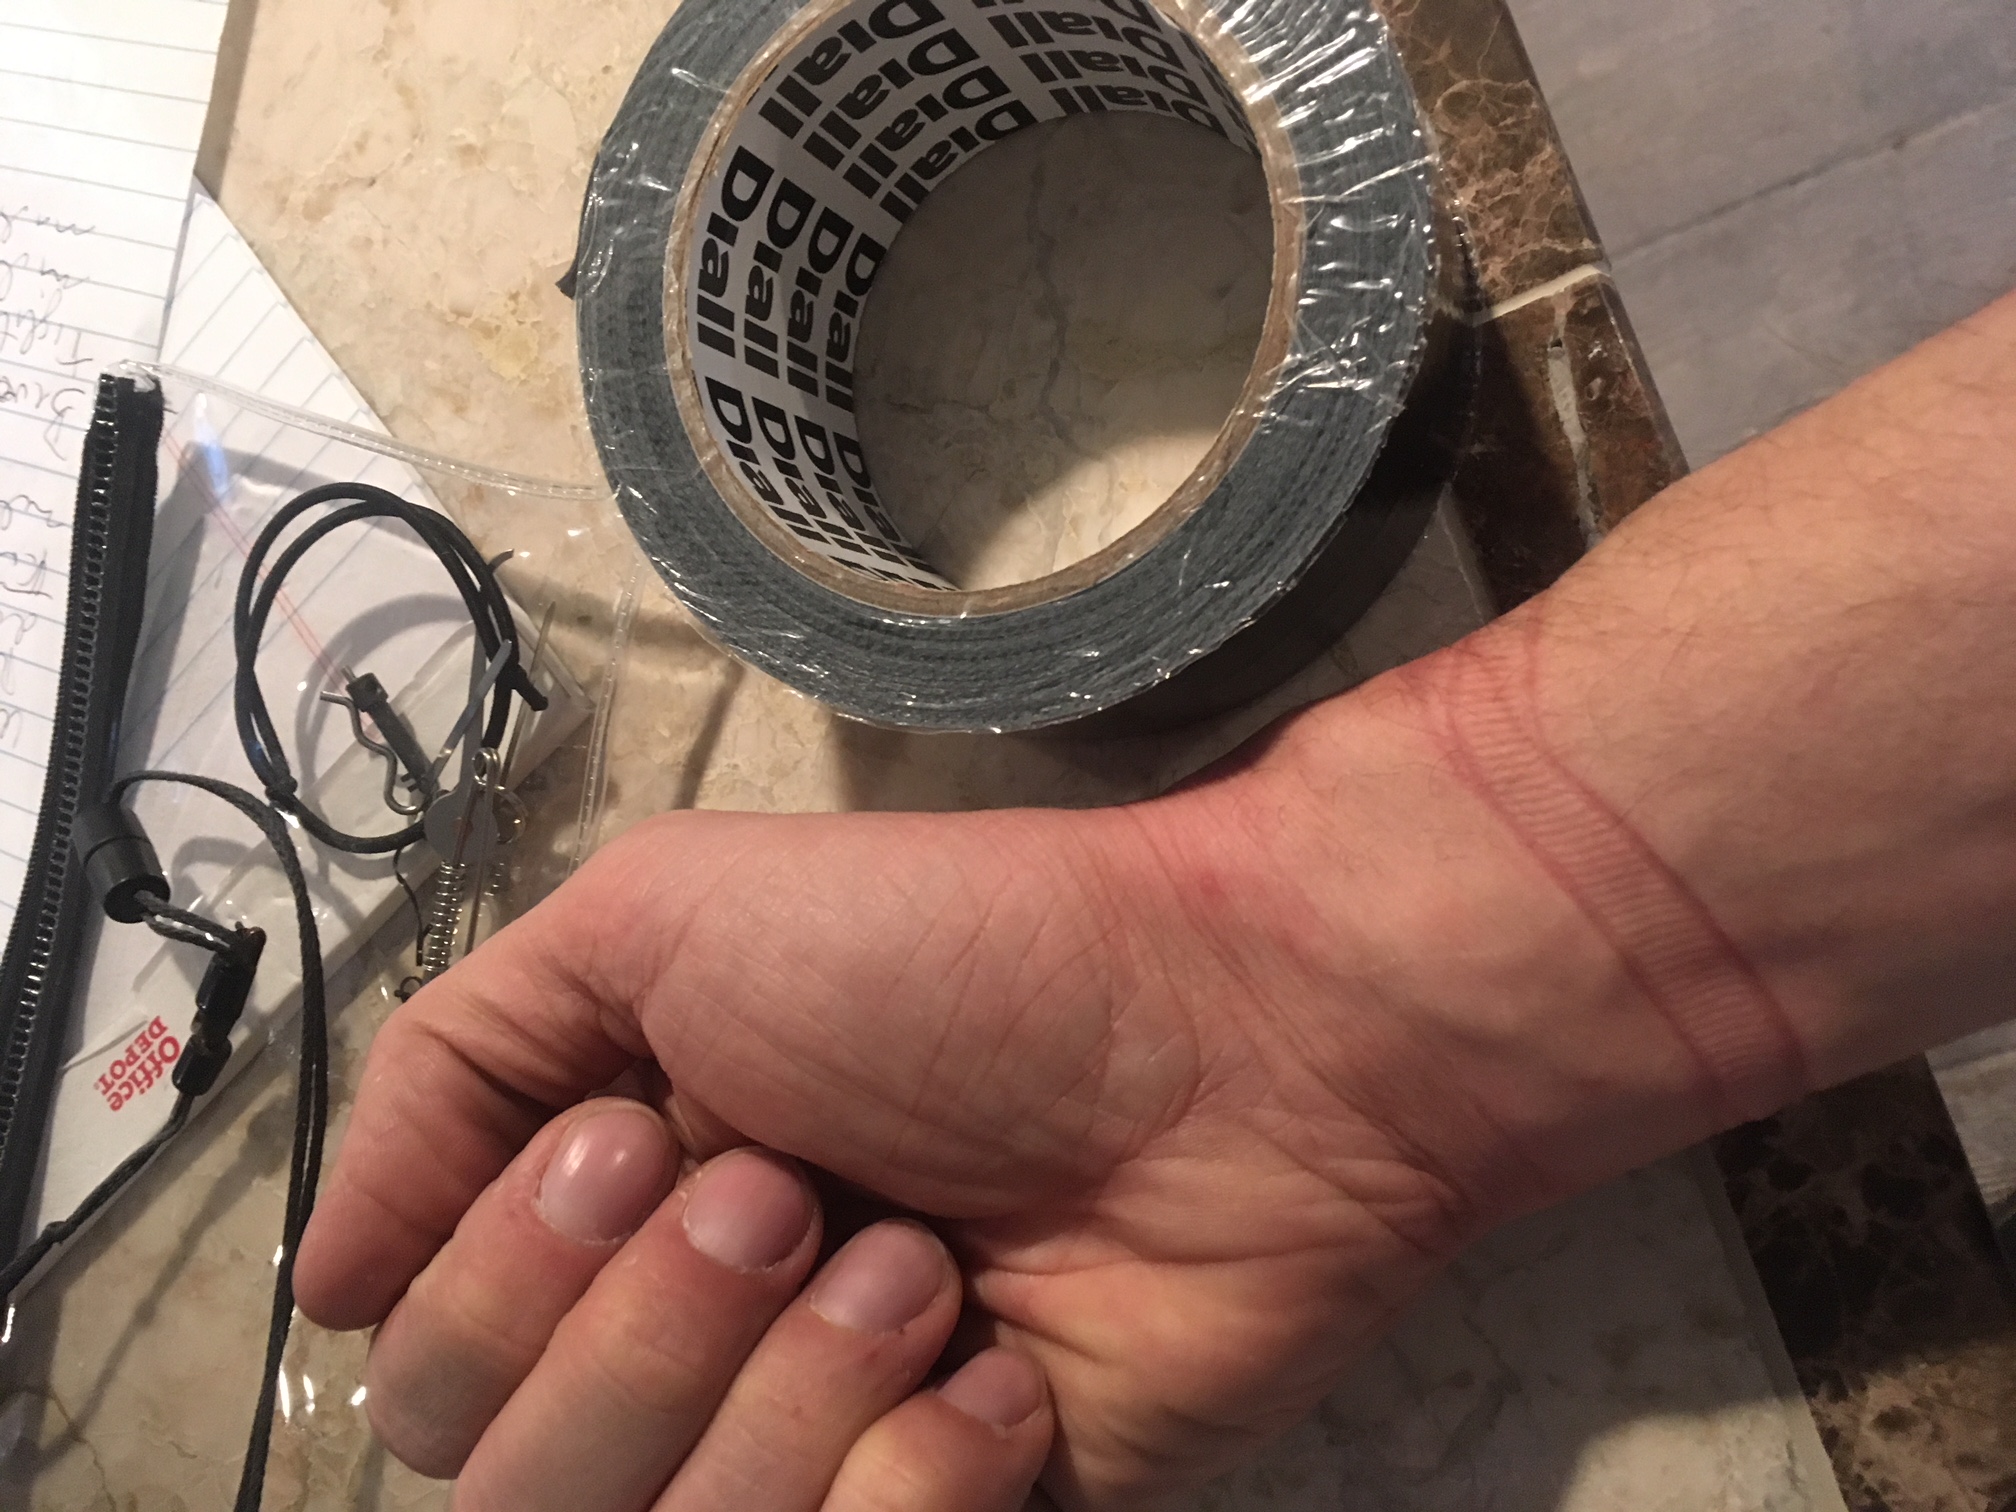
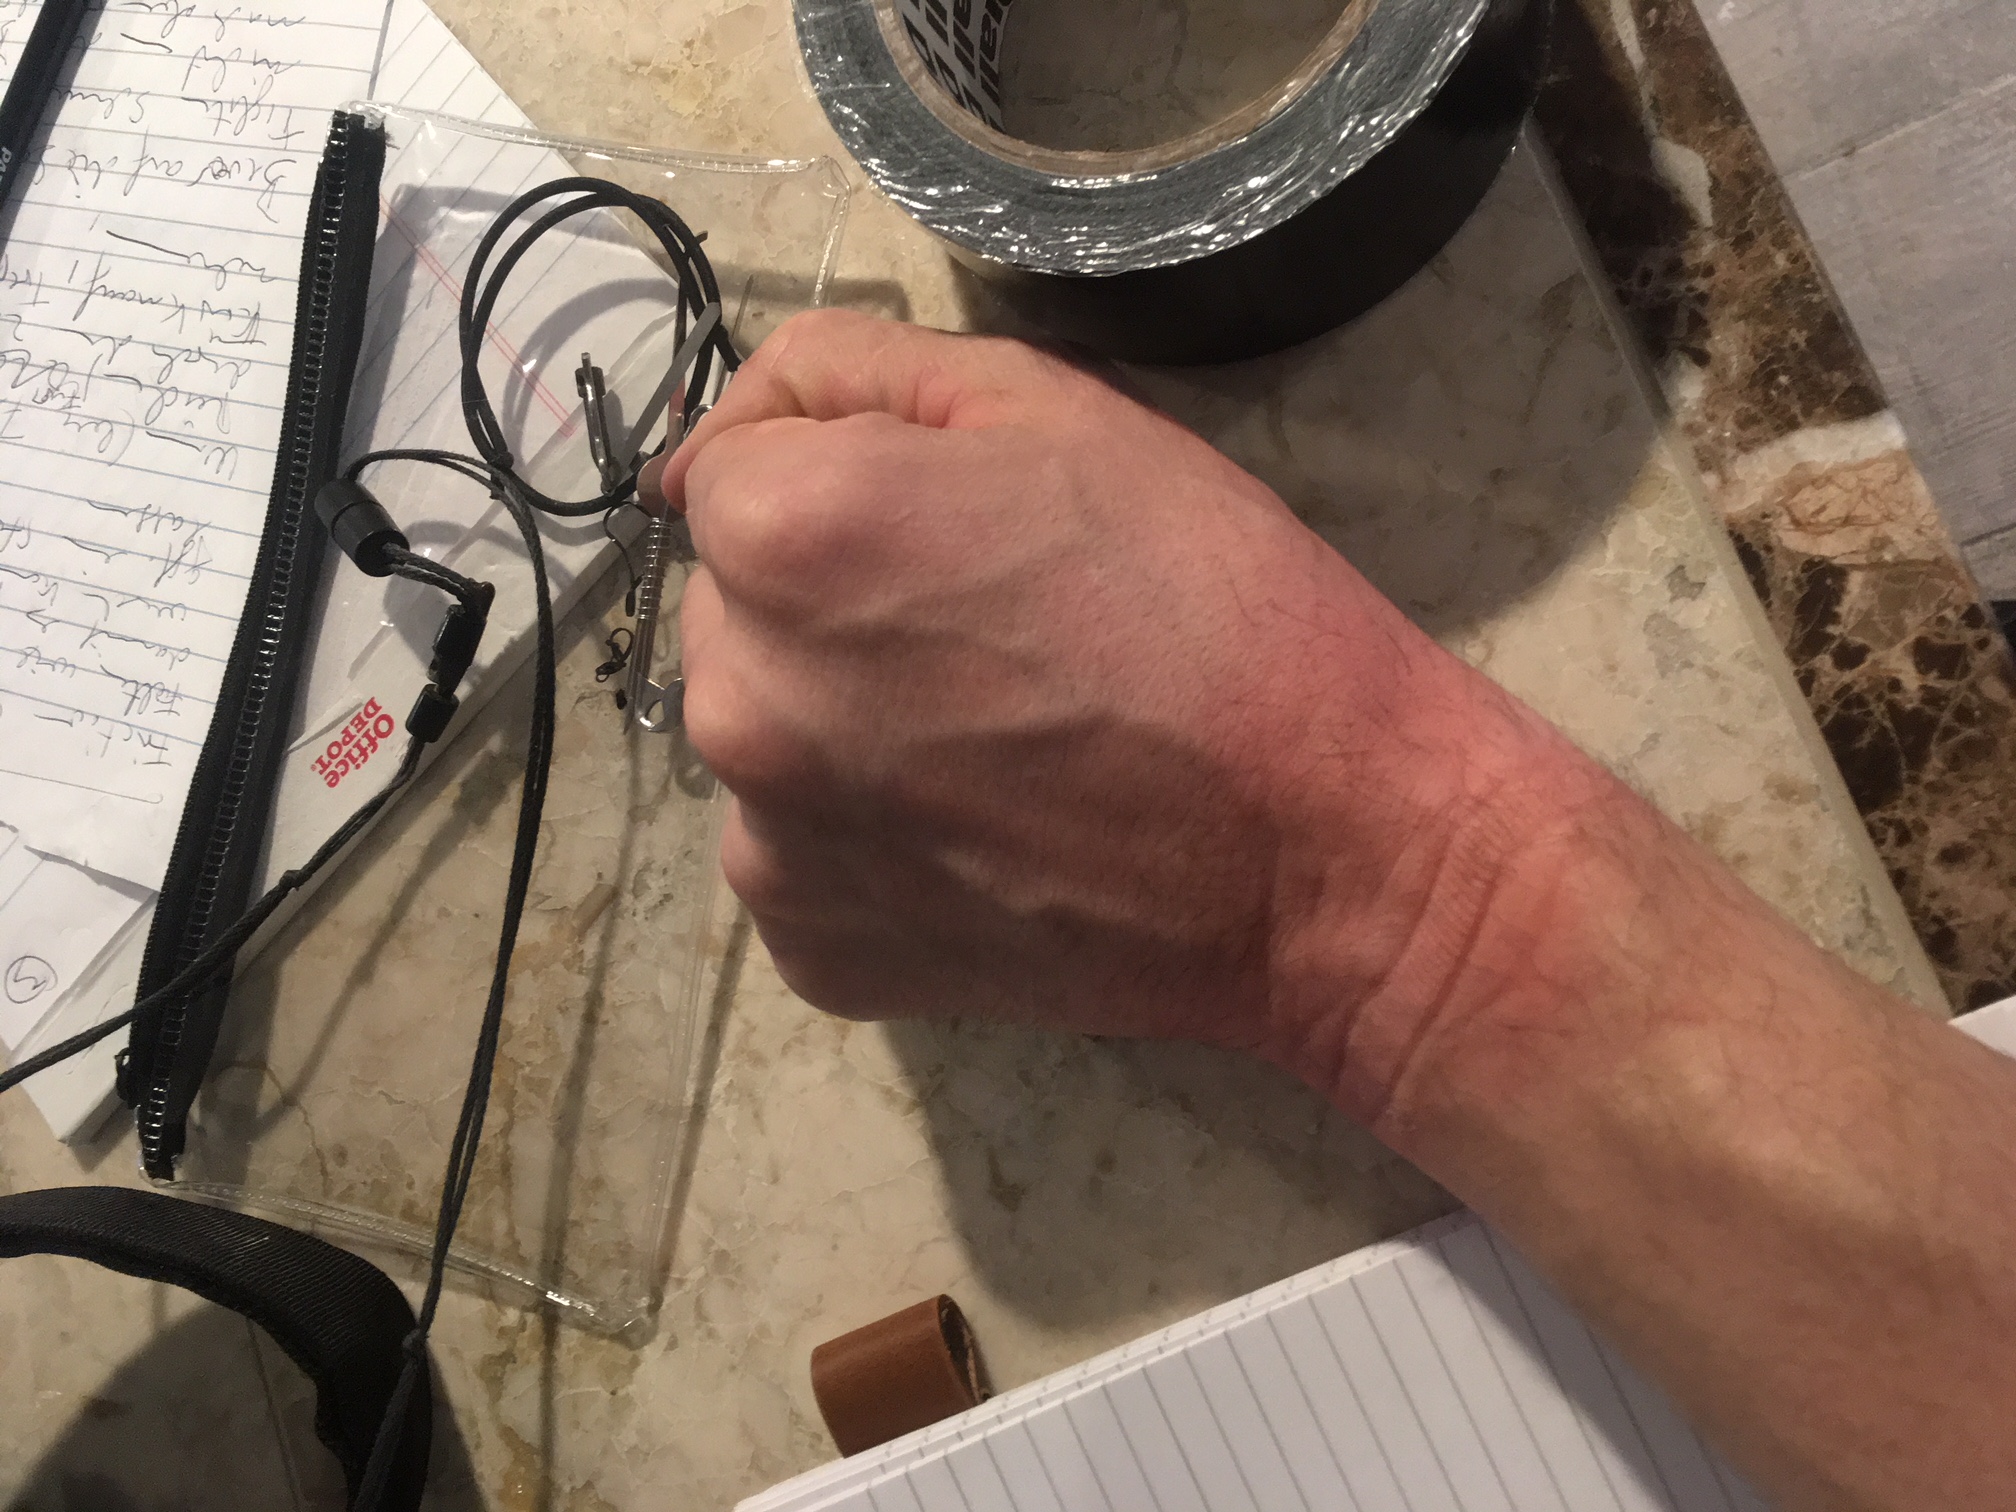
I felt as if I’d been overloaded with information and it took me a while to process what I was learning. So much amazing stuff was coming to me – efficient and effective techniques and principles to put to use immediately. My hands and wrists were smashed and raw by the end of the day but it was well worth the pain to gain the knowledge and hands-on experience in a controlled environment where mistakes can be made and learning can occur. Very helpful when you get yourself in a pickle and need someone to cut you out so you can try again.
Day 2 was much the same in so far as having a firehose of info shot my way. After a great breakfast, we got fuelled up on coffee and a recap of the previous day’s material and dove right in.
Recap Day 1;
Tools, carry, concealment and deployment;
Handcuffs (various, identify, function, features)
More mindset and tactics;
Special tools (contents, function, use)
Anatomy of abduction and custody (phases, counter-intelligence, immediate actions)
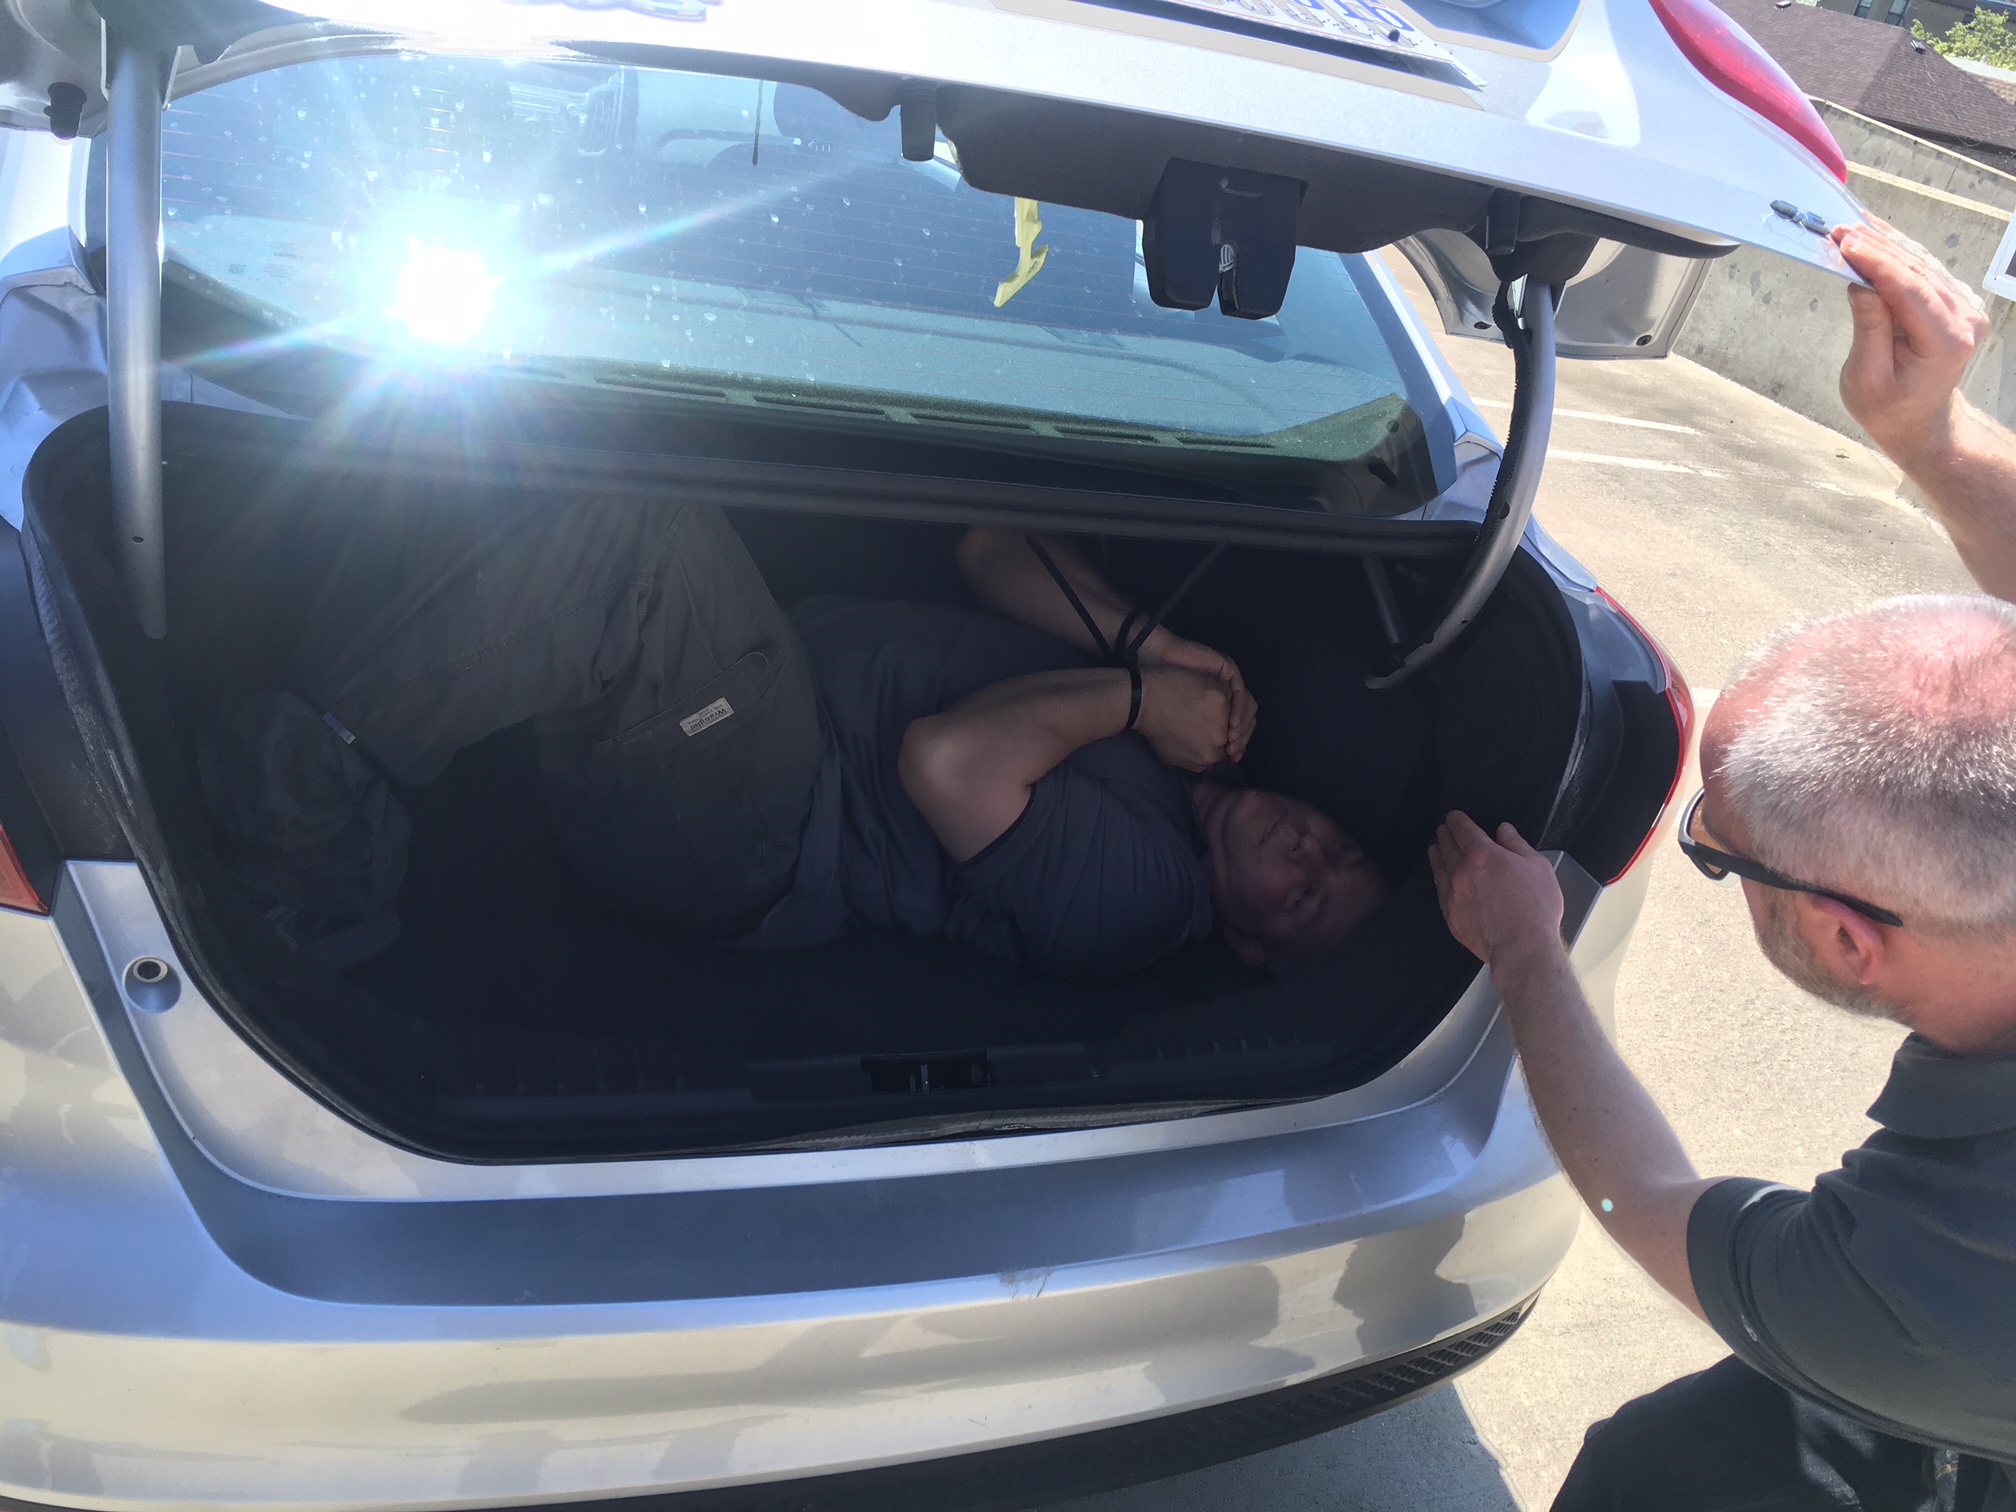
Captivity & custody Exercise
Day 2 was a long day filled with more work, soreness and trial and error. However, the more exhaustively we practiced, the more confident I was with the little curve balls that were thrown our way and, with patience and focus, they could be overcome.
Day 2 dinner was another great time gelling with the group and expanding on the day’s lessons.
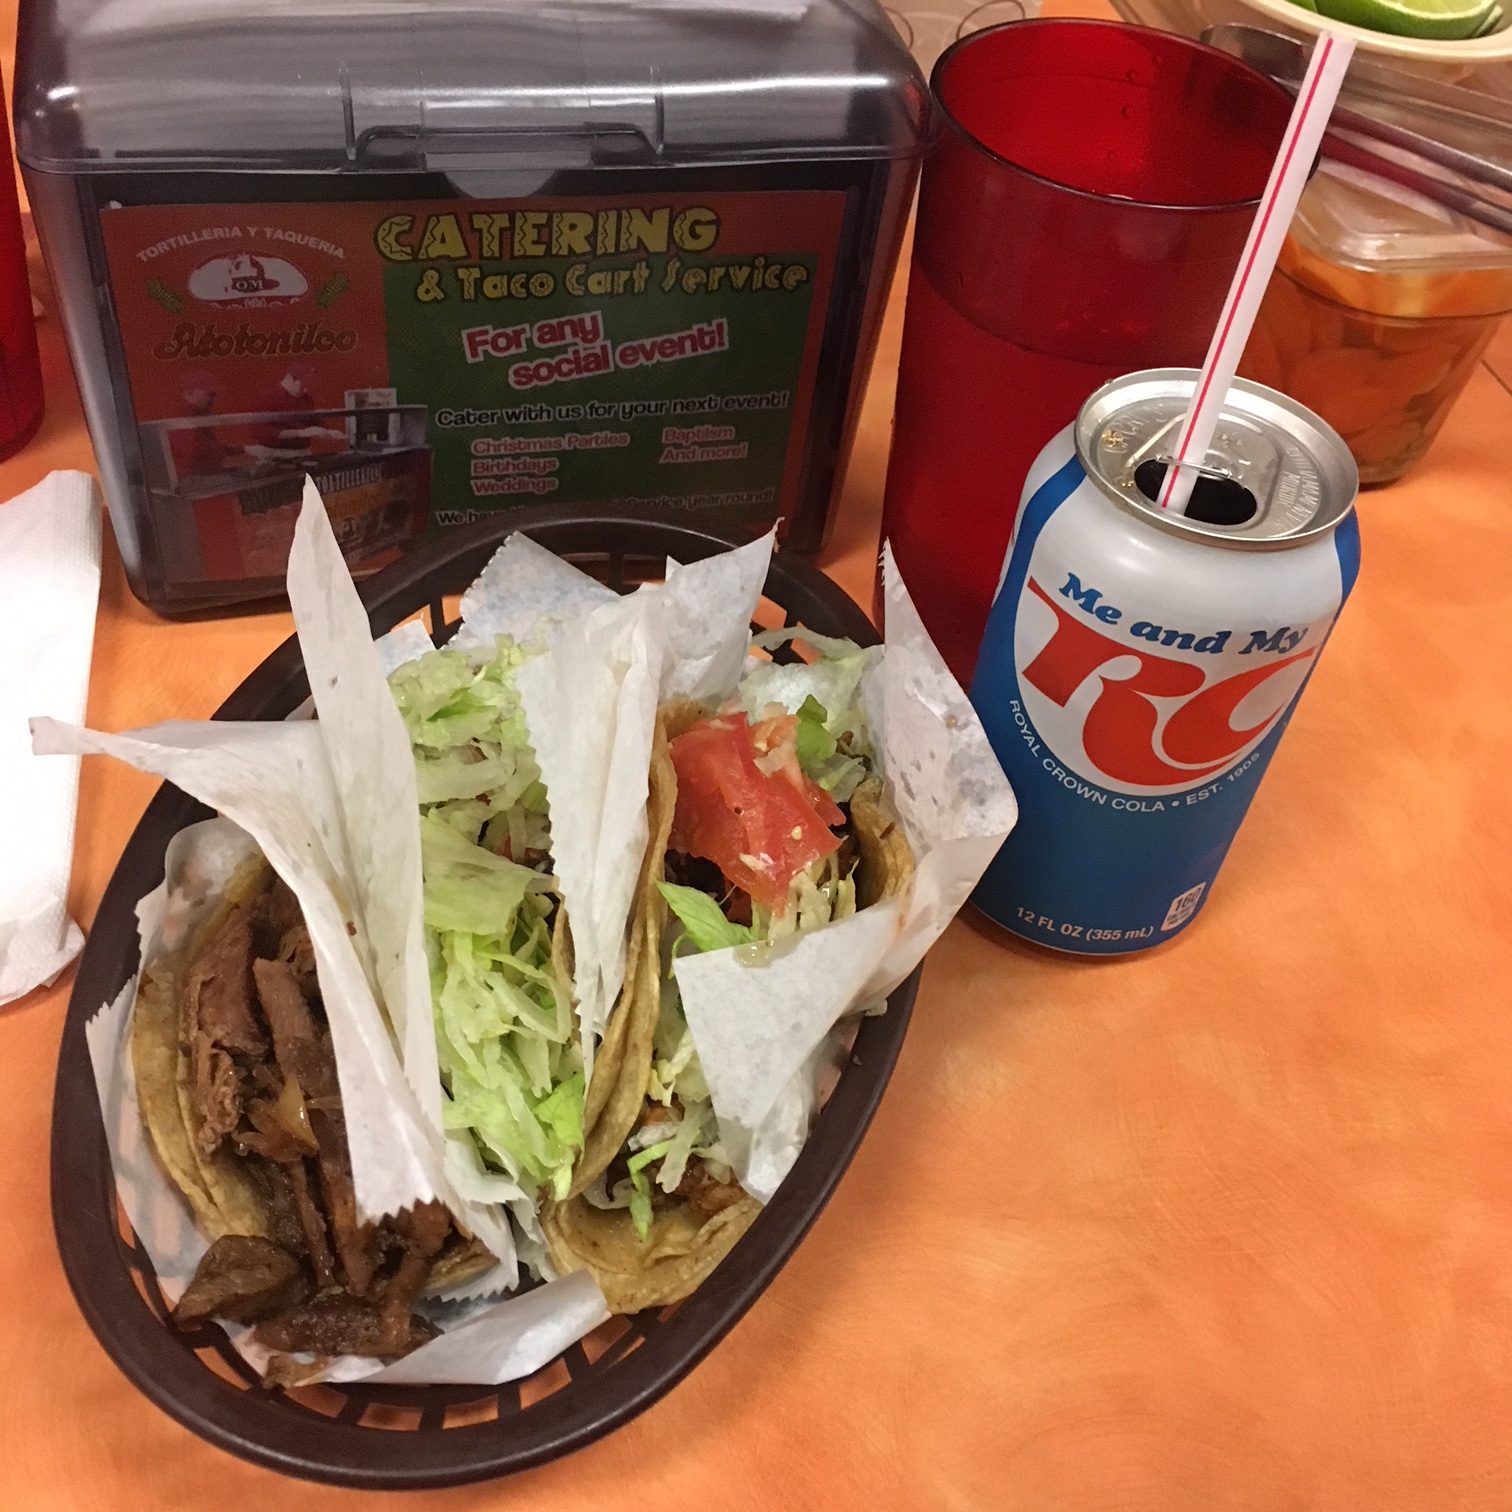
***BTW the food in Chicago was AWESOME!***
Day 3 was the Big Cahuna. Exercise after exercise after exercise, more scenarios and practice. Very involved to test our newly acquired skills and assure we’d assimilated the little tricks and remained focused on the task regardless of the negative stimulus applied. I found this culmination was a thorough test of my skills and my ability to apply them under stress and in unknown conditions.
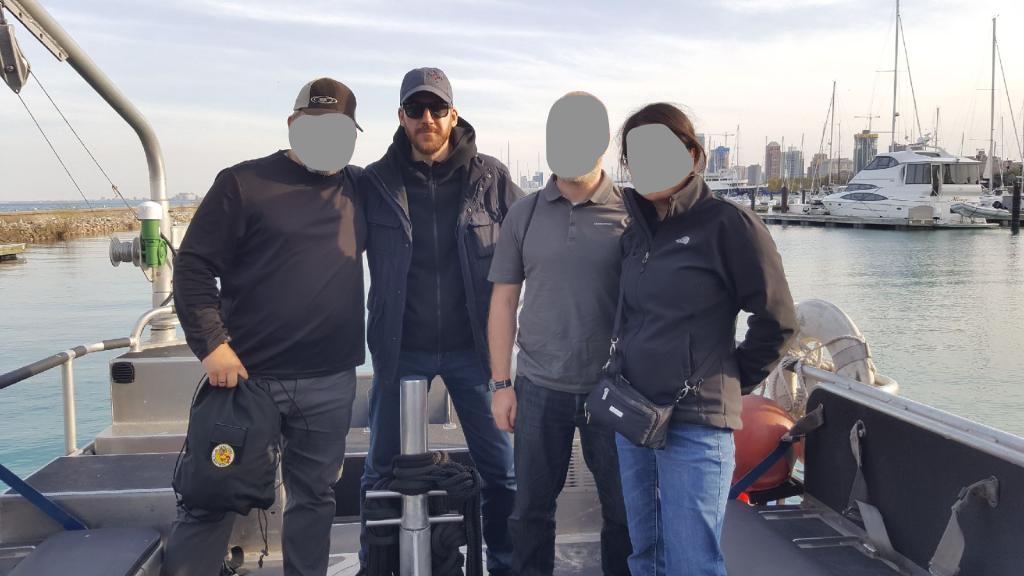
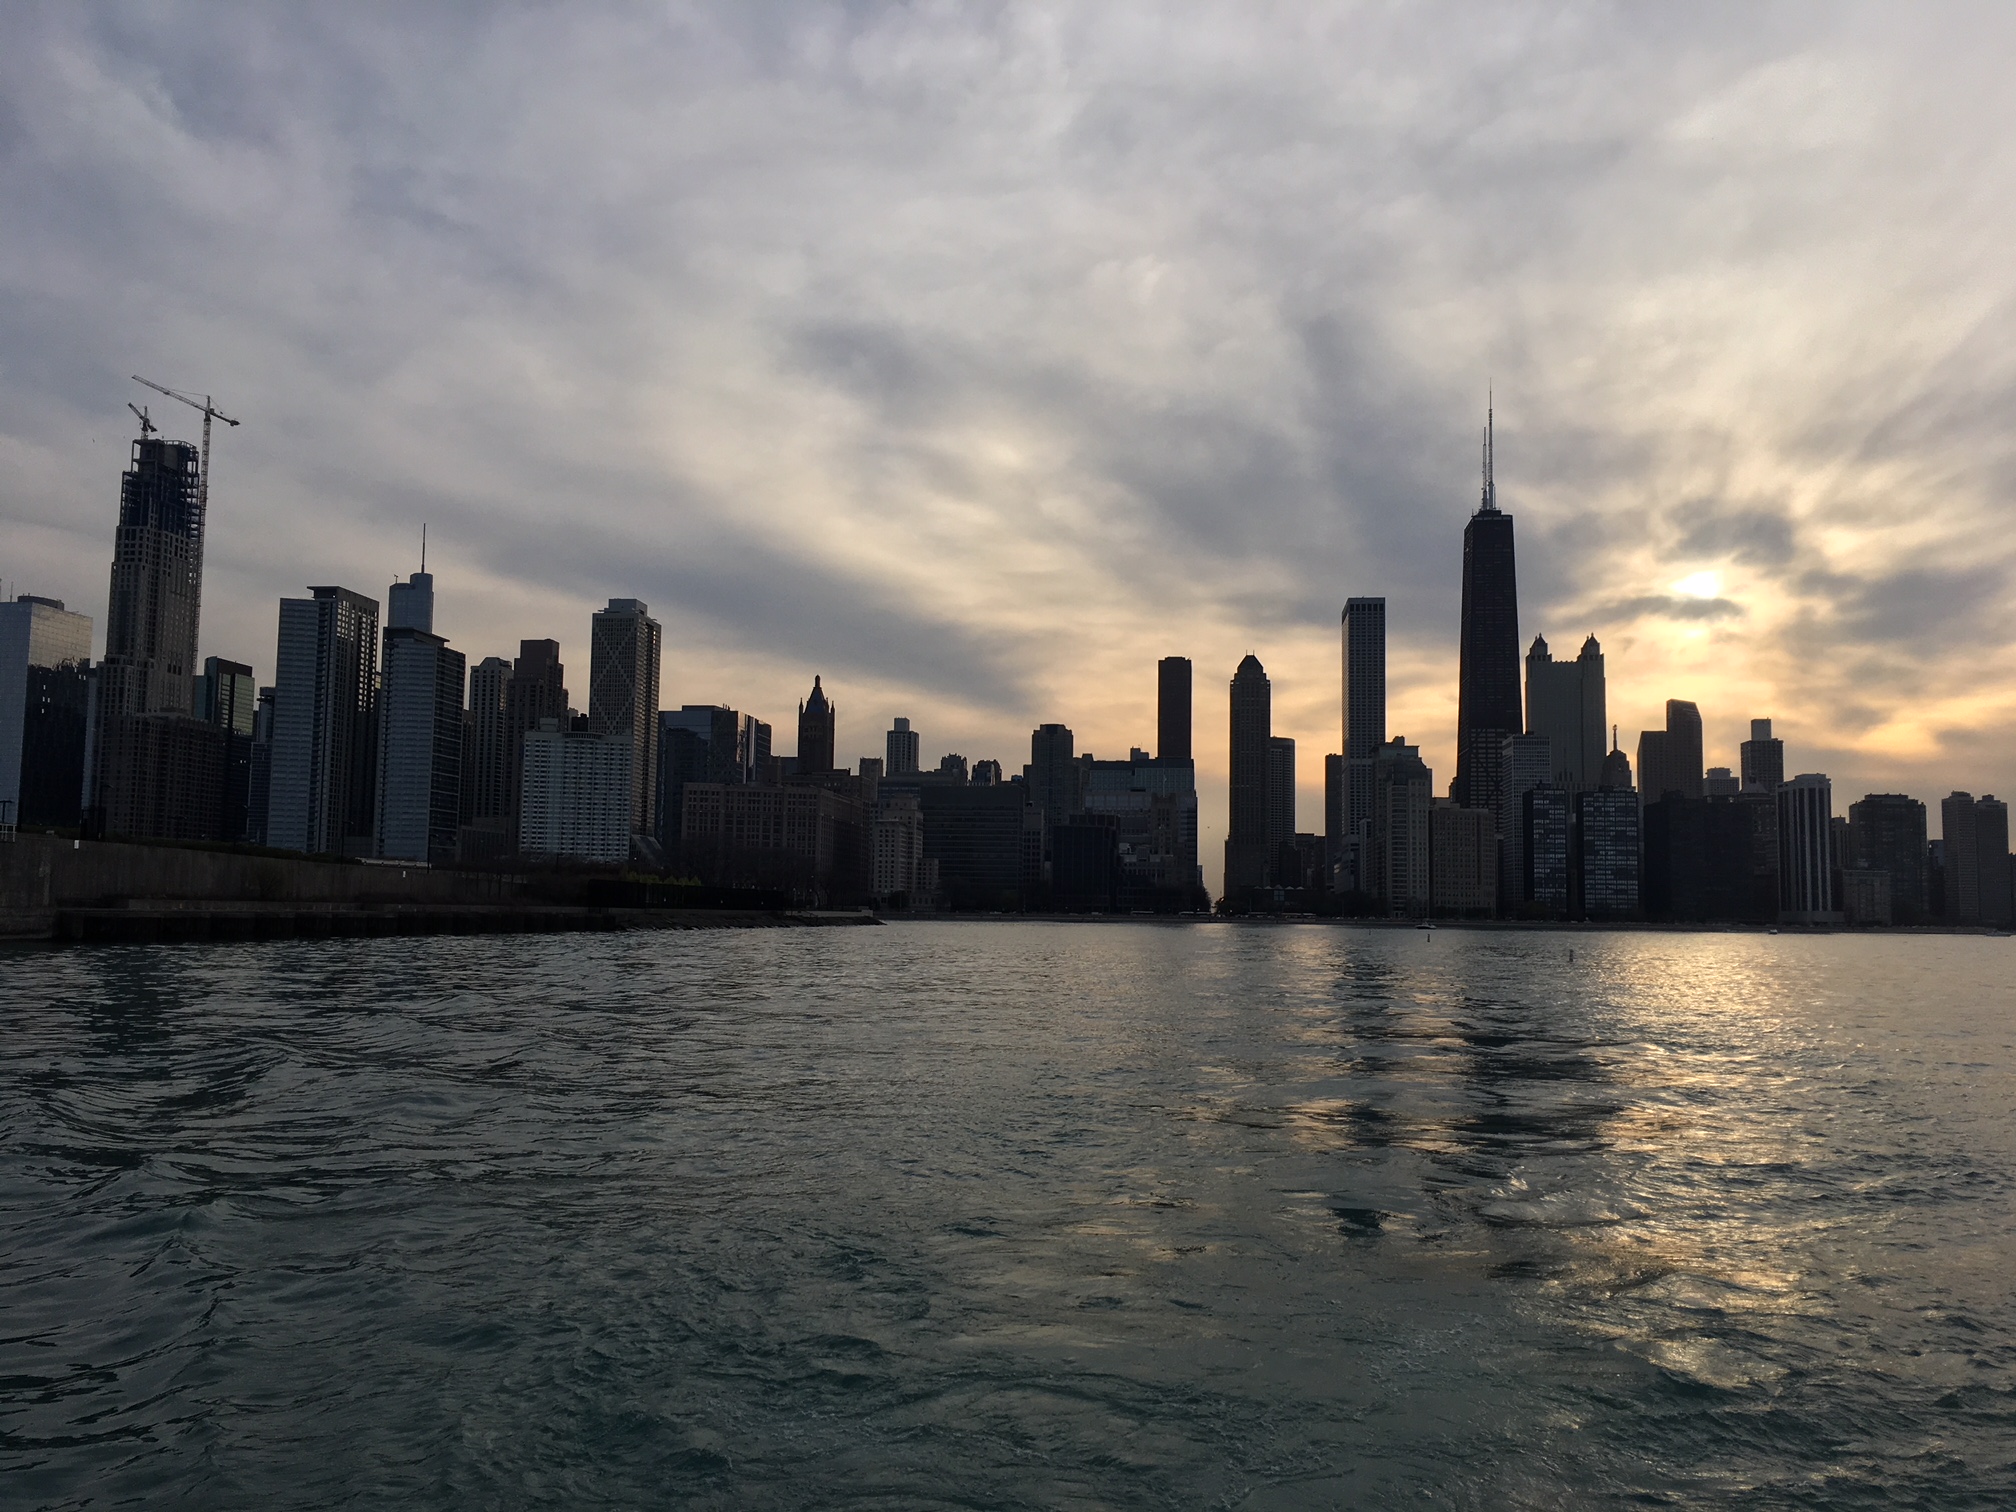
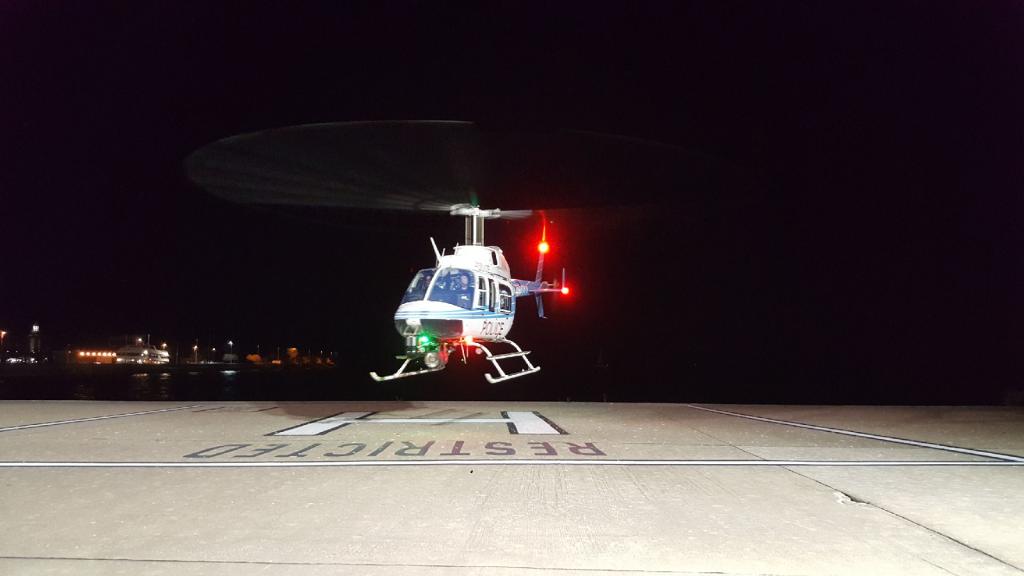
As a finale to the week, Aaron arranged a tour of the Chicago Police Marine Unit (with associated boat ride and waterfront tour) and topped it off with a ride-along with the Chicago Police Aviation Unit aboard a CPD helicopter above downtown Chicago. And, as it was Tuesday, what better dinner to have than tacos? I guess you really haven’t lived till you’ve watch a White Sox game at Wrigley Field from a police helicopter. Karl and I had a blast. What a great night.
The following day included a debrief, discussions, clean-up and certification presentations. My trip to the airport was bitter-sweet. I had made some new friends, learned and experienced some top-tier training and was leaving a very Toronto-like city (minus the 14 people who were shot while I was there).
I extend my sincerest thanks to Aaron Cunningham and the ITTA for hosting the training and for their wonderful hospitality. True professionals doing a great job.
To Karl of 4TAC5, thank you for your knowledge, patience and great sense of humour during the week.
To the Chicago Police Marine and Aviation units – thank you for your hospitality and for the amazing ride-alongs. Stay safe out there!
And to my fellow attendees, thank you for the laughs and lessons. Stay safe in your respective areas of operation and keep in touch.
For those of you who are in Canada looking for counter-custody and hostage survival training, keep your eyes peeled for our offerings for both civilians and military/law enforcement (restricted content) or contact us directly for private training solutions for your group.
For more information on mentioned training and entities, see below and feel free to contact us.
This is Part 3 in a series on Personal Security during travel.
As you’re packing for your trip, make sure you go through the pre-travel planning process to ensure that you’re dotting all your “I”s and crossing all your “T”s.
Ensure all of your passports, visas, tickets, cash and itineraries are in order;
Conduct a map reduce of the area in which you’ll be travelling;
Send an info package to a relative or trusted friend in case you need help while abroad;
Arrange for your home and affairs to be taken care of while you’re away.
When preparing to go (either to the airport, train/bus station sea port, etc – it applies to all equally), ensure you charge all of your devices and that you have the appropriate connectors and adaptors for the region in which you will be travelling.
Take an empty water bottle and some snacks with you so that you can refill it post-security and always have a drink. You never know when you may be delayed and airports are notoriously expensive.
At the airport, keep your passport and ticket/boarding pass hidden to avoid people targeting you and gleaning information about you and your travel. As you walk through the airport, keep an eye open for places of cover should an attack occur. Columns and pillars, concrete planters, walls and corners as well as exit stairwells can offer ballistic protection. Try to stay away from public-side-facing windows.
As you move through the port/station keep an eye for exits, cover and vantage points.
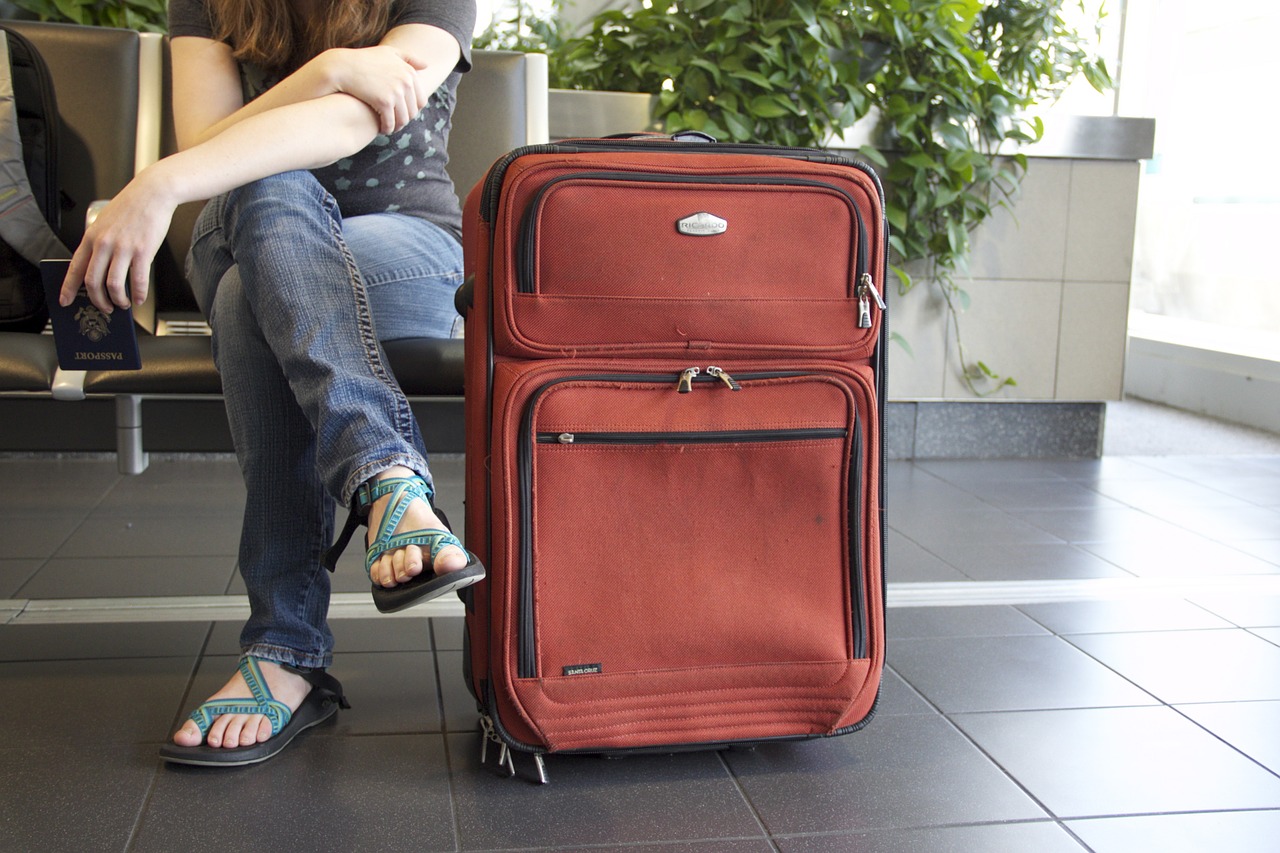
As a general rule, try to pack for quick and easy movement. Travel light and fast. I avoid checking a bag if I can which enables easier movement and less of a chance of lost luggage. Stick with low-profile, non-tactical-looking luggage and bags. The only downside is that if you’re travelling with items prohibited from going in the cabin of the plane, you’ll be forced to check a bag. DO NOT try to sneak anything through security as it’ll either be seized (best case) or you’ll end up arrested (worse) depending on the local laws.
Here’s another tip: DON’T AGREE TO TAKE SOMEONE ELSE’S BAGS FOR THEM! It doesn’t matter if it’s an old lady, a “man of the cloth” or a child “travelling alone”. Carry only your bags, keep a vigilant watch over them at ALL times, don’t leave them unattended and say no to anyone asking you to carry something for them.
Maintain the integrity of your bags and never take anything for anyone.
If you find yourself waiting on the public side of an airport or rail terminal, keep your eyes open for suspicious activity. Set yourself up where you have a good vantage point and no one behind you, close to cover. If you observe someone suddenly get up and walks away from a bag or parcel, quickly find cover and tell security services. If you leave your bags unattended, you risk losing them to security.
Report unattended bags in stations and ports immediately and create distance/move to cover in case of attack.
While travelling, do your best to be aware of the local news and goings-on. This can give you a feel for the local environment in which you find yourself and to possibly give you a heads-up in case of impending bad weather, criminal threats or civil unrest.
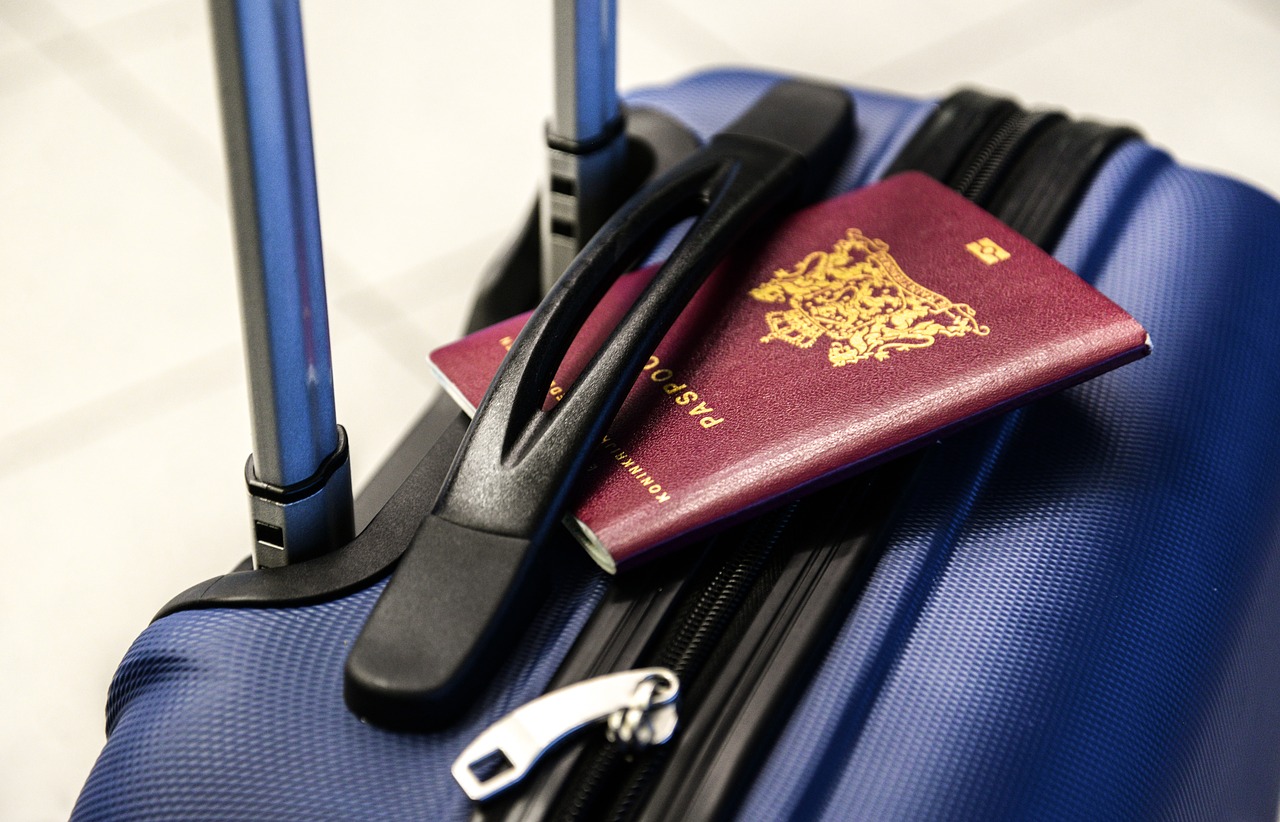
ALWAYS secure your passport. It is the most important item you have when travelling abroad. And depending on the country of issue, it can be worth upwards of $50k on the black market.
Your passport is the most important document you have. PROTECT IT.
When you arrive to your destination and have cleared customs/immigration, you can then “tool up” with any gear you have legally transported or acquire locally-sourced tools.
Do your best to blend in with the local population. Look at online photos of locals and get a sense for what they wear and how they go about their days. Consider stopping by a local store to purchase similar clothing to wear while you’re “in country” and then leave them behind when returning home. With this method, you are essentially renting a “persona”and will bring down your visibility as a tourist to some degree. Leave your “5.11 Tuxedo” at home and get something local instead. Oakleys, Salomons and 5.11 pants and shirt that all say “covert” are usually anything but.
Your covert clothing, isn’t.
If you’re in a situation where no amount of “low-key” will do it (such as travelling with your family or in a group) do the best you can and always remain polite. A smile and a kind word can go a long way in the right context. With this in mind, don’t discuss your personal life with strangers. You don’t know who they are or how they could use that information against you. Steer your conversations about their home country under the auspices of learning more about them.
Always be wary of slick or sleazy locals who appear too good to be true.
When travelling to and from your accommodations (or any base), vary your route and timings and maintain your situational awareness at all times so that you’re not being observed or followed.
When moving around, don’t carry all of your cash in the same place on your person. Break it up across your pockets, decoy wallet and other stashes. Use credit cards when you can to reduce the visibility of cash.
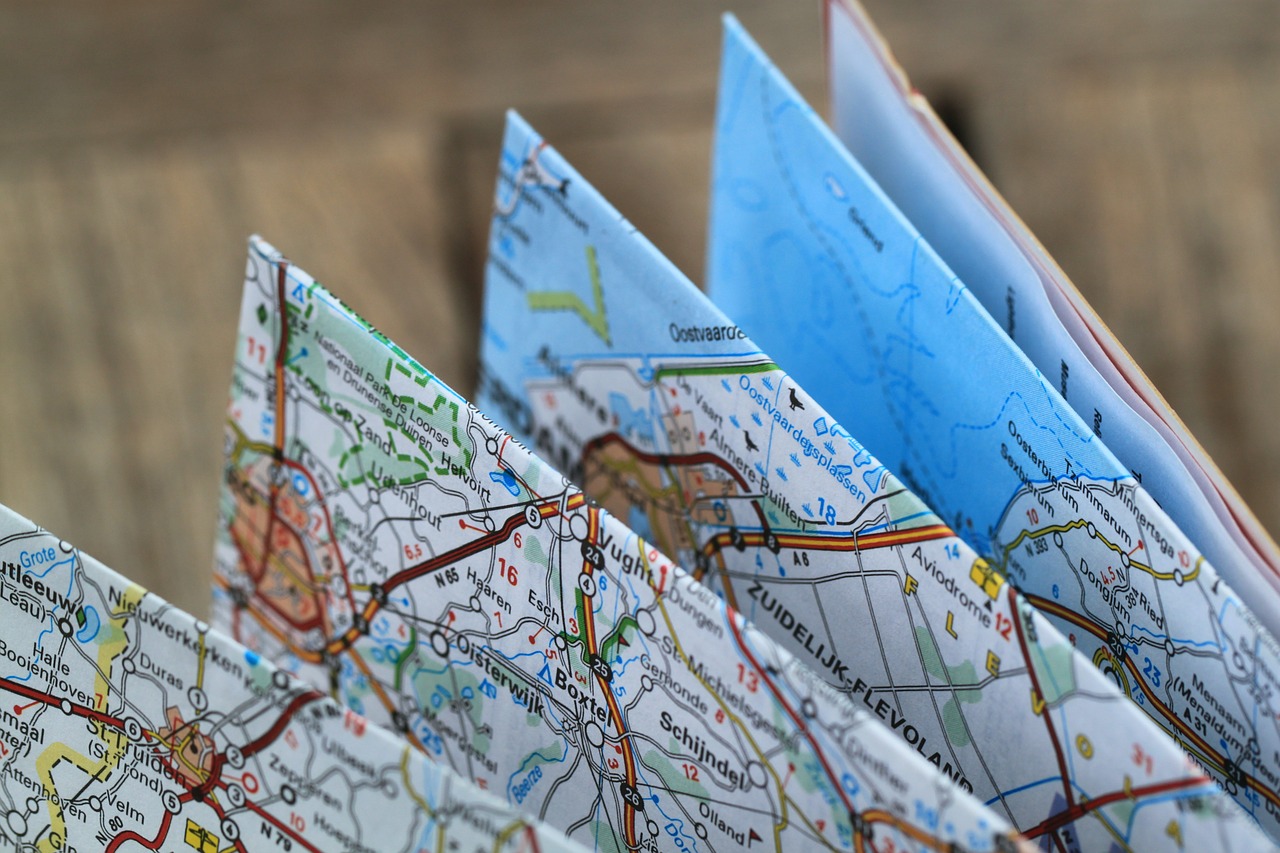
Maps are good. Get one, study it and have it handy.
When on the ground, take a few mins to orientate yourself to the area using your maps and the local geography. Look for common landmarks and pay attention while being transported from the airport.
When you’re first able, make contact and touch base with the folks back home to give them a status report that you’ve landed and what your situation is. This allows those back home to have a time marker as to when was the last contact they had with you, where you were and what you were doing should something happen.
Couldn’t help it…I can’t stand the term “touch base”.
Beware of situations where you are consuming alcohol or drugs (say no to drugs, even if the jerk-off on the beach tells you it’s completely legal, you have no idea what is in it and if you’re being set-up) in the company of those who you do not trust completely. Also, try and stick to bottles and cans instead of drinks mixed out of view, lest someone spike it. And never leave your drink unattended or unobserved.
**The video below shows exactly how easy it is to have your drink spiked**
While travelling around, try to use ride-sharing services like Uber of Lyft over taxis as they are more reliable with better kept records of your trips. You’re also less likely to be robbed (as you don’t require cash to take a ride with them) and if something goes wrong, the driver, car and trip details are all stored with you and the company. If taxis are your only option, prior to getting in, ask for how much it would cost and take a look inside to ensure all looks legit and there are door handles in back. Either way, ALWAYS have a method of escape (some form of window breaker) to get out should something go sideways.
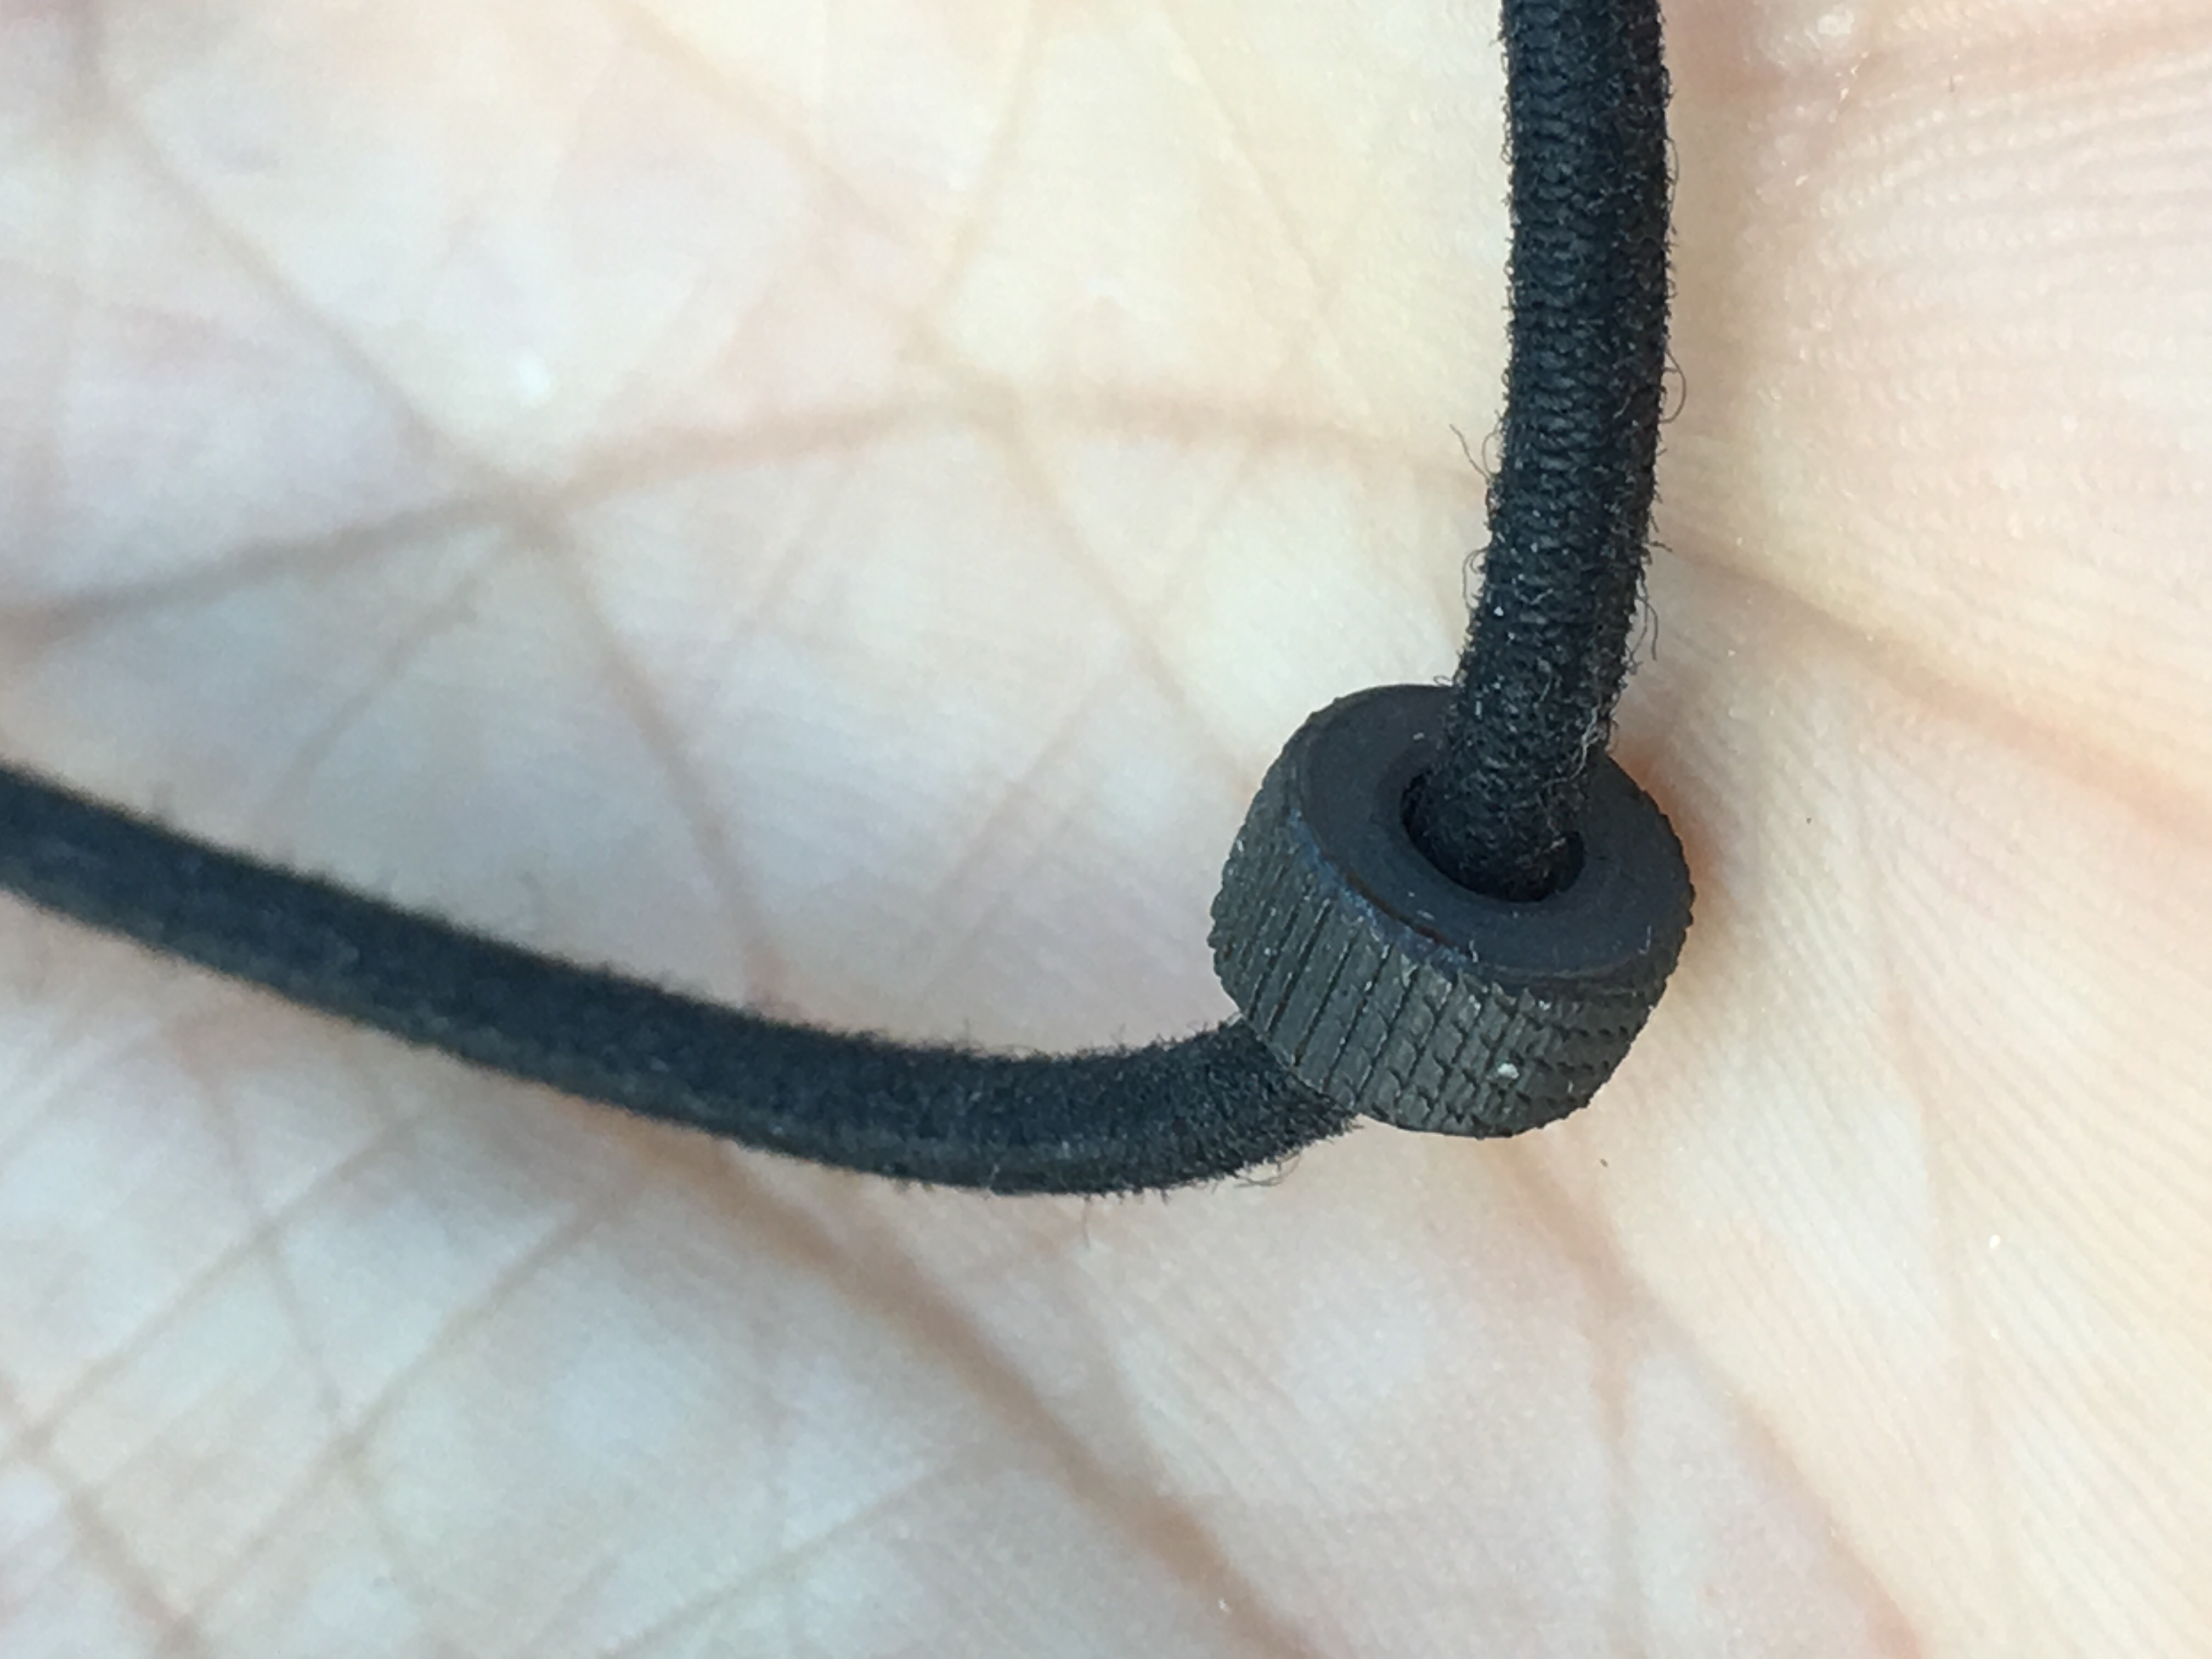
Example of the GTFO Wrist strap available from Oscar Delta (link at bottom).
On the more likely side, you’re also more likely to be the victim of “tourist pricing” when arranging rides. For example, a local taking a taxi may only get charged $4 whereas a tourist will get charged $40 for the same ride.
Change money in banks or approved locations with security, not back alley “cambios” where you might get mugged after people know you have cash.
Be wary of sleazy or too-smooth locals who want to be your friend
When buying supplies in local stores, keep an eye on the price tags that are on articles and ask what currency they represent. And if they start taking prices off articles as they “ring them in”, you’re being scammed. They’ll present you with a price which you won’t be able to recall and you’ll be left wondering what happened. You’re better served to walk away and try elsewhere unless you’re really in a jam.
When checking into your accommodations, ensure that the bellhop goes in first, and that the lights are on. Check every nook and crannyImmediately ensure that the doors and locks are all in working order and use a door wedge to secure the door once you’re alone and have engaged all of the locks. Draw the curtains and turn on the tv when you’re not in your room and hang the Do Not Disturb sign on the knob.
Always sweep your hotel room upon entry and ensure you secure it.
In respect to OPSEC (OPerational SECurity), ensure that you aren’t posting too much on social media which can identify things like your room, locations you’re visiting and valuables you may have on you. Post after you’ve returned or at least left the location.
In the event of a disaster or large-scale event, make your way by whatever means necessary to the Canadian (in my case) or alternately, to an allied nation’s embassy for protection and support. The United States, Great Britain, Australia, New Zealand or another Commonwealth country will support you when carrying a Canadian passport.
Find out where your local (and allied) embassies are in relation to where you’re travelling. If you find yourself in trouble they can help.
Situational awareness, pre-planning, having local currency (and knowing the exchange rate) and a resilient mindset will help deal with most problems you would encounter on your travels. Travel light, travel low-profile and arm yourself with as much knowledge about the area you’ll be in. Remember, low-profile equals a difficult target.
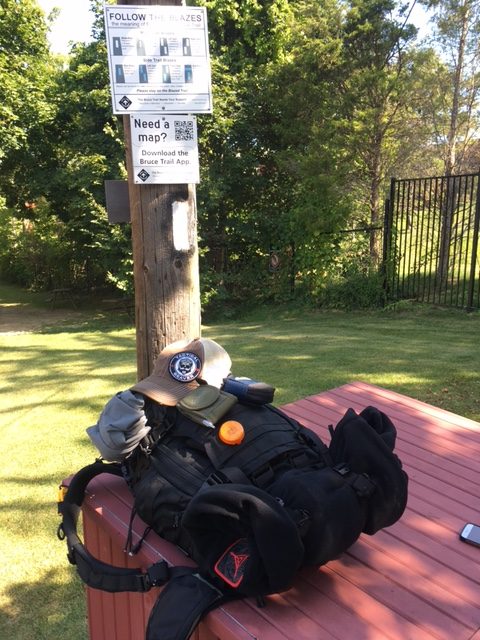
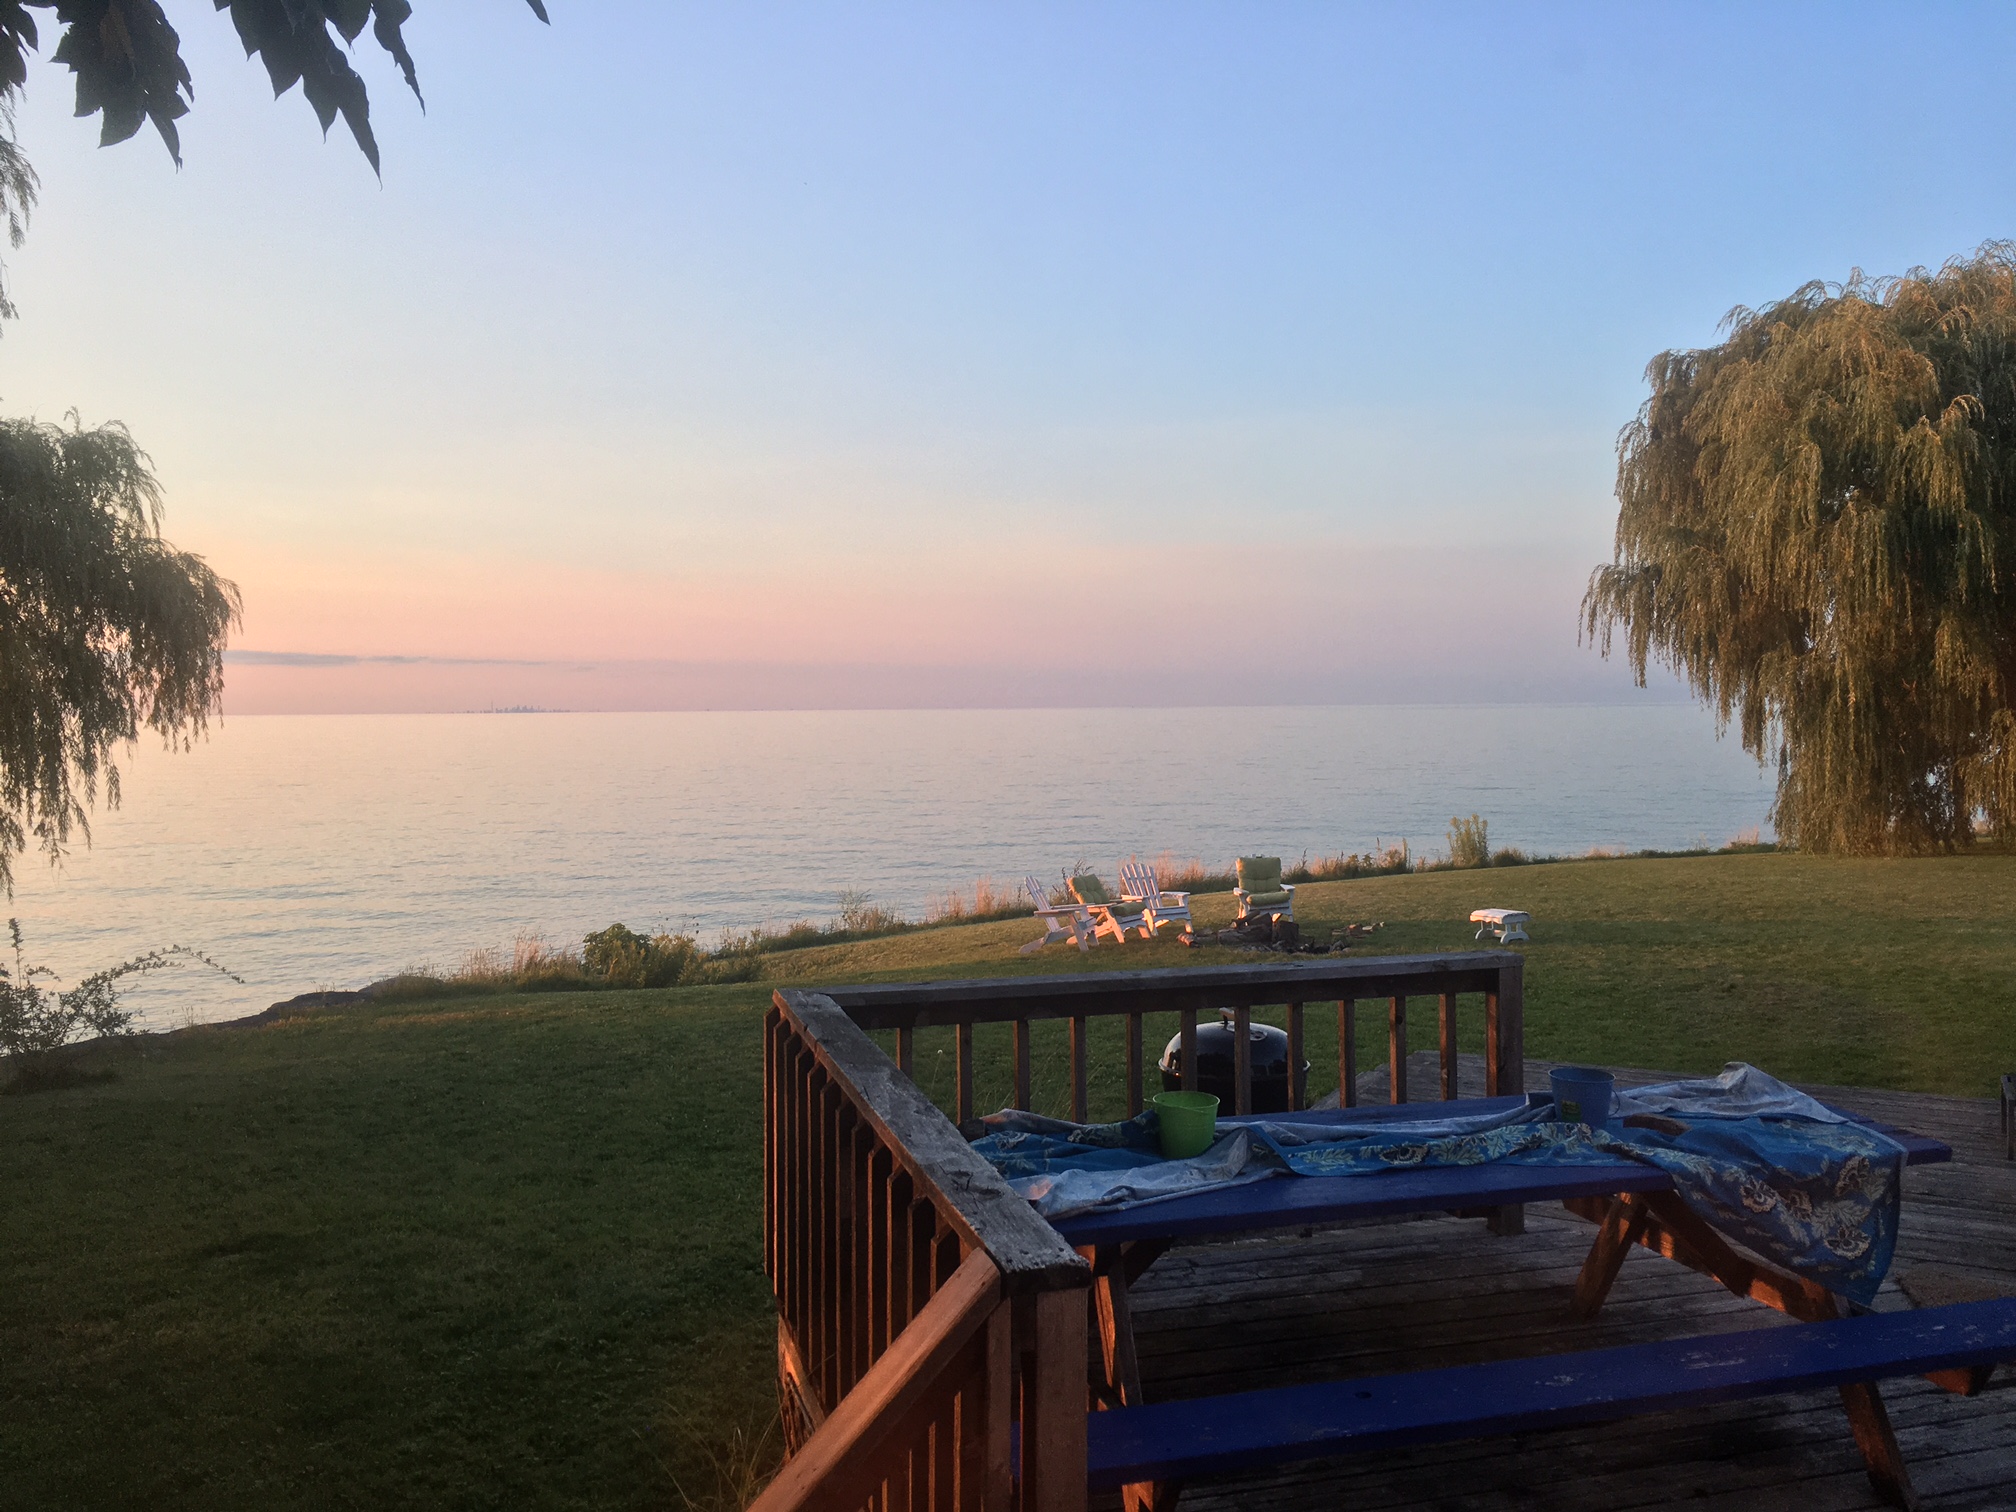
In the beginning…at the Southern Terminus of the Trail. Let’s do this!
Every foray outside one’s home brings with it the possibility of adventure and danger. This excursion was no different.
Our journey took us from the Southern end of the Bruce Trail (in Queenston Heights Park) to just north of Hamilton, Ontario.
*Note, due to personal circumstances beyond our control, we were forced to delay the completion of our trip and return home. We are, however, going to complete the rest in shorter blocks to ensure that our responsibilities at home are maintained in our absences.*
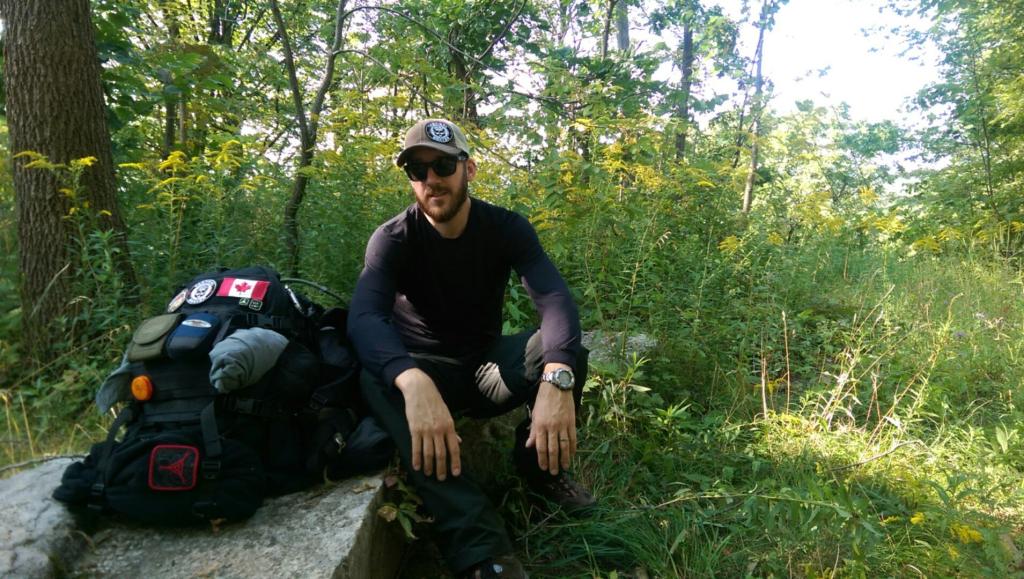
During our time on the trail, I managed to field test several items of kit (to be reviewed in separate posts) and streamline my hiking kit for better efficacy and efficiency. I found that several things I had planned out, thought I might need, or were “essentials”, were not.
Depending on the context and profile of your outdoor adventure, your needs will change.
Here is a list of things that added weight, added bulk or were otherwise not needed given the profile of where we were going:
Teva sandals
shorts
second belt
short-bladed machete
small forest axe
expanded first-aid kit
water purification filter
extra sweater
fleece gloves
second dry bag
This stuff, though individually very useful in the right circumstance, became a hinderance. It added unnecessary weight and made it difficult to move swiftly along the trail. It also had the added unpleasantness of adding soreness to feet, shoulders and knees without any added benefit. The other tools and clothing that I had more than covered for the loss of the above-listed items. After ditching this stuff (at our accommodations at the end of day one) things got much better and our progress improved greatly.
Taking a much-needed break on the trail. This version of my pack was MUCH improved after I ditched some heavy redundant gear.
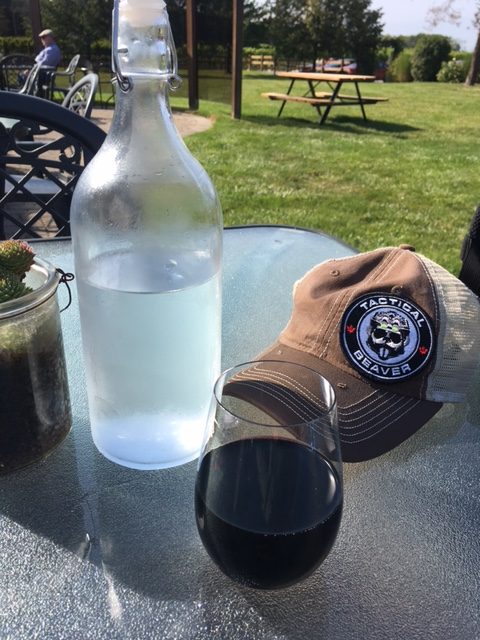
The trail itself was well marked and maintained (for the most part) and allowed for unimpeded movement. The weather was warm and clear. The terrain a never-ending series of up-and-down, so the quads and hams got a good workout every day. Hydration was maintained through the 3-litre bladder I filled-up every morning and I found that I never even got through the entire thing despite drinking almost-continuously through the day. It especially helped to have lunch and “hydrate” at a local winery along the way, just off the trail.
Henry of Pelham Winery. “Hydration” at its finest!
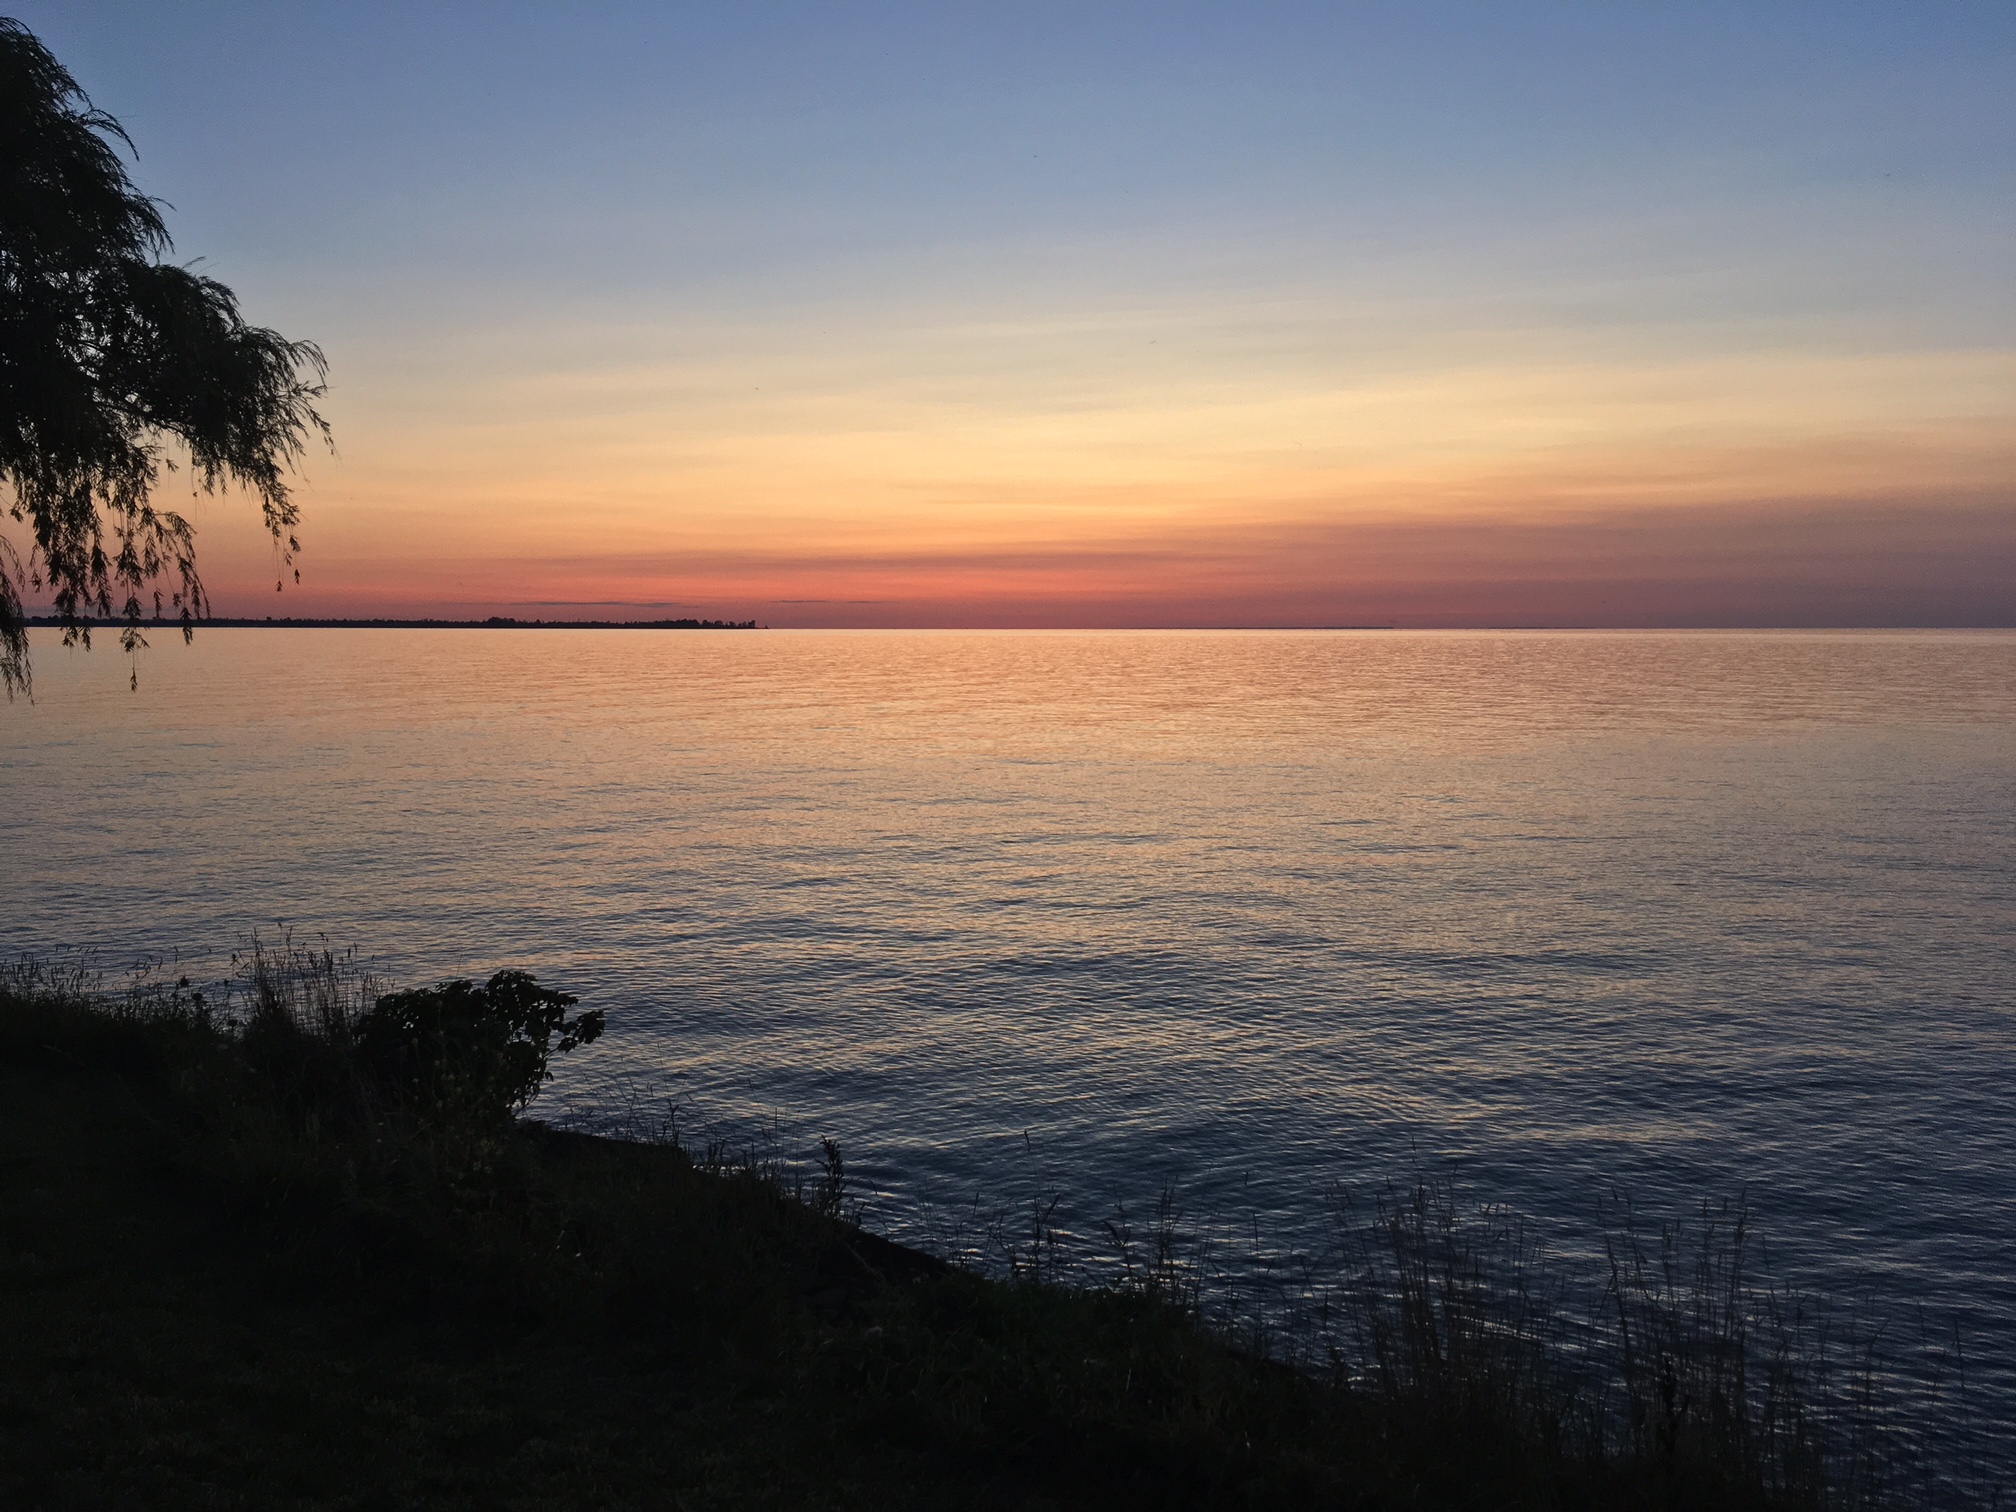
The topography of the Niagara Escarpment and the Niagara Region in general is beautiful and rugged. The views from the tops of the cliffs were open for miles – all the way to lake miles below. As strange as it was to be completely enveloped in the woods and still hearing cars sometime, the peace and calm from such immersion was restorative and calming. Even my evenings were great. Staying at various accommodations along the way made for a recovery treat!
The view from the cottage was just wonderful and the cottage itself was so well appointed it made all the difference at the end of the day. I have already made plans to go back.
So, with all the positives that came along during this trek, there were also some negatives as well. As mentioned previously, the overage in clothing and equipment made for a more difficult first day. Also, the topography of the area and higher elevations reduced our daily distance from 30km per day average to 20-25km per day. Despite the reduced trail coverage, we still made good progress. The weather held, the bugs were barely there, and we made good use of water and breaks to not fatigue ourselves too much.
We saw a whole host of animals, interesting natural and man-made things and got a feel for some of the history and landscape in a rich area so close to home which we’d hardly get to explore had we not gone and done this. I’m very happy I had.
Like a nomadic hobo.
While walking along, I would think about how our context will change as we make our way farther north and farther away from civilization. Those sandals still won’t have a place, but the axe and possibly more first-aid components due to a greater removal from access to emergency medical care. As we continue this journey piecemeal, I’ll be constantly re-evaluating my set-up. With that in mind, to anyone thinking about traversing the Bruce Trail I would humbly suggest that you invest in the Bruce Trail Guidebook. It’s very well laid-out, full of detailed topographical maps and chock-full of useful information. Well worth the $40. Also, ensure you have your compass and separate topographical map of the area. There were a few times where I had to shoot a bearing off a distant tree across an open field with no markings to ensure I crossed to the next trail marker and not on a side trail (or worse, off the path all together).
One step at a time…till you’ve made many, many steps.
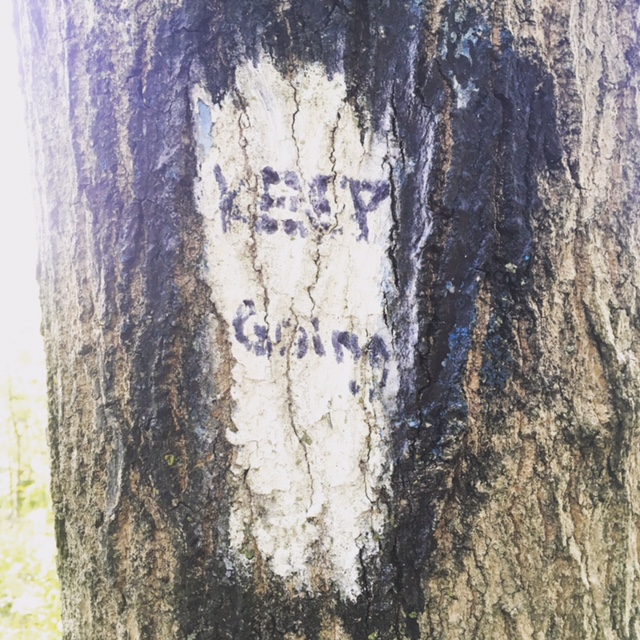
As we left the trail to get back home, one of the last things I saw on the trail gave me inspiration for not only continuing, but also for life in general. “Keep Going” it said. I guess that’s really it in the end. Don’t give up. Hustle and persevere and go for it.
Keep Going. No shit, a good mantra to have. A good form of resilience.
(*all images courtesy of Kennedy Tactical Concepts – I had my hands full) (*for more information on KTC and training, click here).
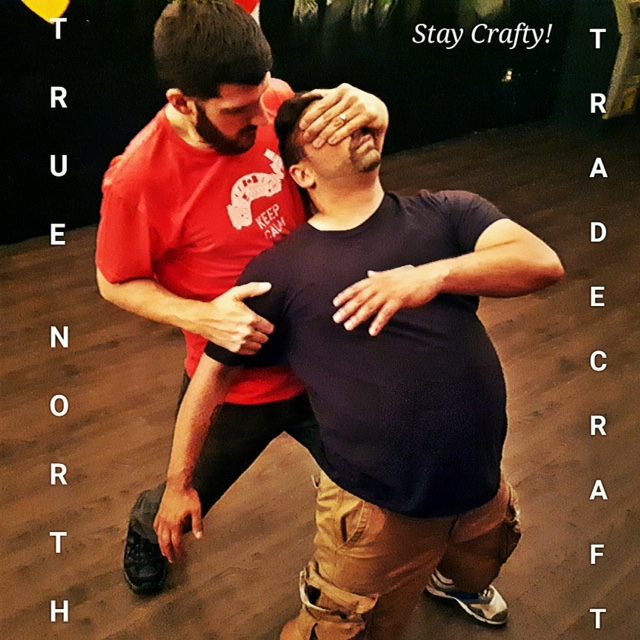
This is part 2 in a series documenting my involvement in the Kennedy Tactical Concepts Masterclass. Part 1 is available here.
Session 2 with TJ was on Wednesday July 26th at the Night Owl on College St., Toronto. (The usual spot).
Again, the environment was pleasantly realistic as we headed to the basement level of the Night Owl. We even had a band setting up while going through the techniques.
This week’s topics of practice were as follows:
Combative Control Positions/positioning;
Combative Control Transitions and;
Takedowns (in combination with #1 & 2).
As with the previous format, TJ began with introductions, an overview of what we would be covering for the night, a warm-up, and then we got right into it.
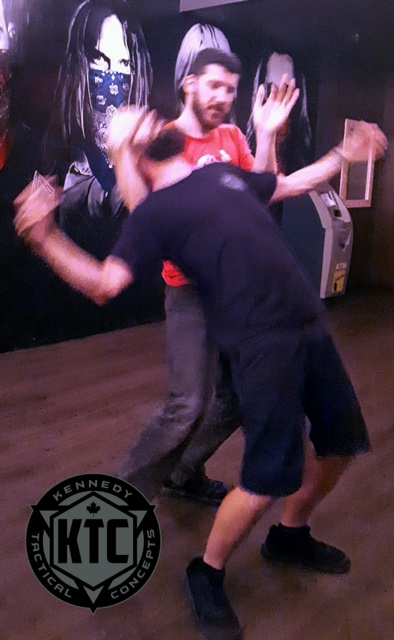
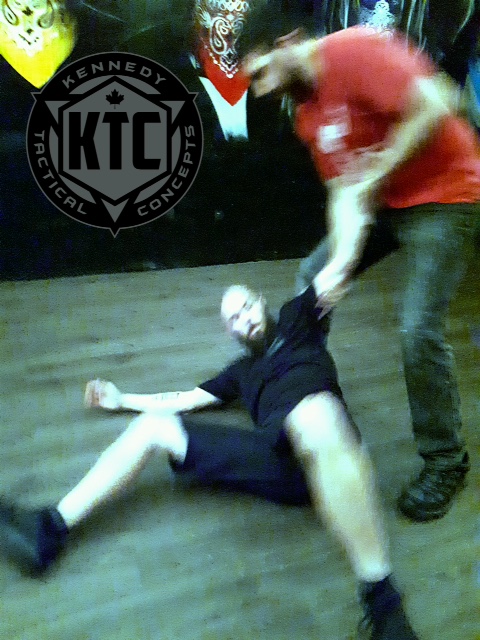
The realistic environment makes for a better appreciation of the realities you would be facing. A bar, stools, a stage, musical instruments, concrete walls and of course, a dirty cement floor. Though the Combative Control Positions and Transitions were not striking per se, they were very dependent on speed, agility and technique. After an hour of practicing and building upon each technique, we moved on to takedowns.
Starting slowly at first, we quickly moved to full-speed with follow-throughs. The result was fluid takedowns with a high degree of comfort in executing the movements. We also worked on improvising all the techniques of the night against larger and smaller opponents as we were all of differing heights.
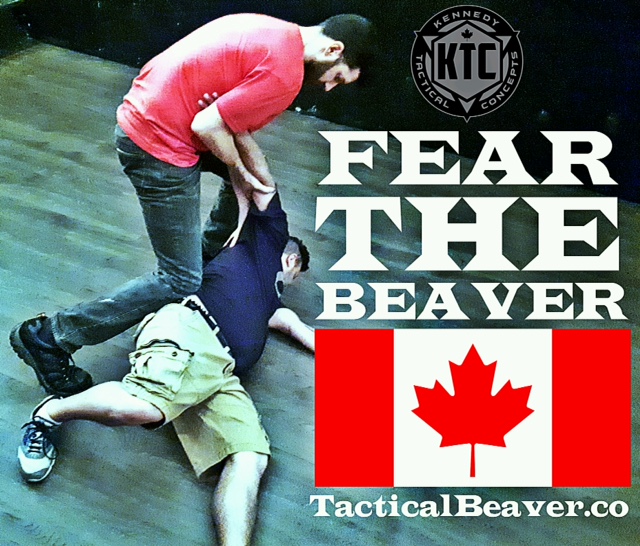
Of course, I was sporting my awesome shirt from www.tacticalbeaver.co Yes, you should Fear The Beaver.
Solid training. The next day I was sore as hell, but at least I wasn’t bleeding on a bar floor. I’ll be at the next one. Stay tuned and Stay Crafty.