The new True North Tradecraft Store is open for business. We are the exclusive Canadian stockists for Tactikey, OscarDelta and Hard Case Survival. Visit the Blog and click the Store button up top or go direct.
Also, check out our new Friends Page listing mutually-supportive companies.
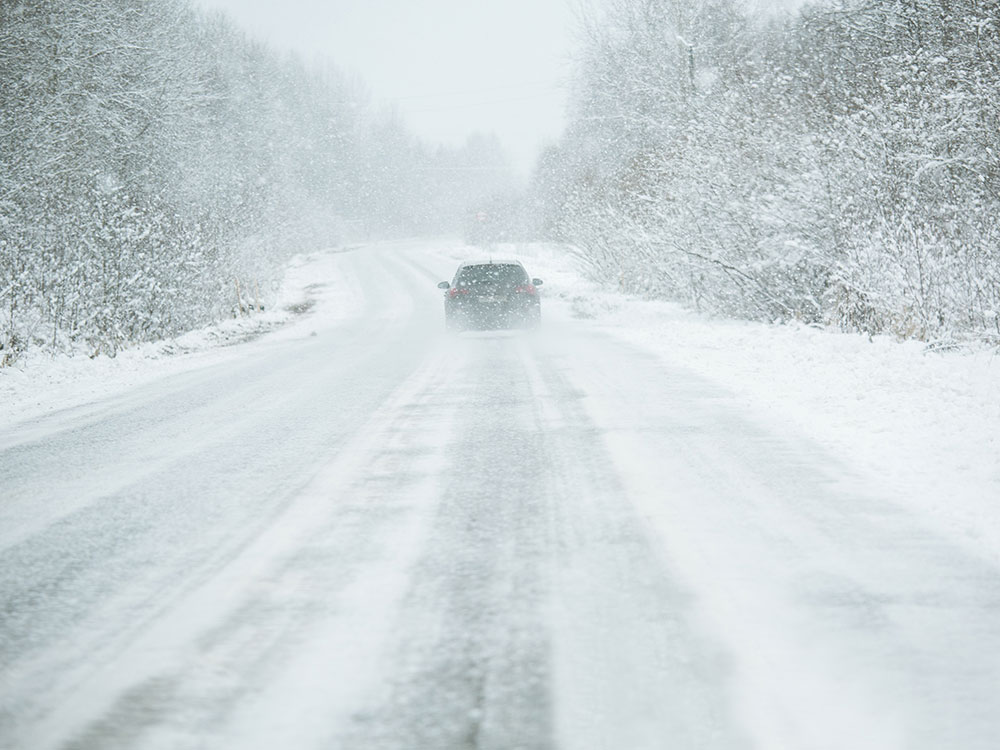
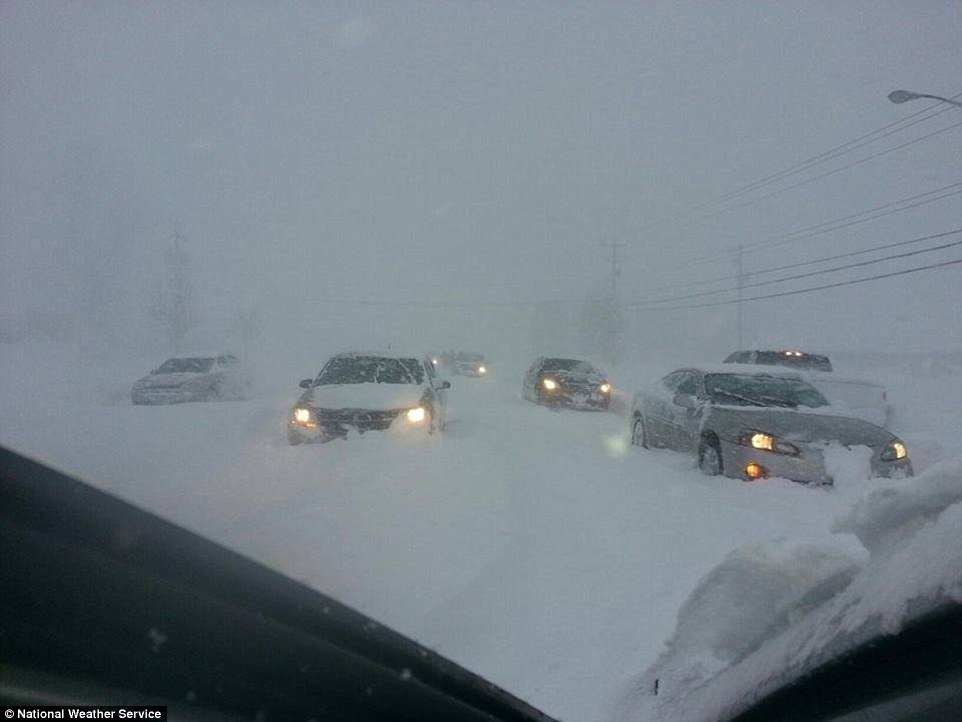
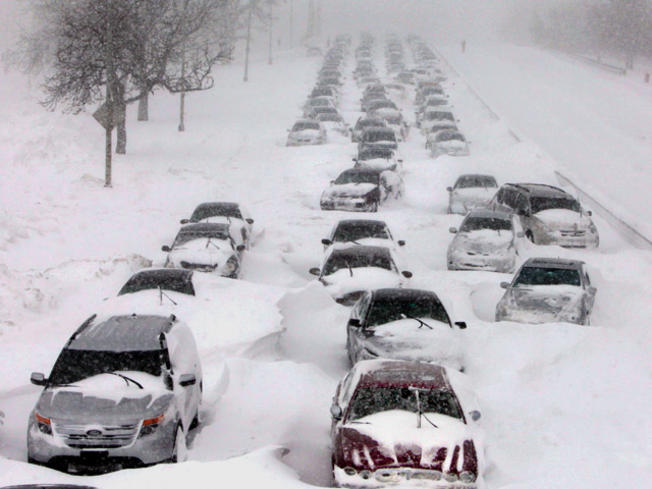
As we make our way through the last weeks of Fall and approach Winter, it’s time to do our twice-a-year vehicle change-over. For those of us who live in areas where snow and extreme cold are realities, being prepared for weather-related challenges is a wise investment.
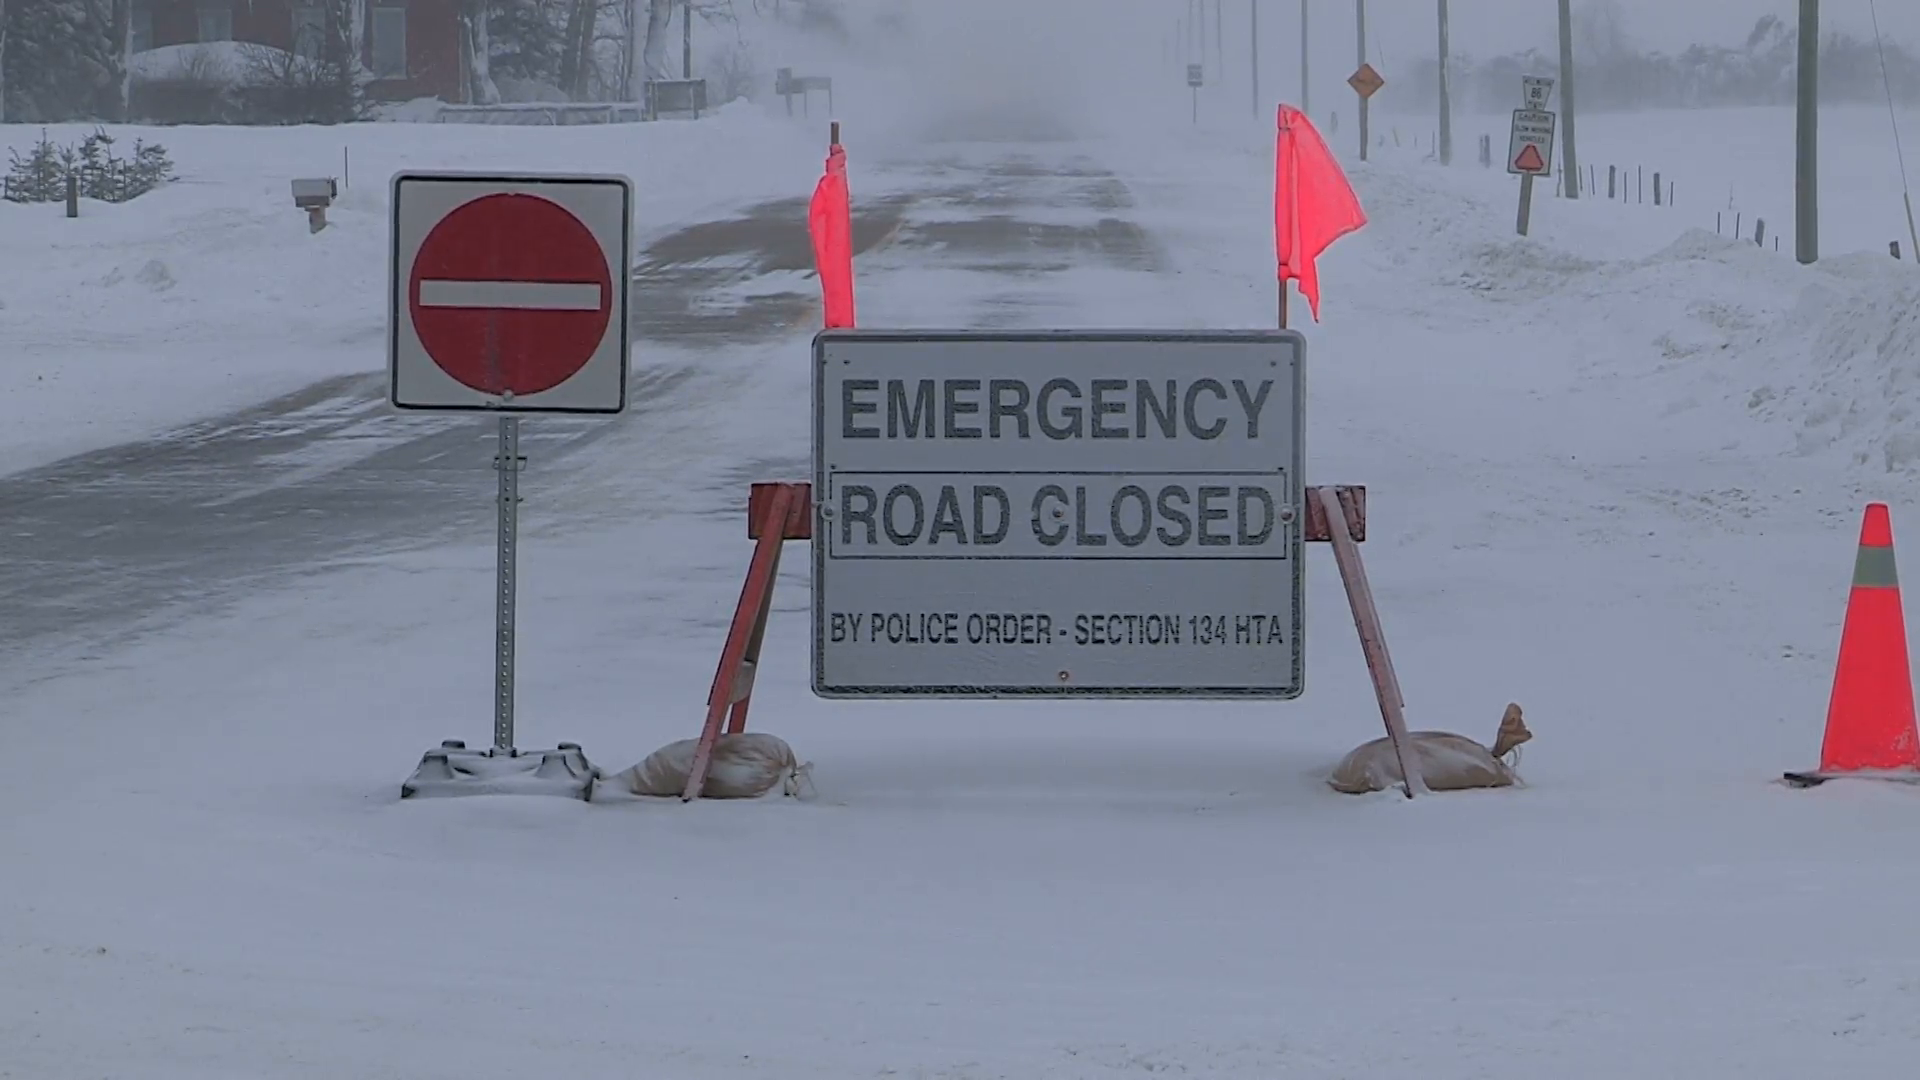
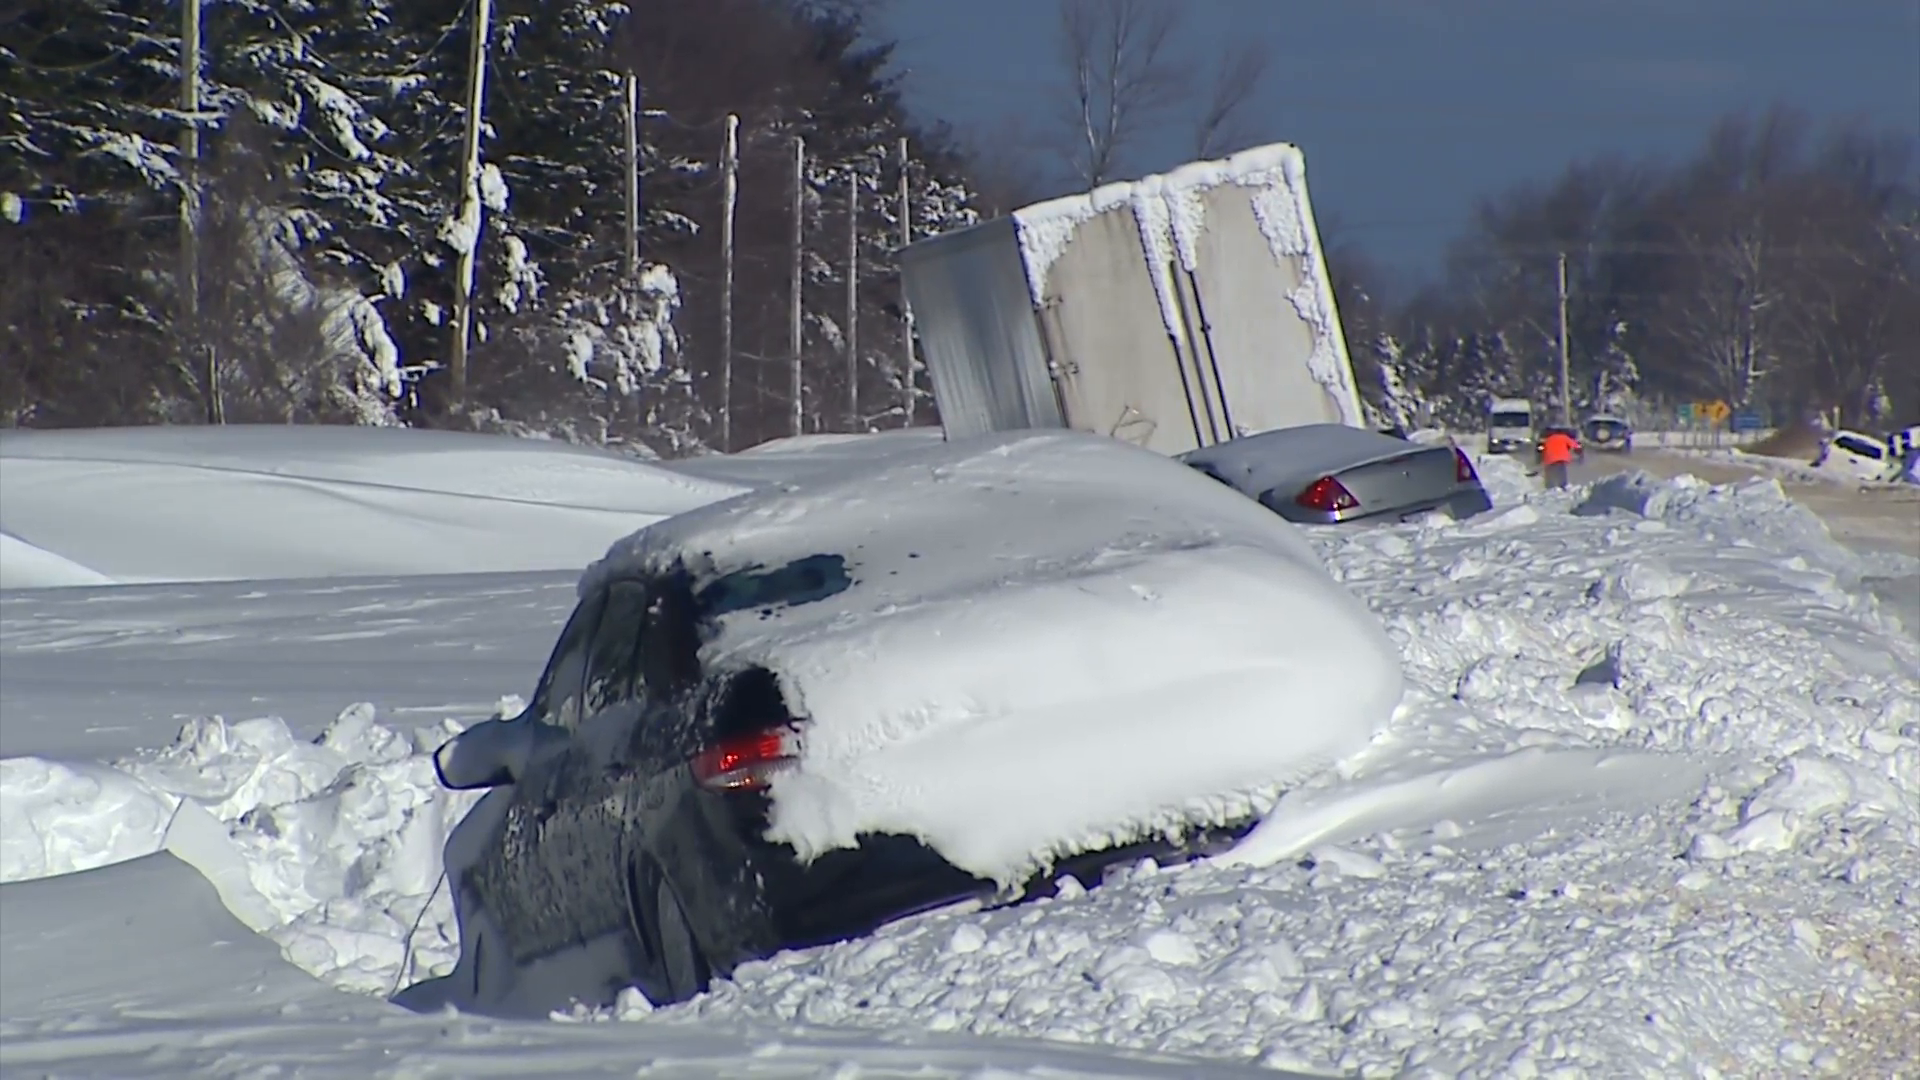
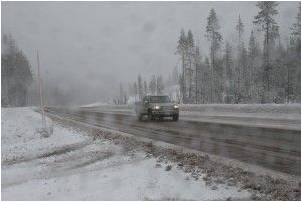
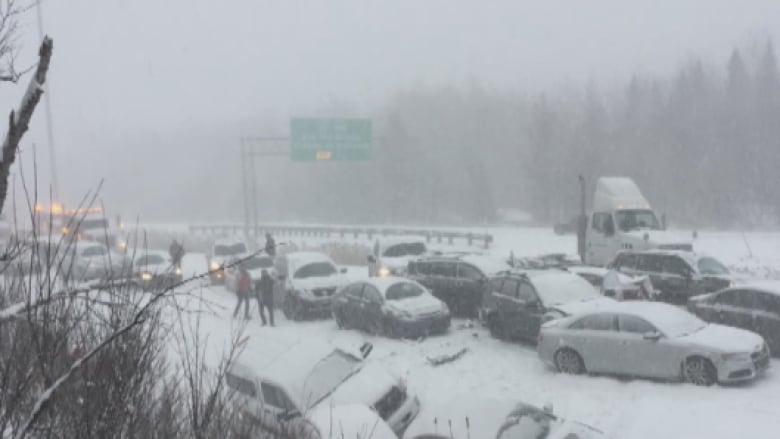
As extreme and inclement weather, coupled with low temperatures, can negatively affect driving conditions, sometimes without warning. This time of year (approaching Christmas and New Year’s) sees us travelling to visit our friends and family, attending parties and generally spending more time on the roads. Roads that can sometimes go to hell real fast.
Be sure to get plenty of rest prior to a long road journey, stay hydrated and nourished and for the love of all that is holy, do NOT drive while impaired.
Winter weather brings with it snow storms, white-outs, icy roads (including black ice), freezing rain, traffic jams and accidents, breakdowns and more. A few well-focused steps and some essential equipment can mean the difference between a minor inconvenience, extreme discomfort or (in extreme cases) death. (Read a news article about a very unfortunate situation like this here.)
As the extreme cold and weather can hasten death under less-than-ideal circumstances, we look to some basic Survival Priorities to ensure a better chance of survivability. These principles include:
Shelter
Fire
Water
Signalling & Communication
Food
Security
*NOTE: These principles and their order of priority can and will change depending on your immediate circumstances. However, I have put them in this order at this time as a general theme and to illustrate their importance. The rationale is that, if you find yourself in a blizzard, shelter is paramount as you’ll freeze before the other considerations even enter into the equation. Then fire for warmth inside the shelter (car), and then water to keep your body functions going. Signalling for help would be next (flares, chemical lights, using a cell phone or radio) followed by food and security.***
Seasonal tires and Service. If you live in an area prone to winter weather, get snow tires, the best you can afford. Sure, you’ll have to switch between your All-Seasons and Winters, but well worth it for the better traction on snow and ice in colder temperatures. Also, be sure to get your car serviced at the same time to ensure maximum reliability through the winter. Have them check your battery, fluids, belts, lights, anti-freeze, windshield washer fluid (the -40 deg C kind) and the rest.
Don’t Run Dry. If heading out of the city or for a longer drive, don’t let your car’s gas tank drop below half-tank on your journey. Stop frequently, top-off your gas tank and stretch. It also helps fight fatigue and gives you the opportunity to get food and drink regularly.
Power-Up! Ensure you have a DC plug (cigarette plug) USB charger and charging cables for all your cell phones/devices. If there are more people in the car on your journey, run cables to as many phones as you can and charge them while driving, thus ensuring a full battery on as many devices as possible and a better chance for contacting help if needed.
Your Spare. If your car allows it, get a full-size spare tire and an appropriate tool kit. It should include a wrench for the lug nuts, a jack, nut lock tool (if your car has them), a small can of WD40 or similar, a small bottle of de-icer, block of wood for under the jack and a pair of warm work gloves. If you get a flat, you should know how to change it quickly and safely. Practice it in good weather so you know how to use all the tools and that the spare is in good repair.
Get a Grip. Stock a small shovel or entrenching tool and a bag of sand/gravel/cat litter to dig a wheel out of an icy patch and sprinkle the bag of sand under the tires to aid in the wheels gripping better. If your jurisdiction allows for chains, consider adding these to your kit and ensure you know how to put them on.
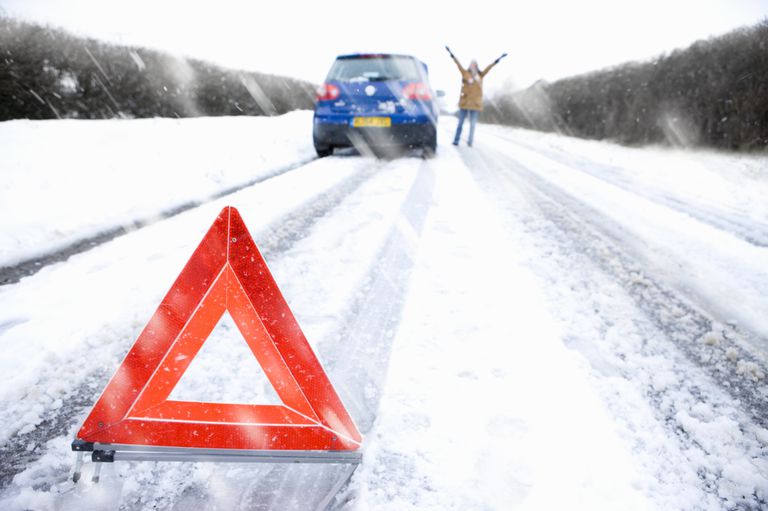
Be Seen. Carry emergency triangles, at a minimum, and consider a few road flares or an electronic LED road flare to increase your visibility to other motorists. If the visibility is low, the likelihood of people seeing you and stopping is low. By the same token, if they can’t see you, you may be struck by other vehicles in the dark. In these situations, visibility is your friend.
Keep In Touch. If you’re travelling longer distances, communicate with your hosts and let them know when you’re leaving and when, approximately, you plan on arriving. If possible, let them know the route you’ll be taking. If it changes, send them a text to keep them updated. If you fail to show or get in touch by a pre-set time, they can call police on your behalf and search for you.
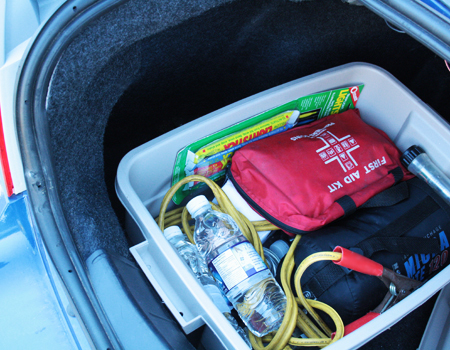
Stock a Winter Emergency Kit. Split between your glove box and a backpack or duffel bag in your trunk with some emergency essentials can mean the difference between life and death in extreme circumstances. No, I’m not being dramatic, I’m being realistic. If you have ever spent a few hours in -35 in the middle of the night in a broken-down vehicle without and equipment hoping for someone to help, you’d appreciate it. I have. And despite knowing that “help was coming”, it was still terrible and very cold You can include the following items in an emergency kit as a start and add-on for your specific circumstances later. Here are the essentials:
Snow brush & ice scraper;
2 emergency candles in a metal tin & 2 Bic lighters;
Flashlight & spare batteries, A few glow stick Chem lights;
First Aid kit with tourniquet (if you’ve not been trained, GO GET TRAINING!);
Warm blankets or sleeping bag;
Extra clothing (hats, gloves, socks, fleece jacket);
Winter boots (like Sorel);
Small bottle of lock de-icer or rubbing alcohol;
Food (such as a few Cliff Bars or similar);
A few bottles of water, plastic so as not to freeze and shatter);
Metal cup;
Consider a thermos filled with a hot drink;
A quality multi-tool;
Solid, full-tang knife;
Seatbelt cutter (stowed above driver visor or accessible in centre console);
A few contractor garbage bags;
Whistle;
25′ of paracord;
Small can of WD40 and small roll of duct tape;
Basic tool kit for car;
Wet wipes, small toilet paper & hand sanitizer;
Jumper cables (for you and to help others);
Extra cash and change (in small bills);
Fire Extinguisher (small);
Tow strap (if it can be attached to your vehicle);
Extra fuel;
Anything else you feel is necessary.
Staying in your vehicle, if possible, is the safest place to ride out a storm. It is a metal cage which protects you from other vehicles, but also from the elements. With the candles, blankets and extra clothes, you should be able to stay warm enough to survive. Adding food and possibly hot water, your chances go up even more. Adding to that higher levels of visibility and communications, your chances begin to climb higher.
If you do find yourself stranded, take immediate action to prepare yourself for a long stay.
Stay CALM.
Take stock of your situation. Stay in your vehicle.
Attempt to make contact with Police or anyone who may be able to render aid.
Remove your survival kit from your trunk to the back seat and break out its components while your engine is still running or is still warm.
Deploy your visibility markers and, if visibility is low and it’s night out, consider your glow sticks, LED flares and chemical road flares.
Use your shovel to clear the area around your exhaust pipe to prevent carbon monoxide from being pumped into your vehicle.
Run the engine for 10-15 minutes at a time to conserve your battery and fuel.
Ensure all unnecessary power expenditures (radio, phone use for games, etc, are cut. Only use your hazard lights if possible.
Use the items in your kit to their maximum.
I trust this will serve as a solid primer to preparing you to deal with many unforeseen eventualities this winter driving season. Use common sense. If the weather is bad, stop. Reschedule. Turn Back. Get a hotel for the night. It’s not worth the risk. Don’t be caught unawares and unprepared this winter. Prepare now and get home safely.
Thank you to everyone who provided input into this article. Across varied backgrounds and experiences, thank you for your continued support and friendship.
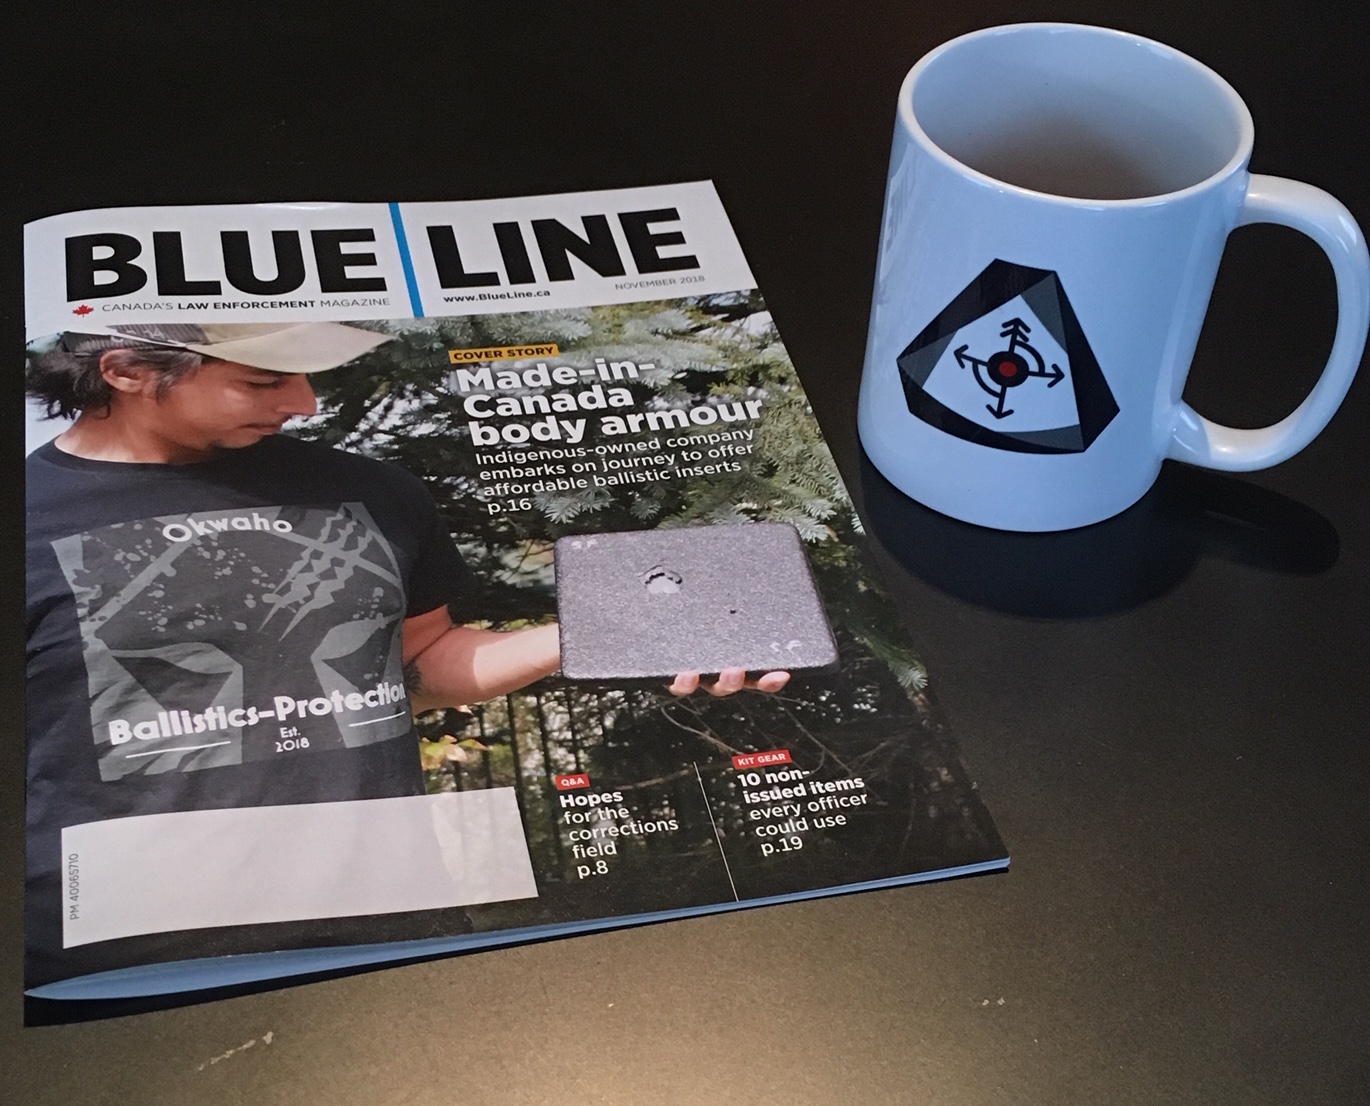
Be sure to check it out in your local copy of Blue Line Magazine – likely already delivered to your agency – or check it out here online or here. Also visit our new LinkedIn & Facebook company pages and give us a follow. Instagram doesn’t hurt either!
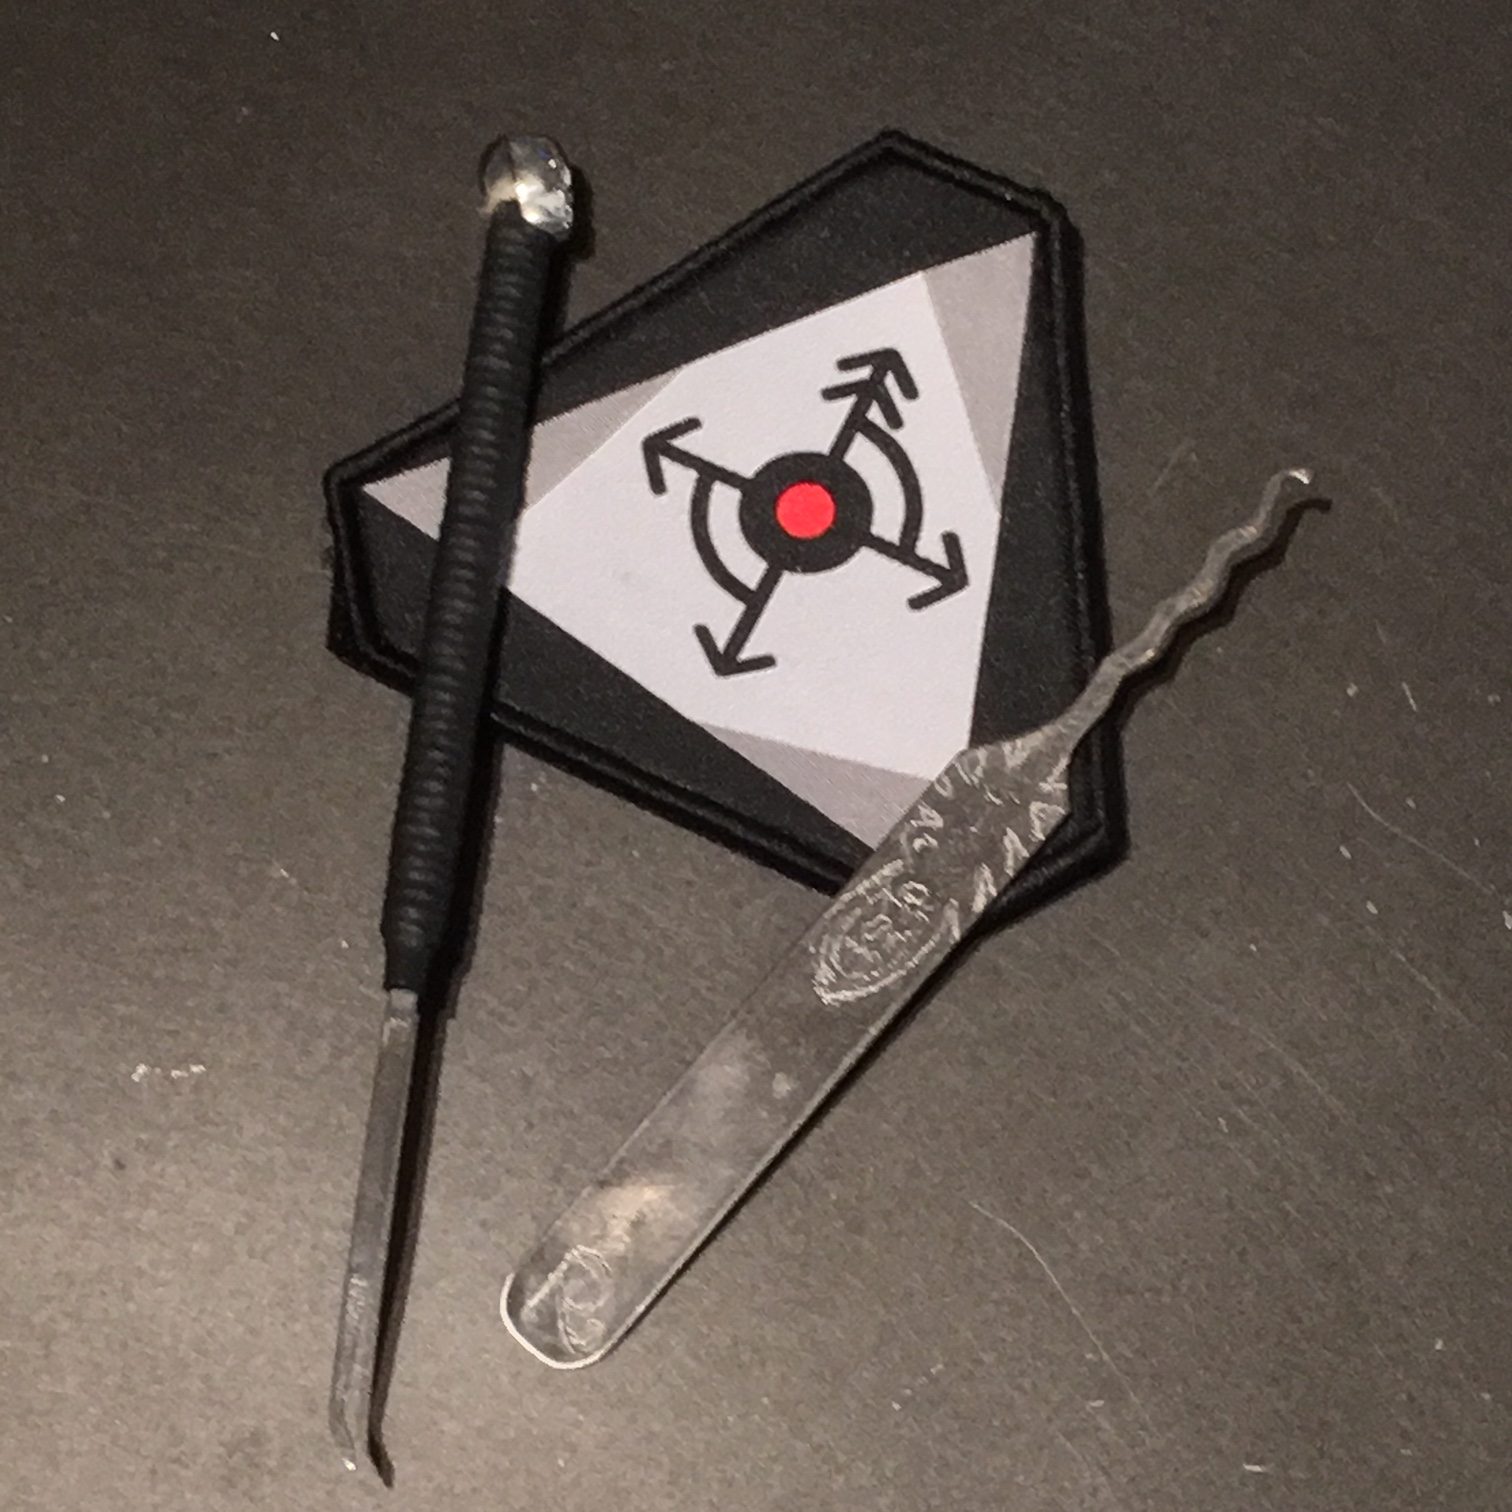
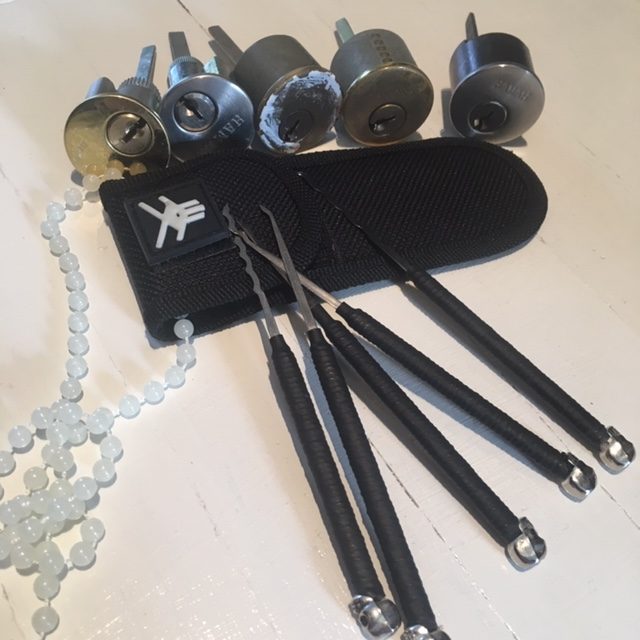
Coyote Mountain (Left) and Rare Element (Right) picks.
To this point, all of my lock picking has been done with “production” tools. Some cheap and flimsy, others high-quality. But this is my first foray into hand-made & custom lock picks.
This review’s purpose is not to pit one against the other, but rather to showcase both on their own merits as they are different. They are also custom-made for me, so your experience may differ. With that in mind, here are my thoughts.
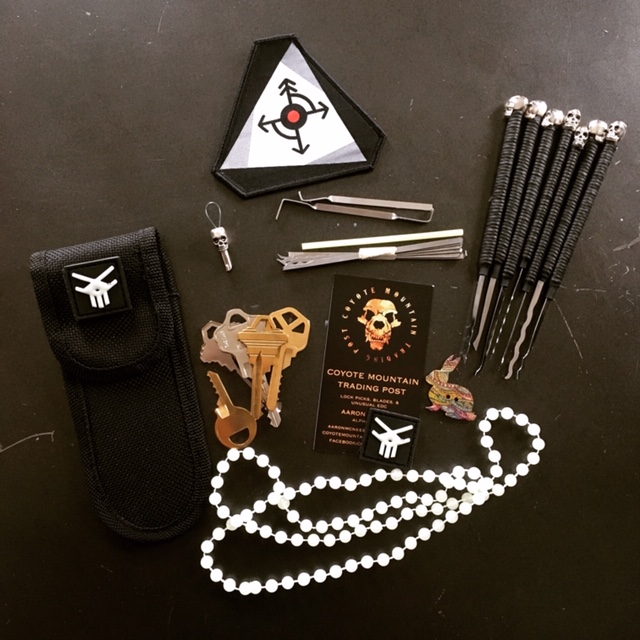
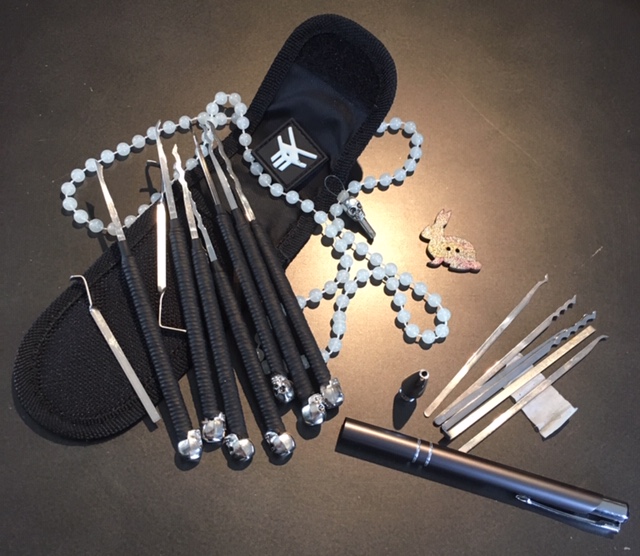
I received a selection of picks and some other “tools” (including bump keys, handcuff keys, tiny patches, a glow stick & beads and a fantastic little pouch.
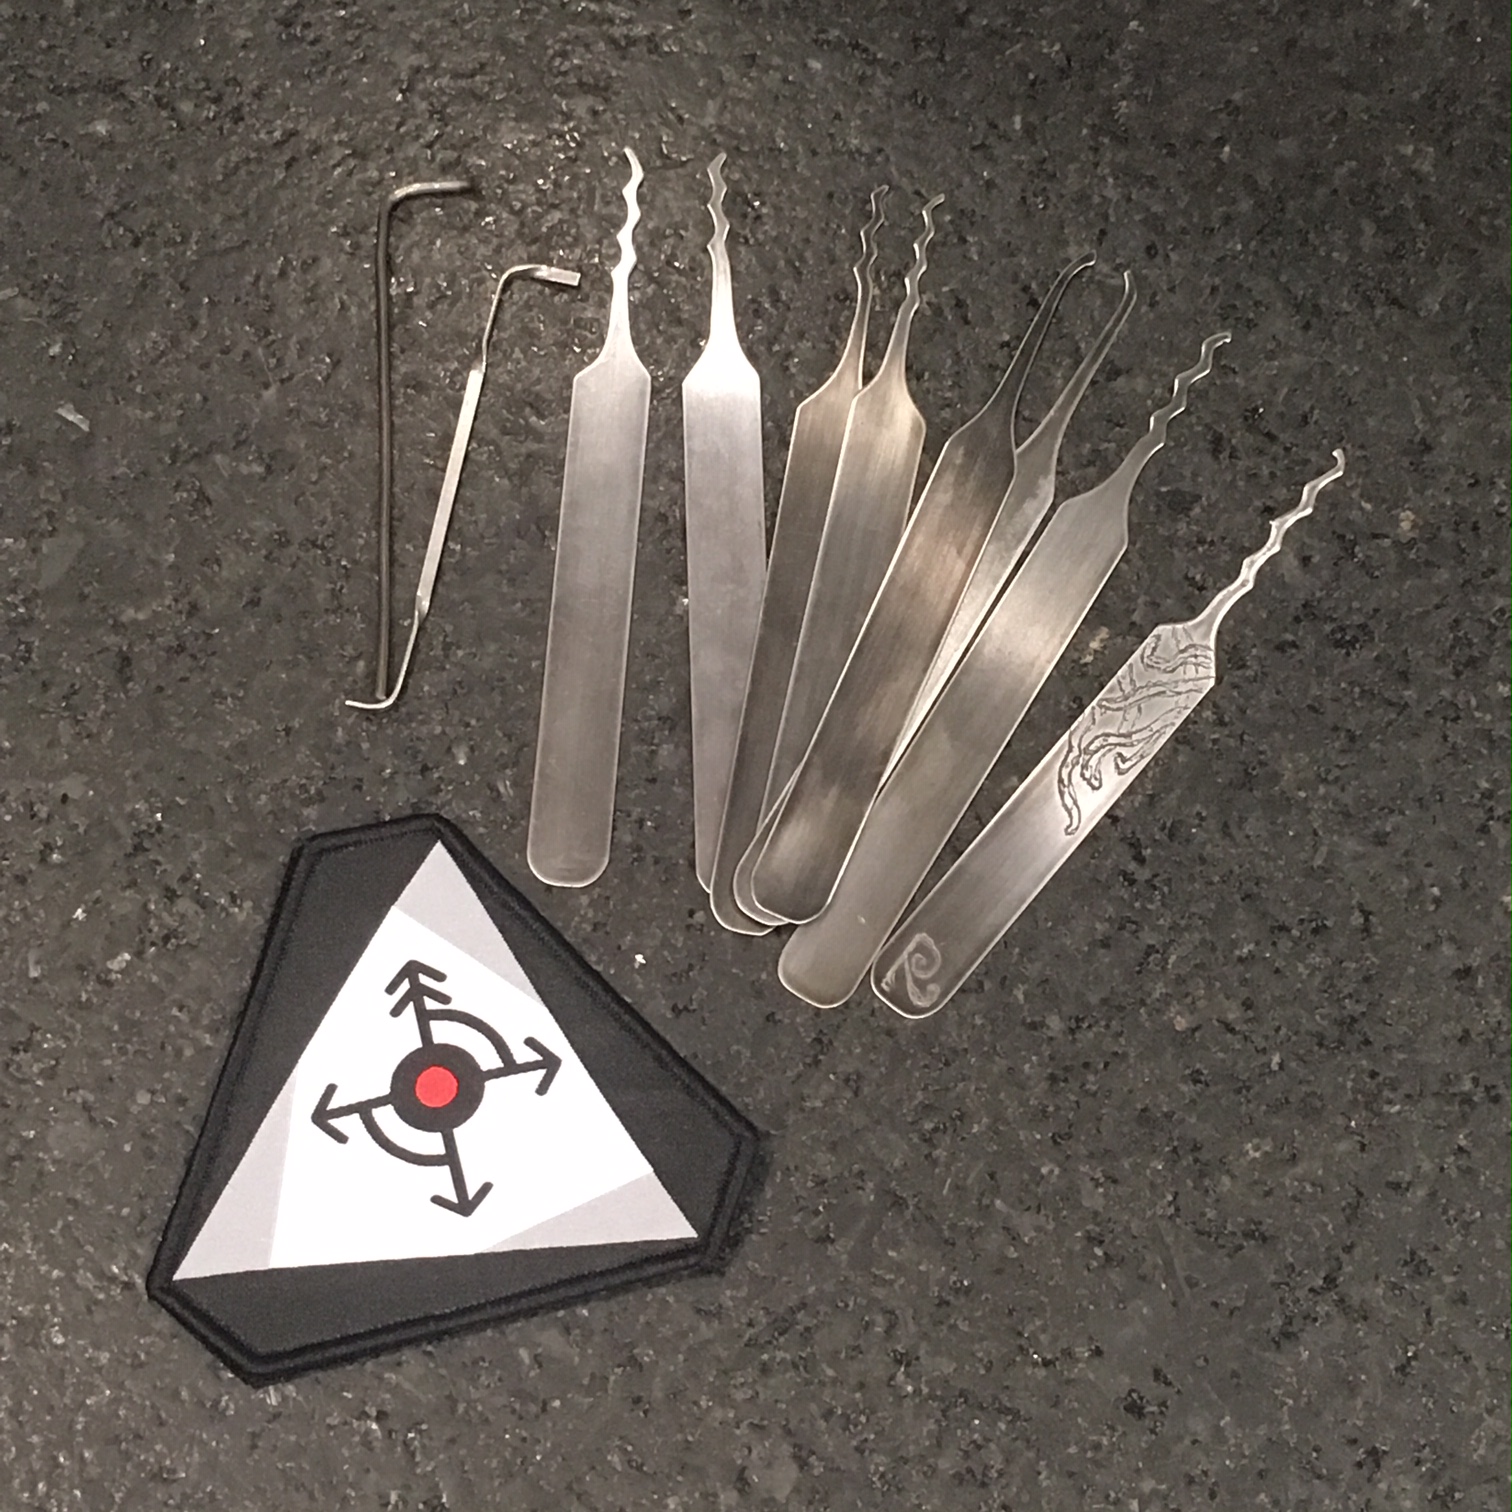
The picks themselves feature a variety of profiles. They come wrapped in cordage and shrink-sleeved with a rubber covering. Then they’re topped with little silver skulls to ensure a level of bad-assery when picking.
The grip and finish are fantastic, however I find that the handles are a bit narrow for my hands. It’s not that it hinders use in any way, it just causes me to use a different grip.
These picks went through those locks with ease.
The only preference I’d change on these is the flexibility (bend from side to side) of the picks. Yes, I know that I’m not supposed to be bending them from side to side, but I am used to slightly more rigid picks. Again, personal preference. This does not detract from their effectiveness, I just find that the feedback takes some getting used to.
The second set I received was a “pen kit” which is a super-minimalist kit which fits into a pen body – VERY COOL. I took it along with me on a recent trip to New York and had zero issues with it. It works equally as well as the “regular” picks, but the handles are bare and the turning tool is not as versatile as the full-sized one.
The finish and polish on these are great and there is no noticeable drag through the lock bodies in any of my practice cylinders or padlocks.
The hand-made custom set of Rare Element lock picks I received took a while (RELP has a waiting list for his stuff, so be patient, it’s worth the wait) and arrived in great shape.
I opted for a mix of rakes and some custom turning tools. The picks came in two thicknesses and various similar profiles. All were high-carbon steel. One was even hand engraved. VERY COOL!
The finish on these had an “acid etched” look to them which looked great and still benefited from the polishing they received. No drag or snag in any of the tested lock bodies.
The only thing I found, well, needing of some adaptability, were the custom turning tools that came with the picks. They had slightly different ends then I’ve been used to but once I got the hand of them and figured out a comfortable way to hold them, they worked very well. Also, the handles are straight steel with no additional grips or wrap added. This is personal preference. They are wider than the CMTP picks, but this isn’t a negative. Just different.
Smooth action and shaping made these practice locks a breeze.
Picking cylinders and padlocks went very well with both sets. I have to say, it’s very difficult to pick one over the other, so I won’t. Both sets are fantastic. I would advise that if you have particular wants or needs that you contact each and discuss. Custom jobs are for particular needs and have requirements that only the person making the items can take into account. They’re top-notch, period. If you’re just starting out then of course, wreck some production stuff. But if you’re feeling a bit adventurous, or are working with these types of tools professionally, do consider checking what these guys have to offer.
Very excited to have my work featured in Tactical Solutions Magazine, the official publication of the International Tactical Training Association (ITTA) based in Chicago, IL.
The International Tactical Training Association (ITTA) is always on Mission to provide members with advanced tactical and technical programs of instruction formulated and directed by a core council who possess extensive Law Enforcement and Military experience. We seek to transform, keep you ahead of the curve, and one step ahead. Semper in ViaITTA retains a broad spectrum of instructors with Special Operations backgrounds and current post 9-11 operational and instructional experience. We are here to transform, keep you inside the loop and one step ahead with best practices, hard learned lessons, and disruptive technologies.
You can go directly to the issue and article here. Be sure to check out their entire website and read their other publications for fantastic content.
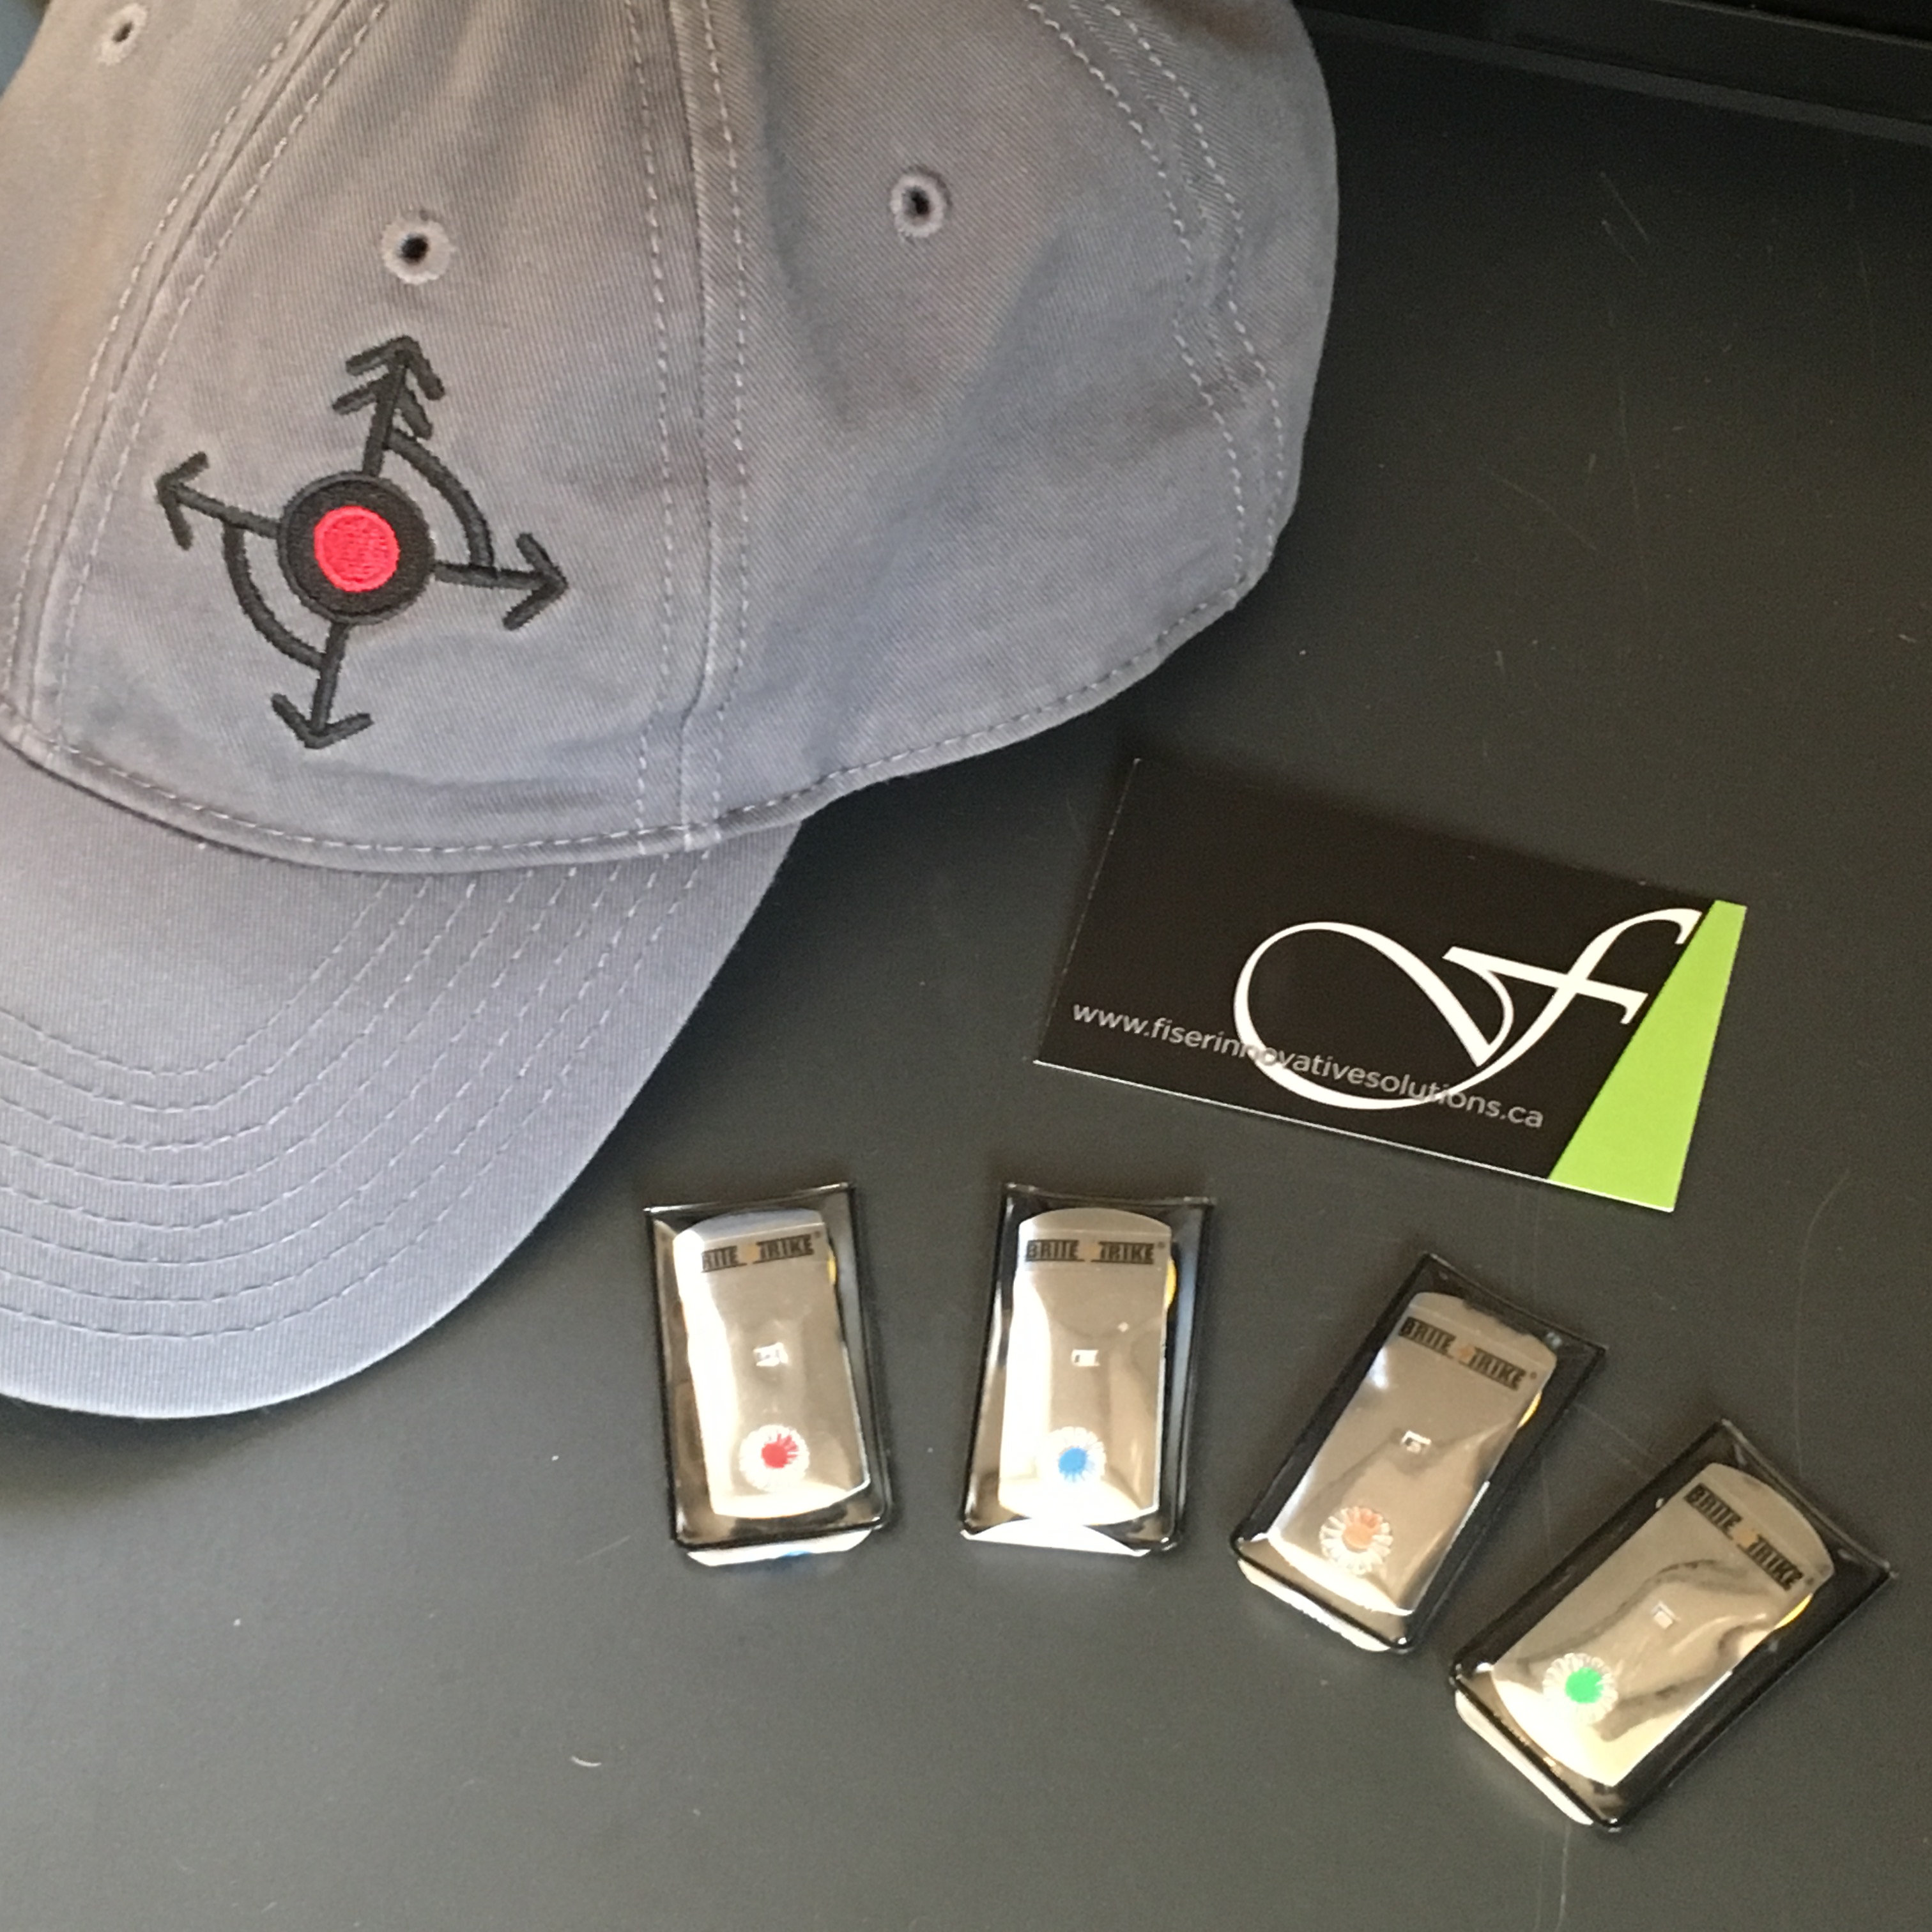
Brighten up your day with Fiser Innovative Solutions.
There are a lot of flashlights out there. When you need light, there are many varieties of portable lights from which to choose. Sometimes you need lots of light, sometimes less. Sometimes under water, sometimes they need to be small. Whatever your specific need, there are solutions.
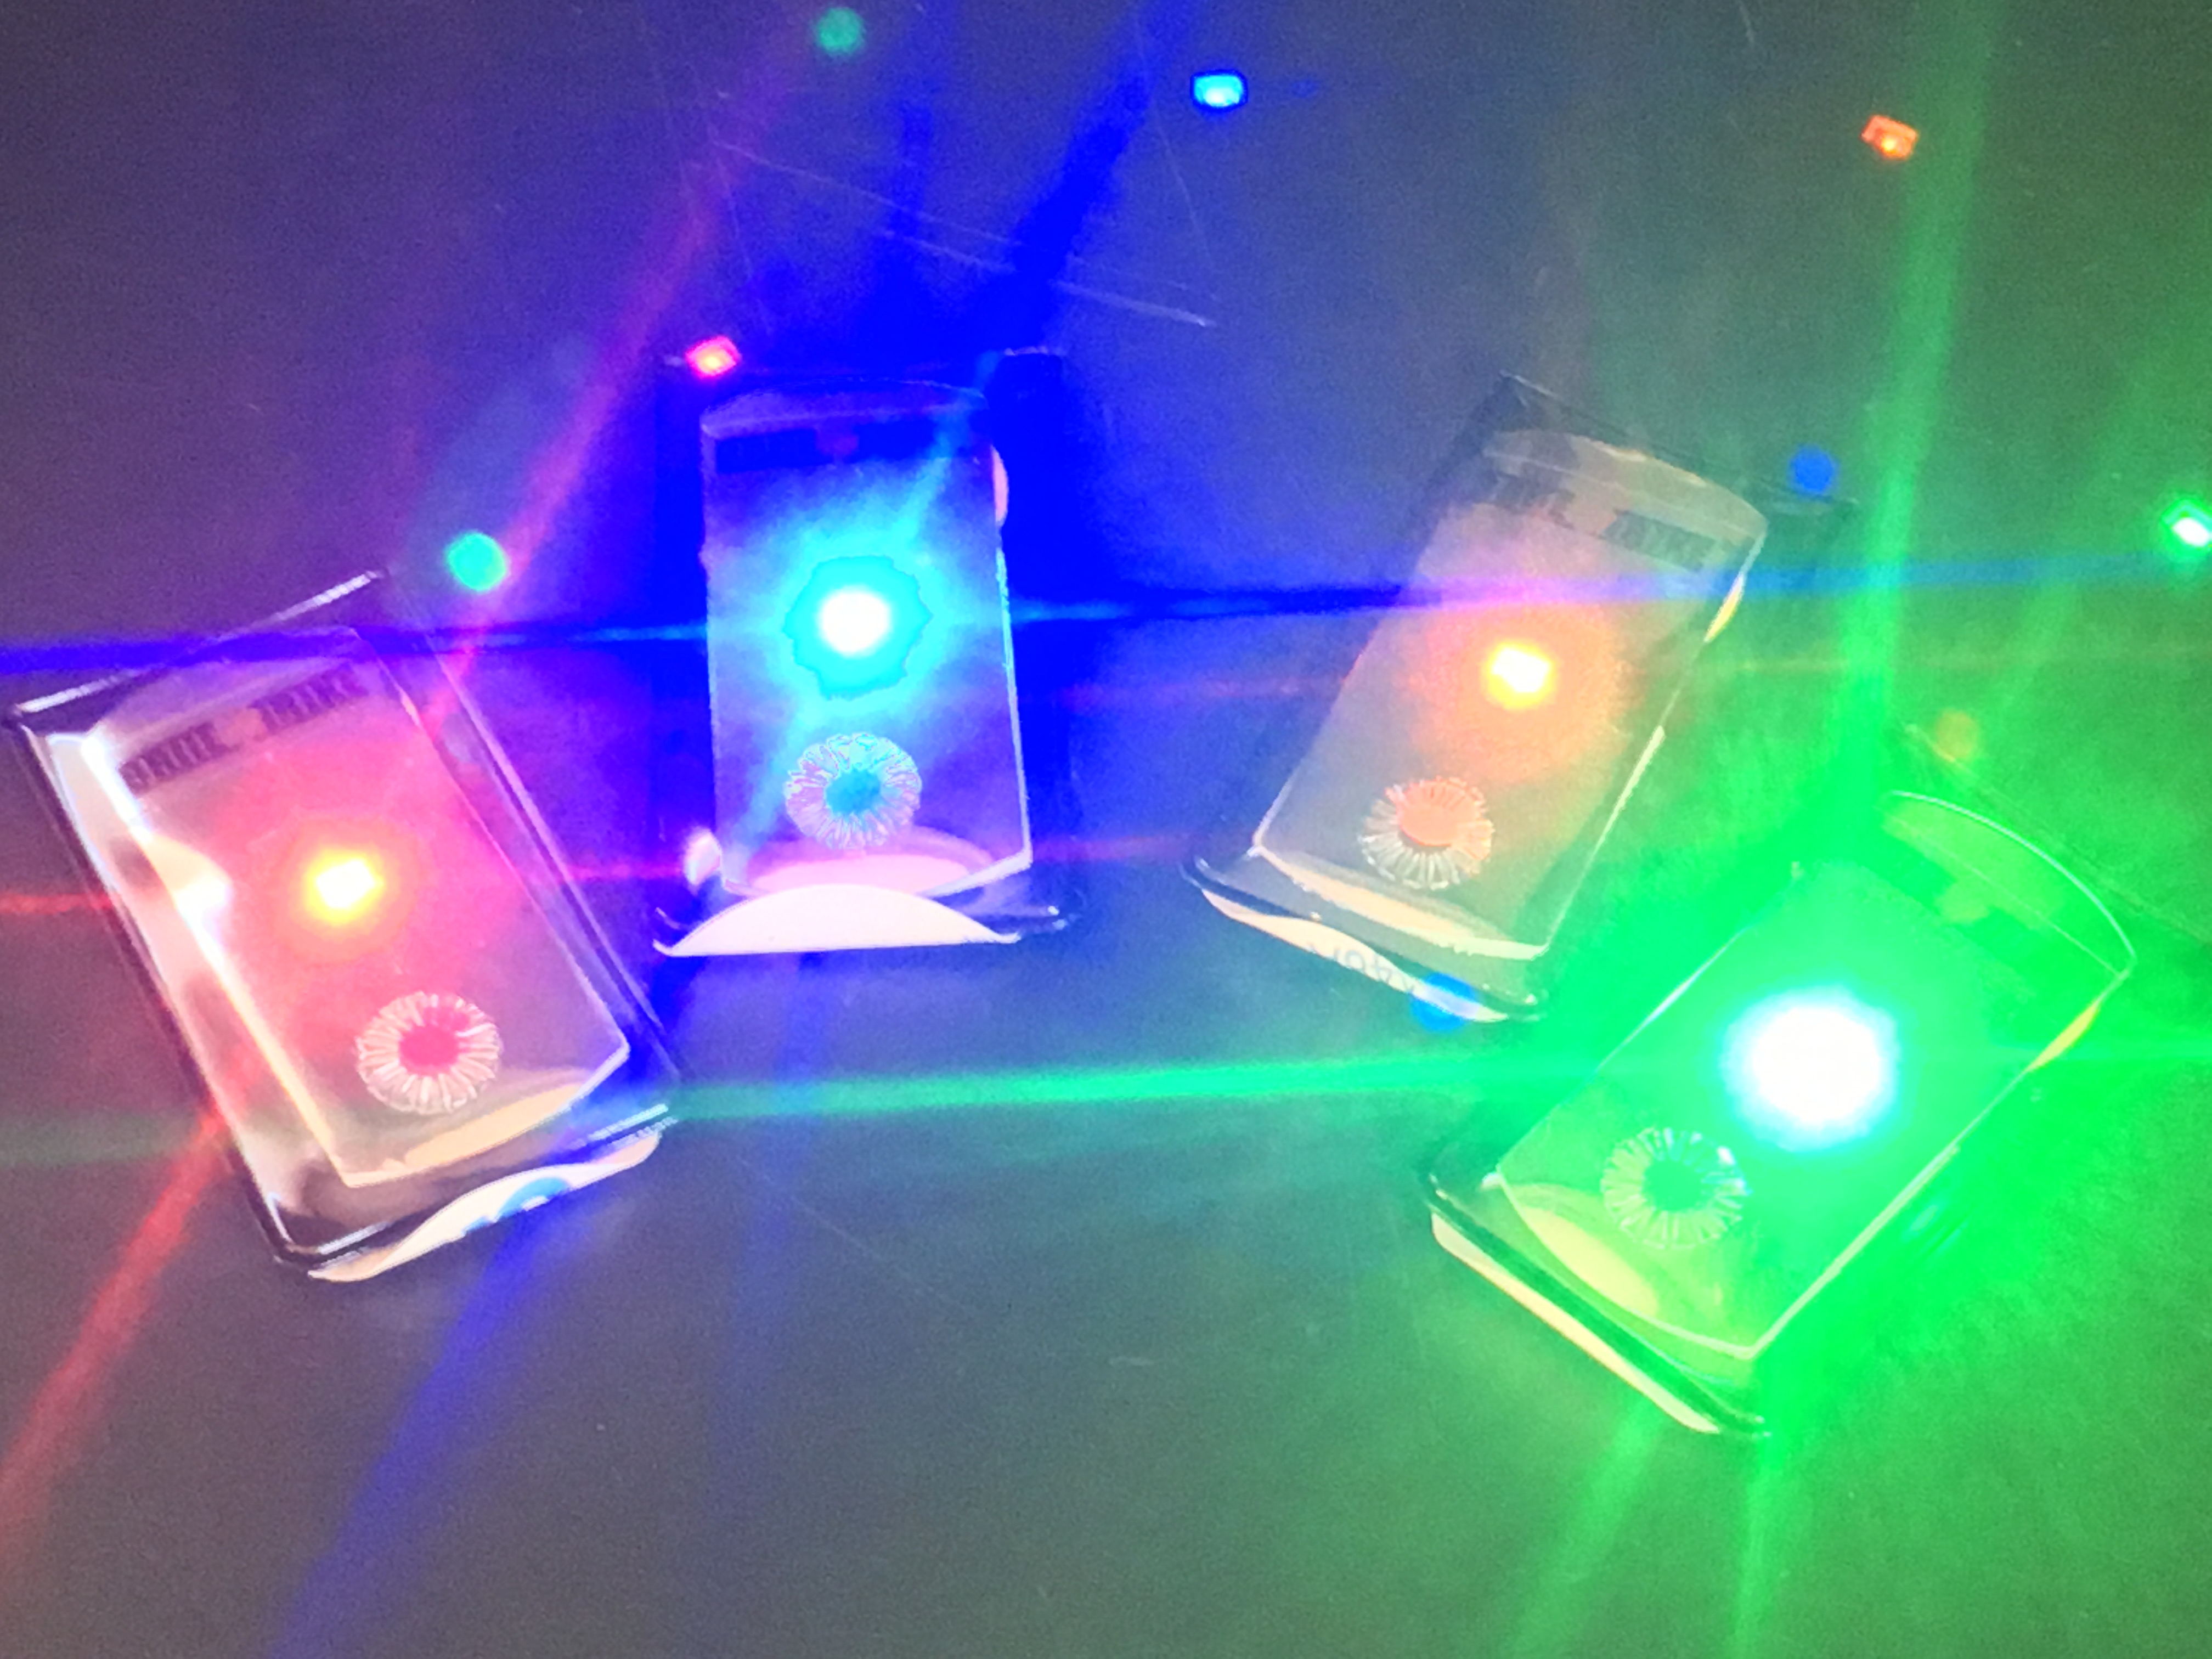
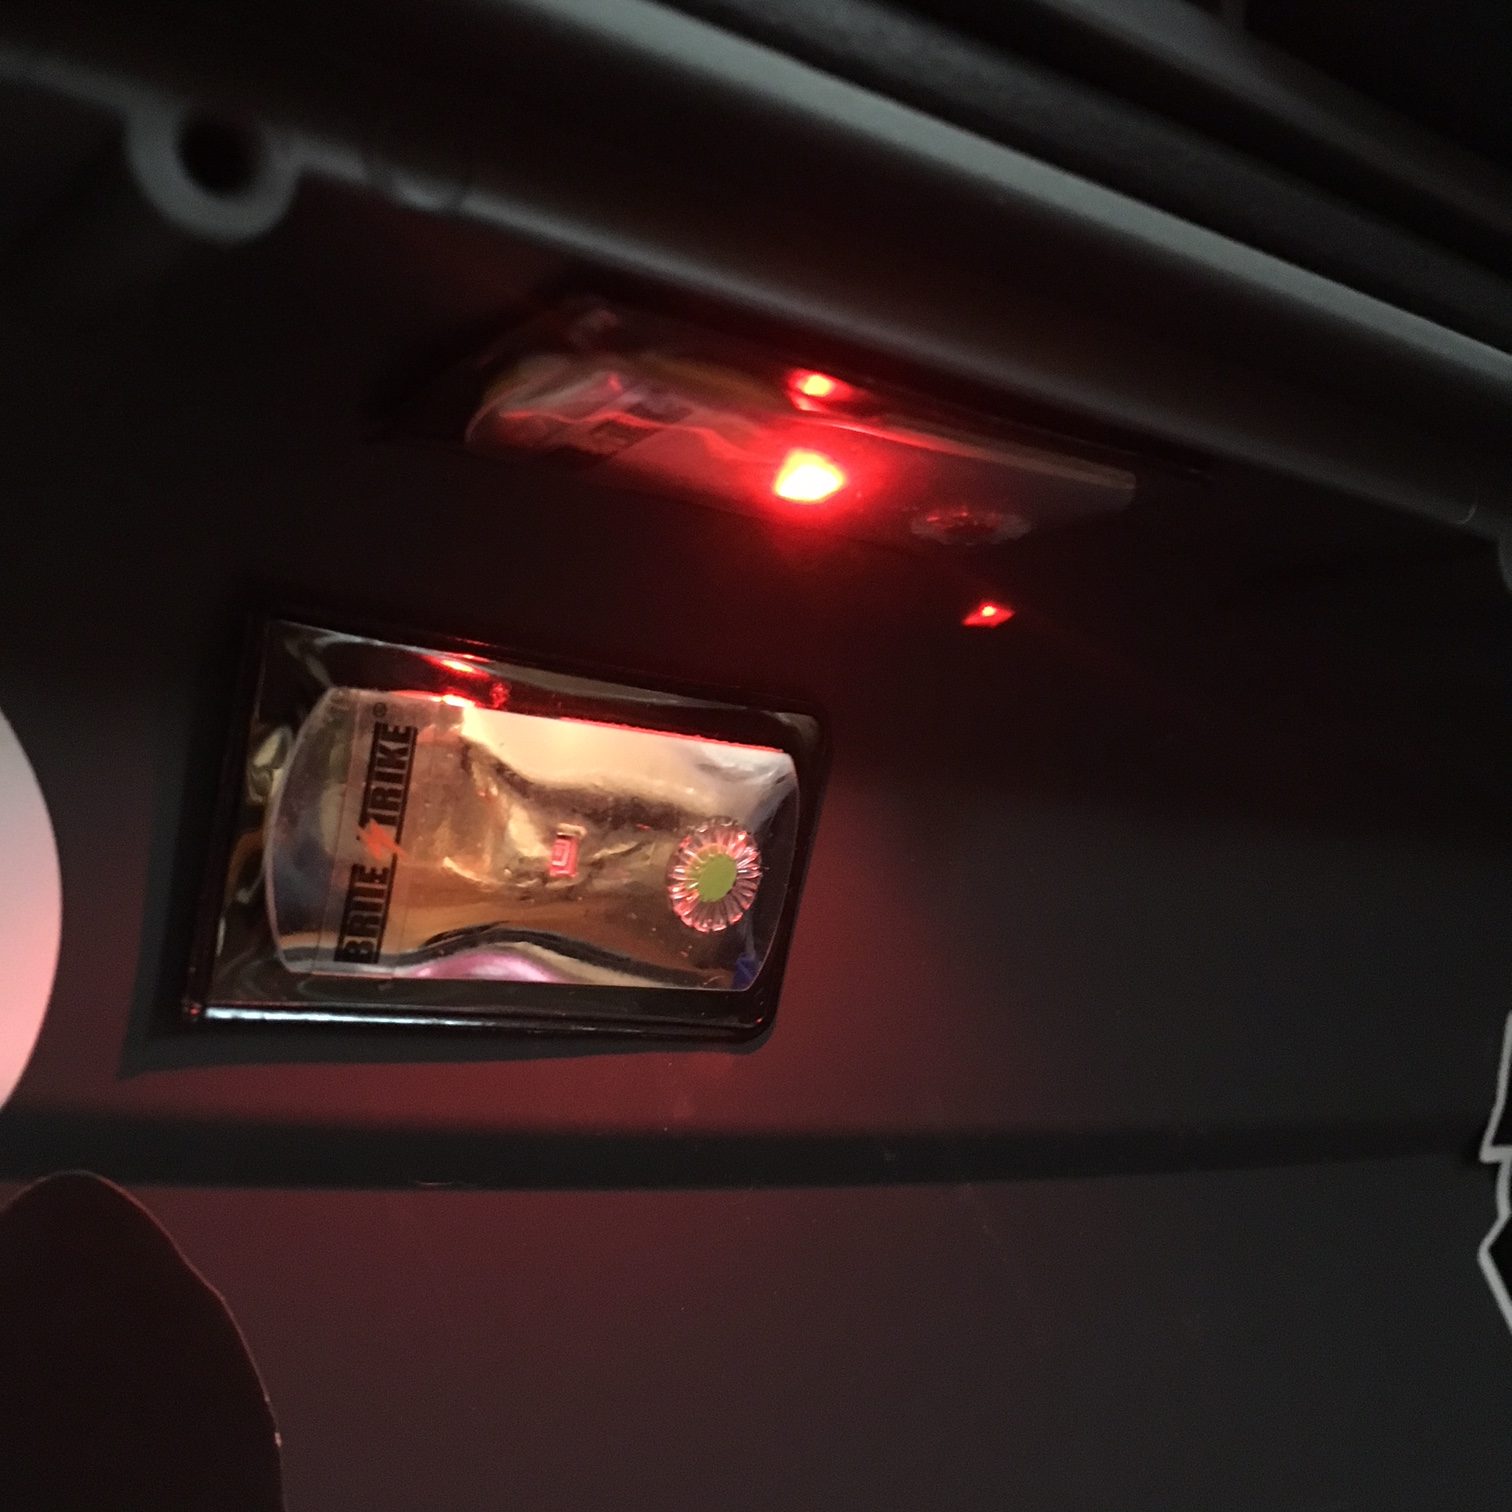
When I was introduced to the Brite Strike APALSmini LED lights distributed in Canada by Fiser Innovative Solutions, I didn’t know what to think of them. (APALS stands for All Purpose Adhesive Light Strips). They were small, I didn’t expect much but so what? Then I turned one on. BRIGHT! As I played around with the tiny light in my hand, Tom Fiser (Owner), gave me a rundown of the many technical specifications of these lights along with the ingenious uses they have integrated them into.
(Update & correction: Fiser is the Canadian distributor. Brite Strike Technologies Inc. is the manufacturer, they are made in the US.)
Here is a photo for sizing comparison:
2 Fiser lights, end-to-end, against a standard Bic lighter for size comparison. The 3M adhesive backing shown to view both sides.
They are very thin, weigh next to nothing and can stick to just about anything. Here are some technical specs:
very small, 2″ long, almost completely flat;
featherweight at less than 5g;
Visible up to 3.2km(2miles) on land, 4.8km(3miles) from the air;
Up to 200 hours or run time;
Waterproof to 200FT;
Modes: Fast Strobe/Slow Strobe/Steady On/Off;
Available in 5 colours (Red, Orange/Amber, Blue, Green, White);
Heavy Duty 3M® Adhesive Back Tape;
Easy Pull Tab;
Waterproof, Dust-proof & Shockproof.
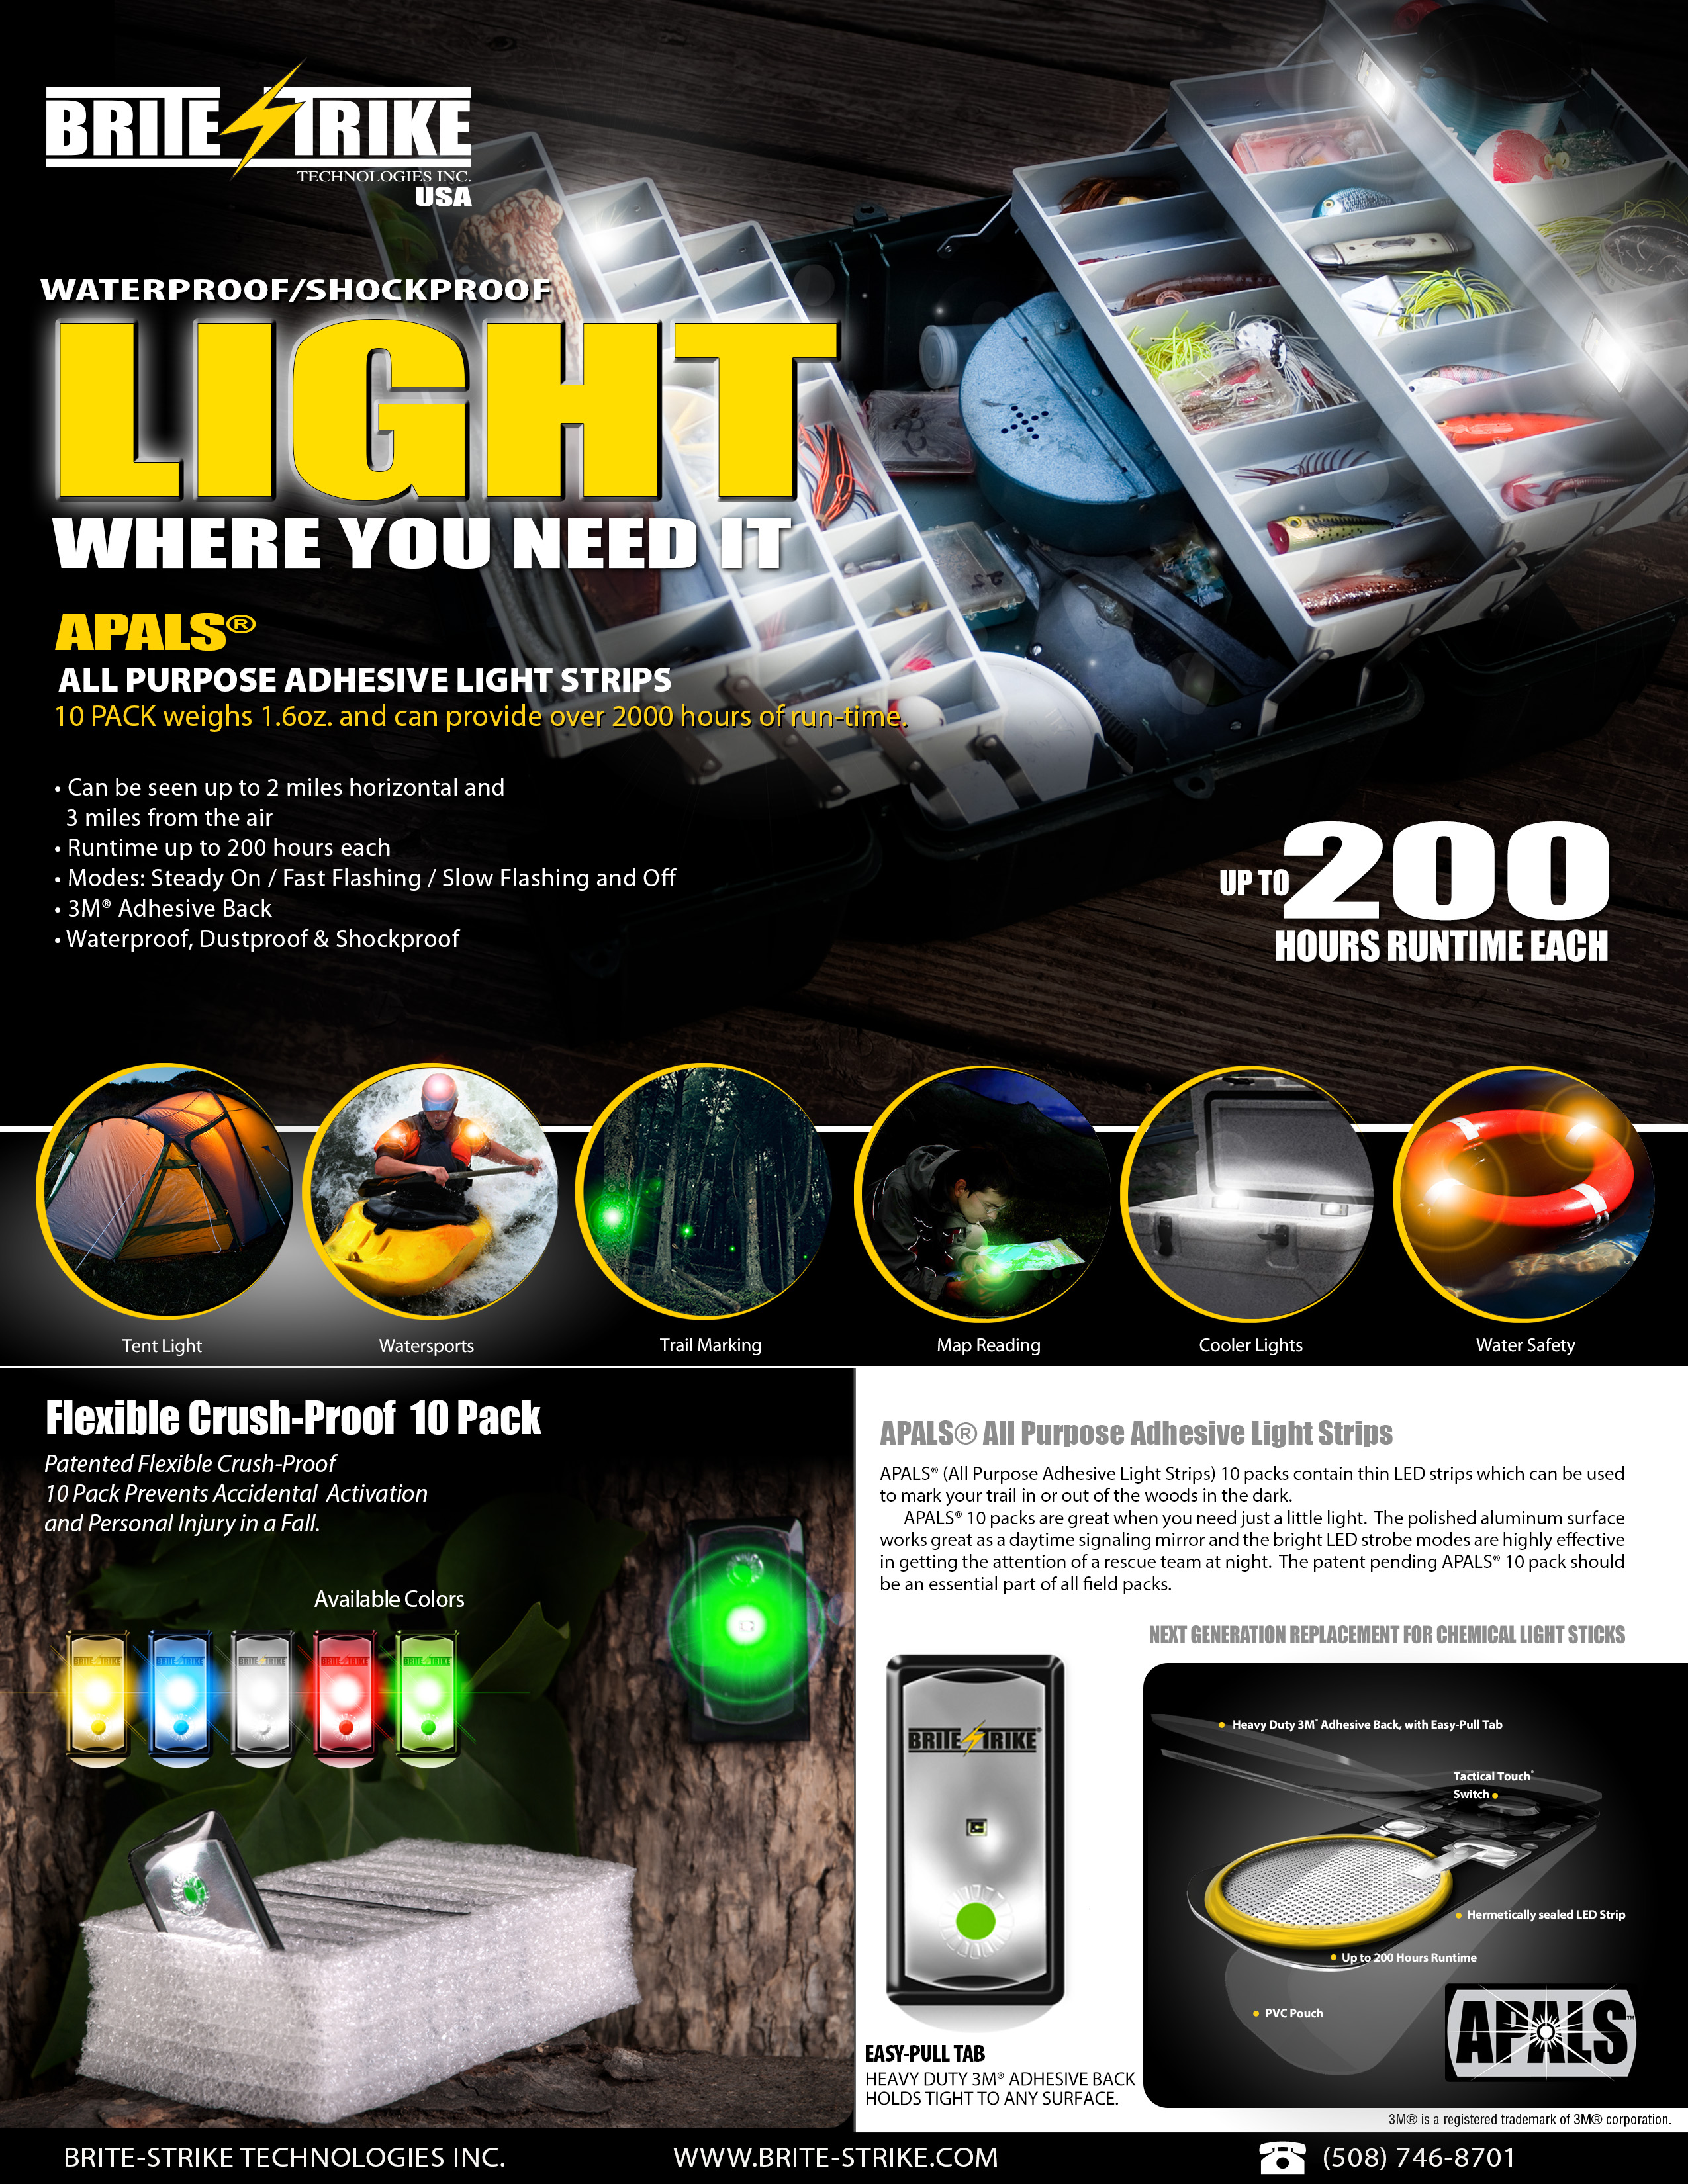
Here is a pdf of their info sheet:
Fiser Light Info
On the Fiser website, they list several innovative and creative uses for these mini lights. They even make gloves with little sleeves for them for Police working traffic duty, police on bicycles, SCUBA divers, hunters, cycling & roller sports, outdoor adventure and even for pets! I’d feel comfortable in adding that, for such a light package with 3 modes, high-visibility and 200hrs of run time, you could throw a few in your car, home, go-bag, any emergency kits, keep one in your first aid kit. They’re so versatile. For those doing plain clothes work, members of your team can keep one in their pocket for activation for hi-viz identification by peeling off the backing and sticking it on themselves. They can be used to mark entrances, evidence, route or trail marking, bike light, land or water recovery…the possibilities are quite vast.
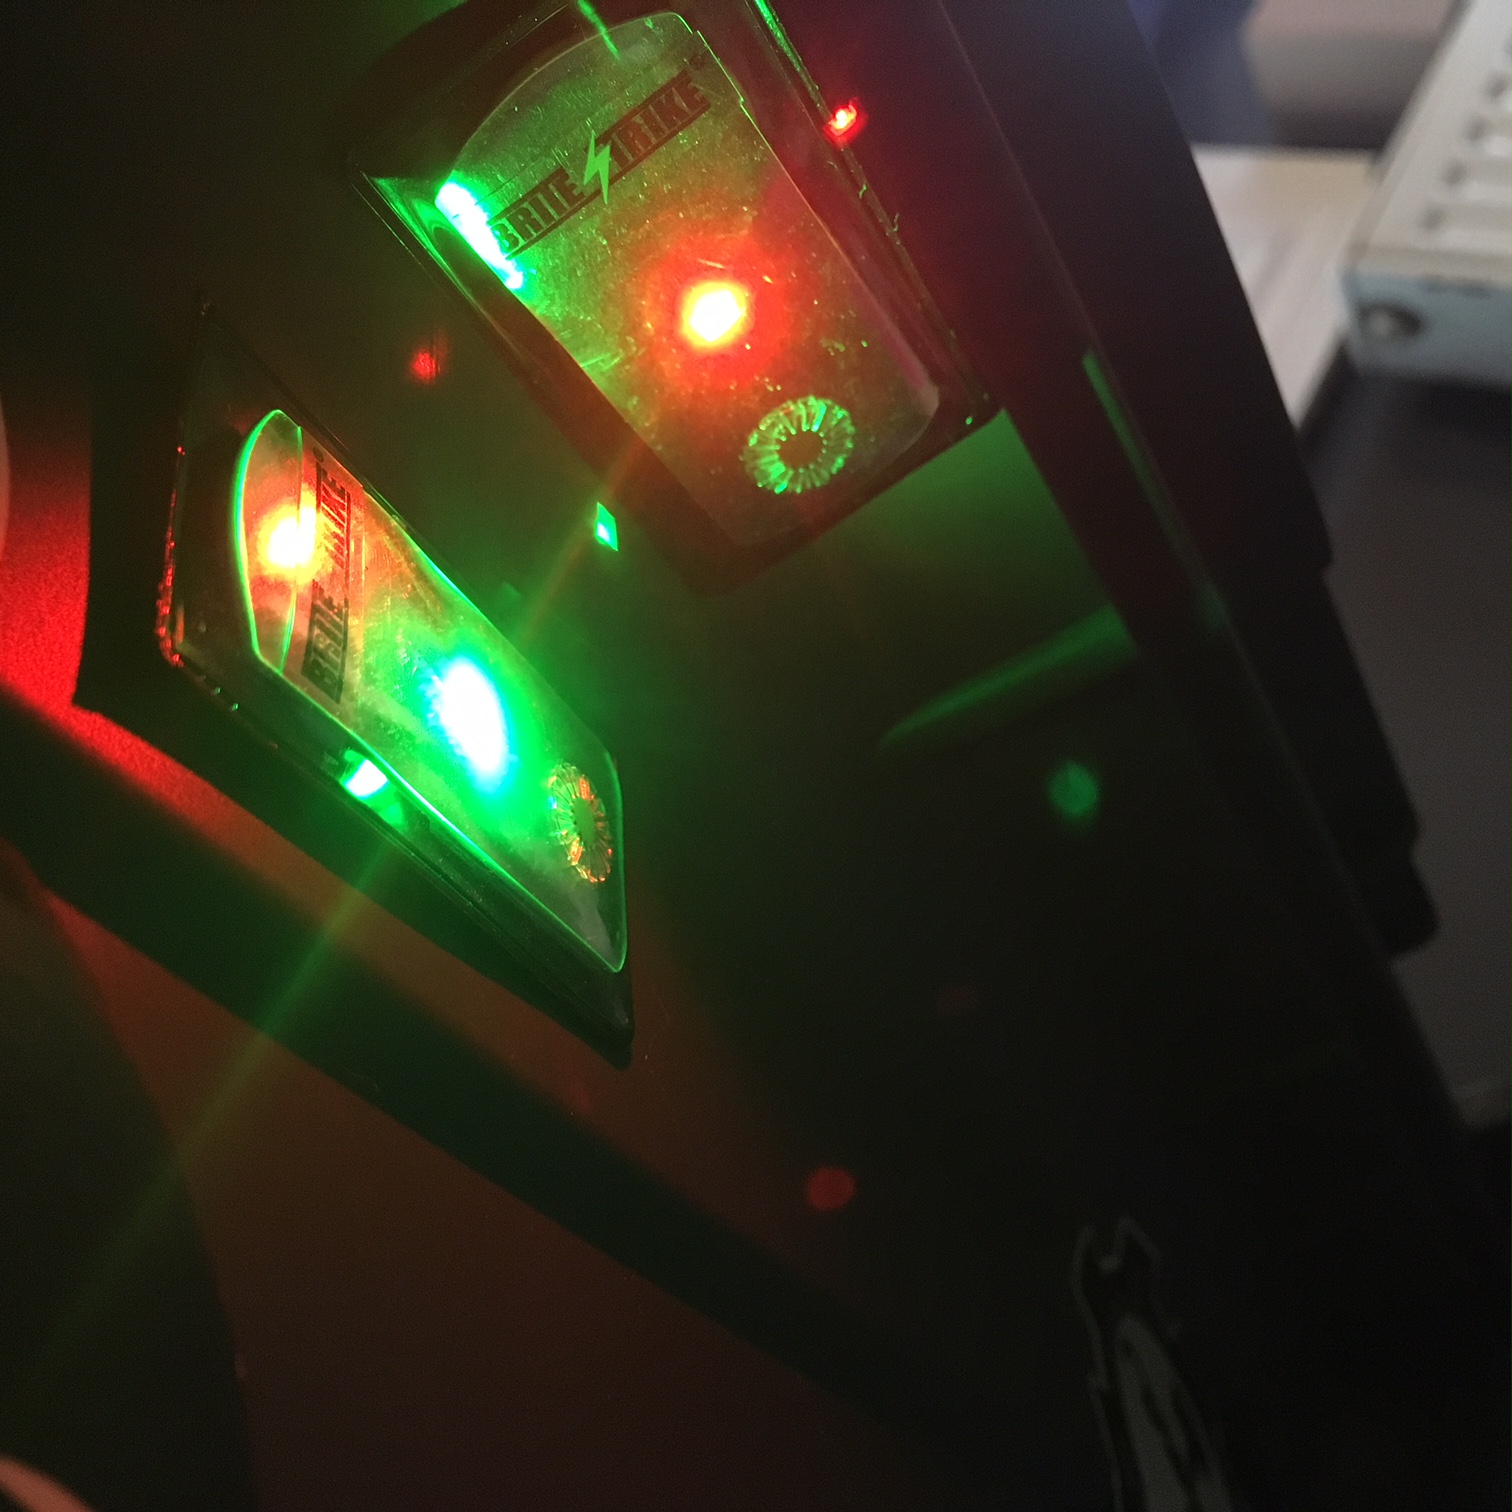
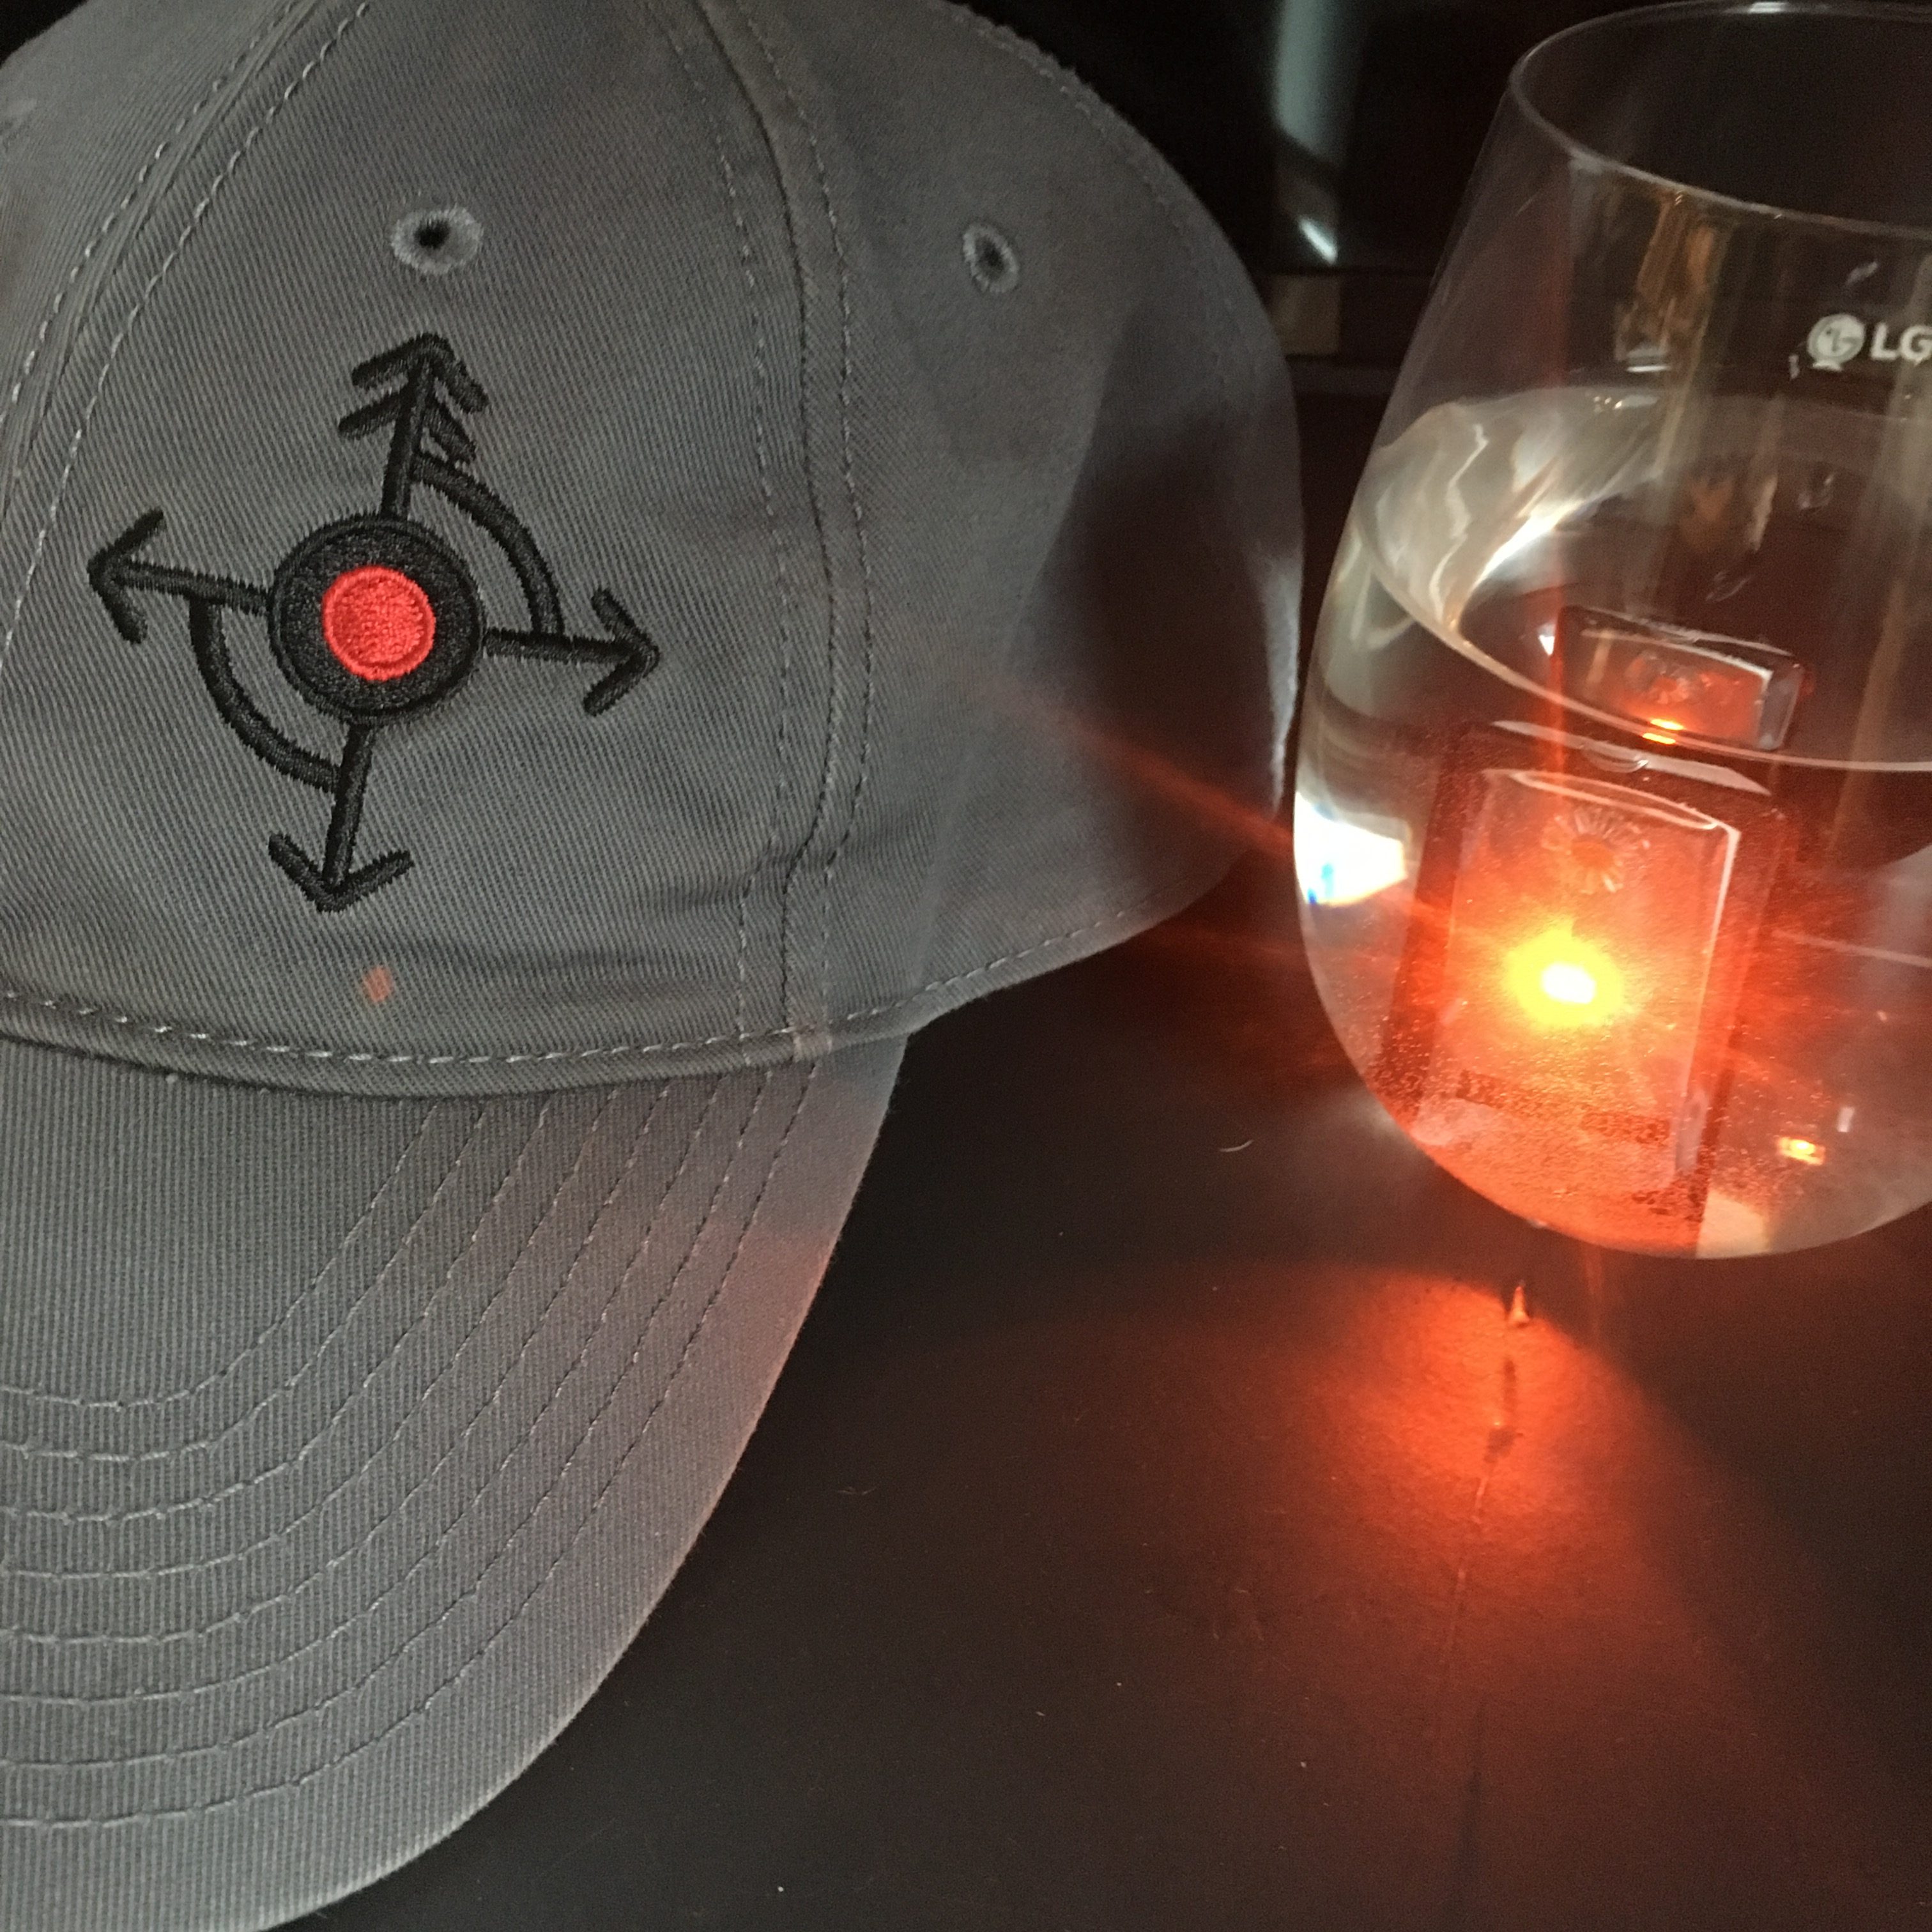
I’ve even put 2 in my Nanuk935 roller case (both red and green) for backup light and low-pro options. They stick to the lid and do not obstruct anything and are almost invisible (see below):
Green light turned off because it was too bright for the photos head-on.
This kind of setup can be adapted to closets, cabinets, safes, gun safes, medicine cabinets, suitcases, etc as a back-up in case you need it, especially during a power outage.
I also popped one into a glass of water for a half-hour to see how it did:
Overall, I’m very impressed with these little lights. They last longer and are brighter than glow sticks and are smaller too. I like the 3-mode options they have and that they are almost weightless.
They even sell them in 10-packs for expeditions or teams. Pretty great. Canadian too, from Hamilton, Ontario.
If you are looking for a different kind of light to augment your situation or if these sound useful, reach out to Fiser Innovative Solutions at their website.
Till next time, stay safe, stay visible (when you want to be), and stay crafty.
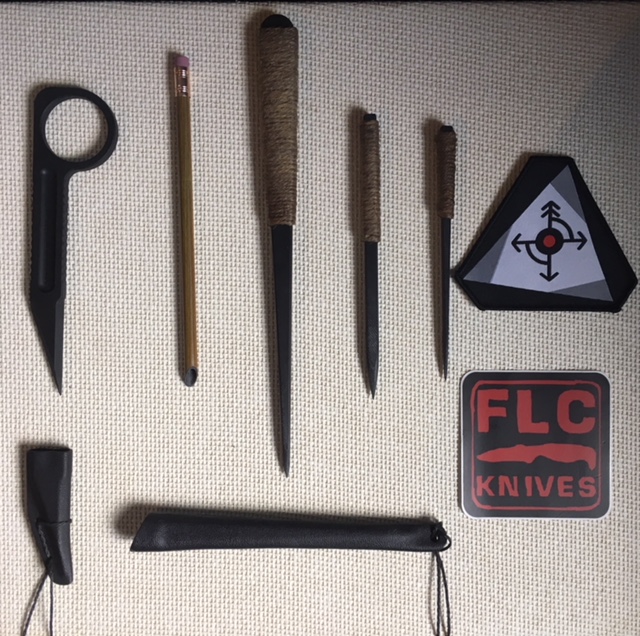
I haven’t, to this point, dipped my toes into the waters of G10 implements. After doing some training down south of the border, I was introduced to G10 tools. Strong, non-metallic, non-magnetic, very light-weight and can be fashioned into almost any shape, I was properly intrigued. I reached out to Dave at Fat Lazy Cat Knives , just outside of Toronto, and read up on his materials, production processes and available models.
For those who don’t know what G10 is (like I didn’t) here is the explanation from Wikipedia:
G10 is a high-pressure fiberglass laminate, a kind of composite material.[1] It is created by stacking multiple layers of glass cloth, soaking in epoxy resin, and compressing the resulting material under heat until the epoxy cures.[2][3] It is manufactured in flat sheets, most often a few millimeters thick.G10 is very similar to Micarta and carbon fiber laminates, because they are all resin-based laminates, except that the base material used is glass cloth. G10 is the toughest of the glass fiber resin laminates and therefore the most commonly used.
Dave and I chatted for a while and I arranged a small batch purchase to test and play around with. That was a few months ago. I have now had an opportunity to poke things with these sharps and I am very impressed with their durability, sharpness and craftsmanship.
As I can only speak to the models I have tried I will say that I received prompt, courteous service, fast shipping and nicely packaged products.
I received as follows:
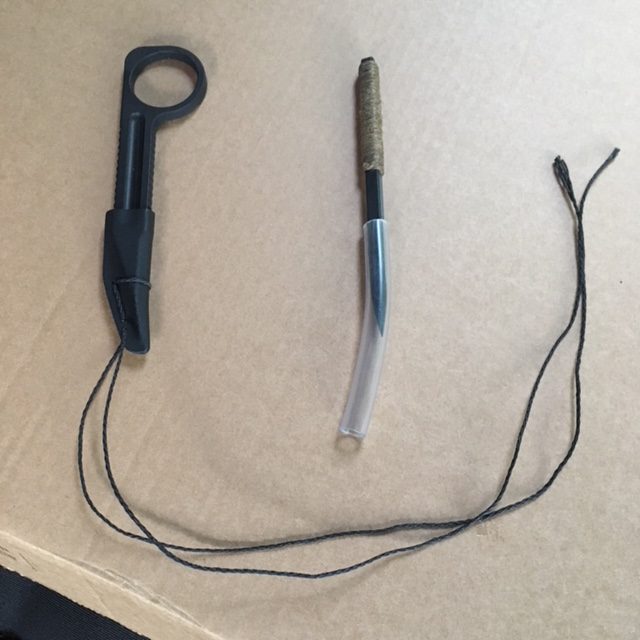
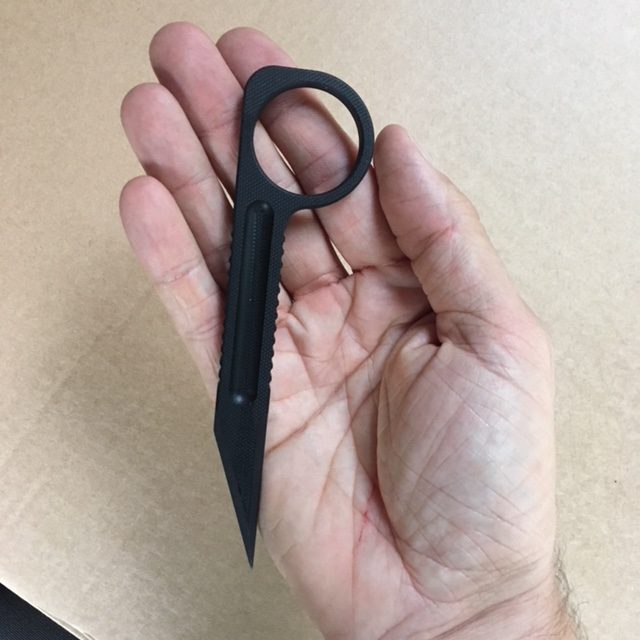
Get Off Me Tool (GOMT) No. 6 in G10, stubby, offset, with Kydex sheath
GOMT No. 4 (ventilator)
GOMT No. 1 (Synthetic, Slim) with Kydex carrier
“Hatchlings” (both thick and thin profiles)
Cool stickers. (Thanks Dave!)
Immediately out of the box I noticed a few things:
SHARP points on all (good thing they come in protective tubing)
Very lightweight. I’d equate them to a pen.
Sturdy, durable and smooth.
The jute twine which furnishes the handles is comfortable and epoxied to hold the cordage in place. It works well.
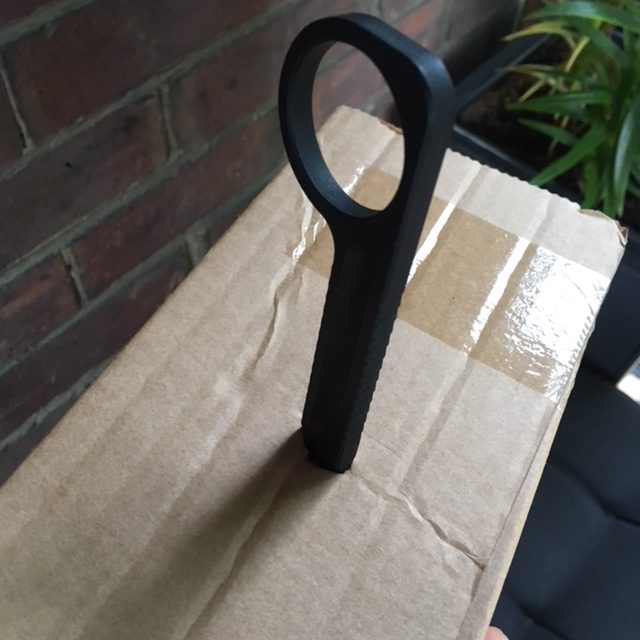
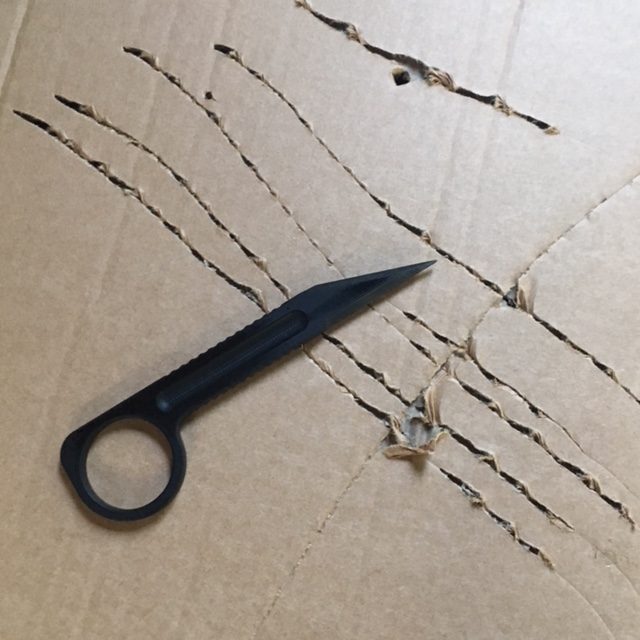
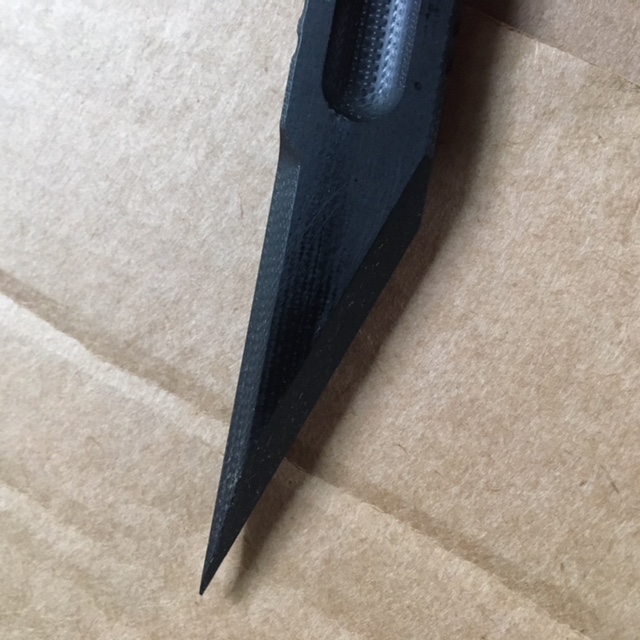
Though I have yet to test them in an organic medium, they easily penetrate several layers of cardboard and towels. The points seem sturdy (none have broken yet, but again, no organic medium testing yet) and maintain their sharp points even after several uses.
The box testing I did (the photos in this entry are not all-inclusive) showed no damage to the points, an easy grip and to-the-grip penetration. The GOMT No. 6 even managed to cut the box (with the point) several times without noticeable resistance and maintain its integrity.
Get Off Me Tool (GOMT) No. 6 (left) and a Hatchling.
Small size. Comfortable grip.
No resistance or deformation of the point.
No problem.
Cuts just like a metal knife through cardboard.
Strong point. Very sharp. Easily field sharpened on concrete.
VERY sharp point.
As you can see, the G10 penetrated with ease and there was no damage to any of the points. The ergonomics worked quite well and felt comfortable in the hand – easy to hold and manipulate. They can even be re-sharpened on concrete in a pinch!
To see some more, check out some YouTube videos of other testing of FLC Knives:
All told, the implements made by FLC Knives are top-notch quality. I am very happy with my purchase and do not hesitate to recommend them to others. Just be careful, they’re pointy.
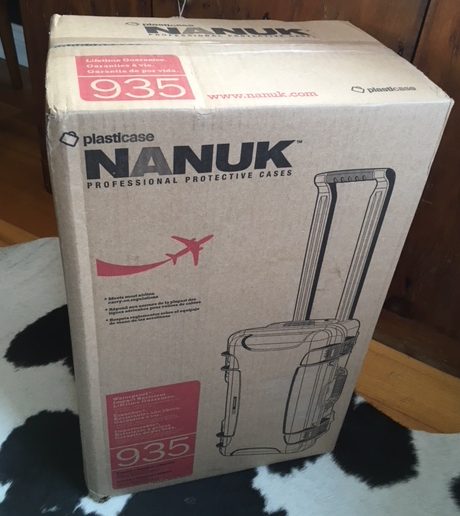
The 935 Roller Case by Nanuk. Solid protection for your sensitive gear.
In an effort to organize some of my equipment, I have gone through several options to address issues surrounding ease of transport, durability, security and protection. I initially went with low-cost/low-quality options such as boxes, bags, duffels, etc., and tried to keep everything organized, protected from damage and loss and something properly sized to fit everything in one piece. I was hesitant to go with a Pelican case, as their price point was too high for what I was looking for, so I searched for other options.
Earlier this year, when I was at the Toronto Sportsman’s Show, I had the fortune of meeting Dan from Nanuk (pronounced “Na-Nook”, the Inuit word for the mighty Polar Bear) and exchanged contacts. Their display was expansive and their options for protective cases ranged across sizes, colours, shapes and options. I also liked the fact that they were Canadian and also that they offered a Military/Law-Enforcement discount.
A couple of weeks ago, after several failed trials to organize my gear the way I wanted, I reached out to Dan and arranged to purchase the Nanuk 935 hard case. The following covers my experience dealing with Nanuk and my impressions of the Nanuk 935.
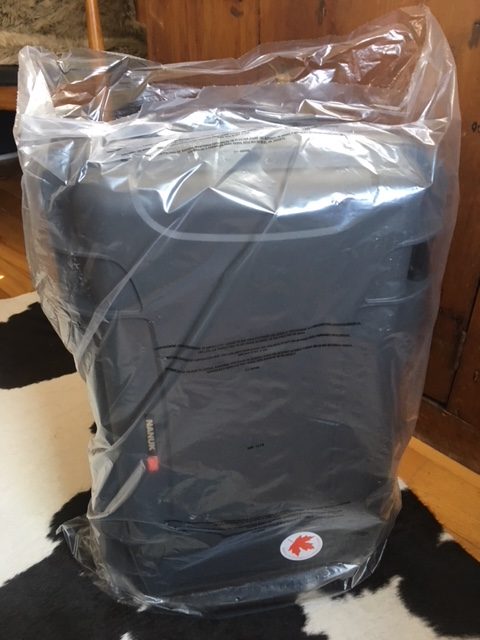
First off, the service was FAST. As in the case arrived at my door within 48hrs. I was impressed. The customer service and administration was excellent. The team at Plasticase is very efficient.
The 935 arrived mint.
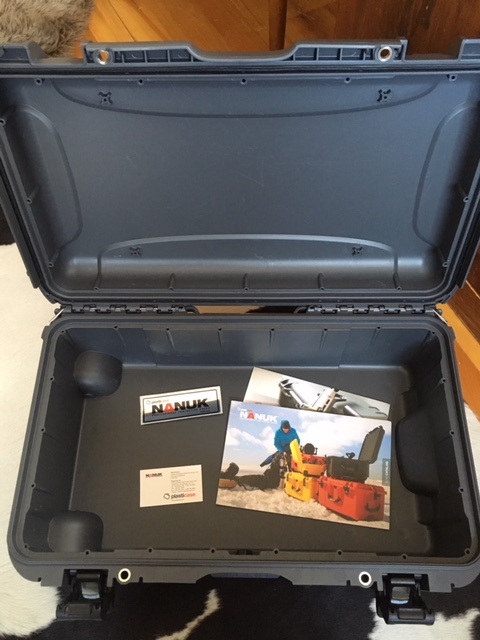
My first impression of the 935 (even though I had seen it before at the Sportsman’s Show) was how solid it felt. Everything on this thing is heavy-duty. Not a piece feels flimsy or cheap, despite its relative light weight.
Here is a rundown of some of the key features of Nanuk cases generally and the 935 Roller Case in particular:
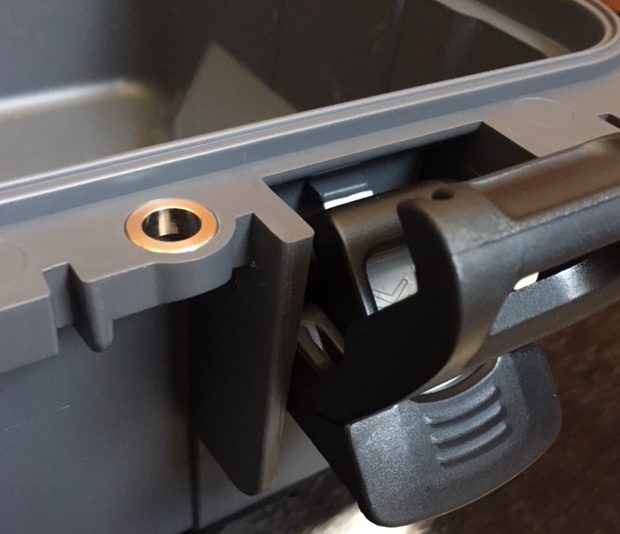
Features the “Powerclaw” latching system.
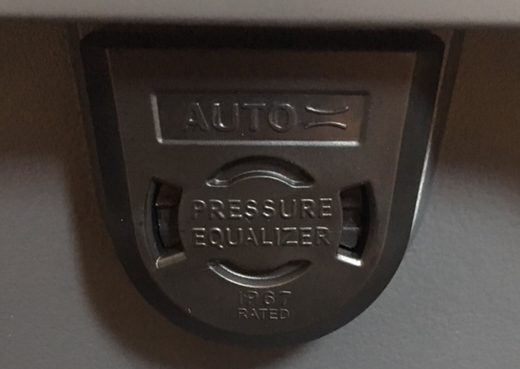
Waterproof: rated to IP67 for 30mins under 1m(3.3′) of water.
Automatic pressure release valve
Hard-wearing NK-7 resin for impact resistance
Stainless steel hardware
Model-specific bezel and gasket system to ensure a watertight seal
Handle & lid stays
Polyurethane wheels
Conditional Lifetime Warranty
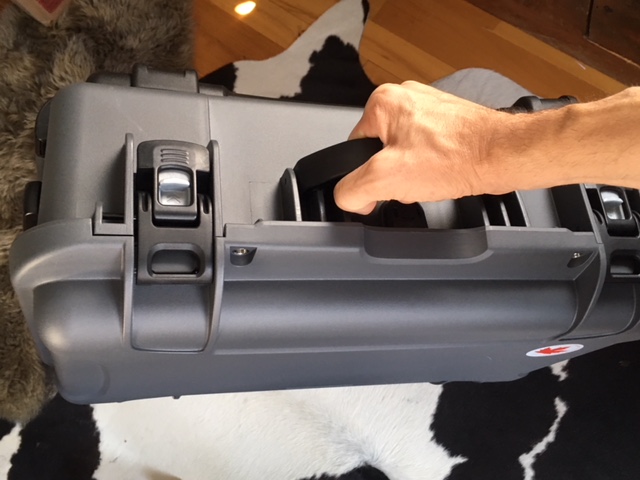
Model 935 features a 2-stage, heavy-duty pull handle for rolling the case behind you like a carry-on.
Model 935: Interior dimensions (L x W x H): 20.5″ x 11.3″ x 7.5″ & Exterior dimensions (L x W x H): 22.0″ x 14.0″ x 9.0″, Weight 11.6lbs (5.2kg)
Carry-on compatible (check with your airline for specifics)
Comes in a variety of colours and internal configurations.
Made in Canada!
For more complete details about the Nanuk 935, go to the webpage here.
Below are more detailed photos with cations speaking to the above specifications and observations.
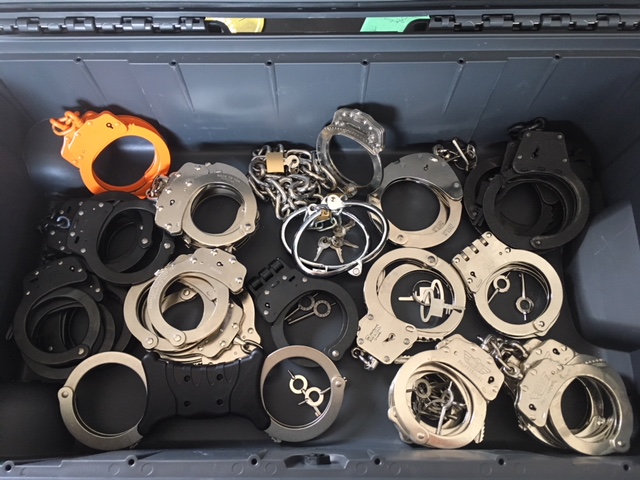
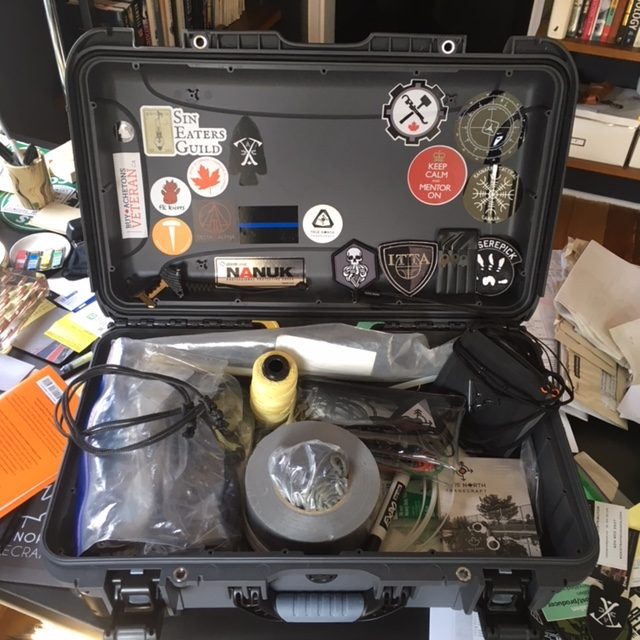
Lots of space inside.
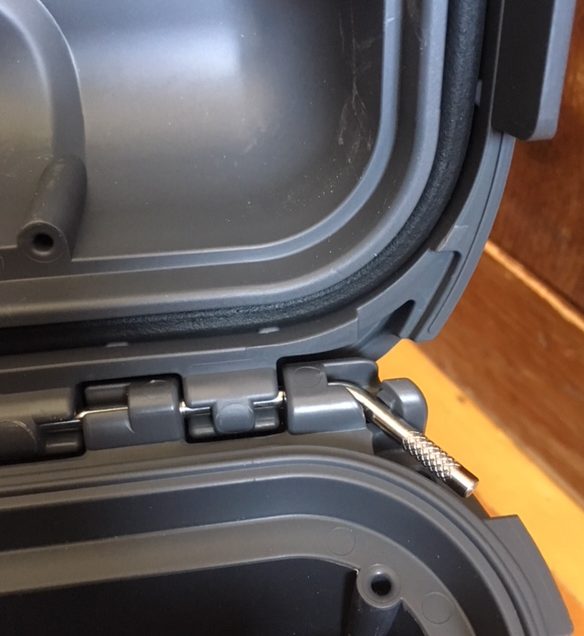
Powerclaw latches are beefy, tough and connect with a positive and satisfying click. To open, you have to actuate the button and latch.
Stainless steel hardware and tough, large gasket seal to ensure long life and solid seal.
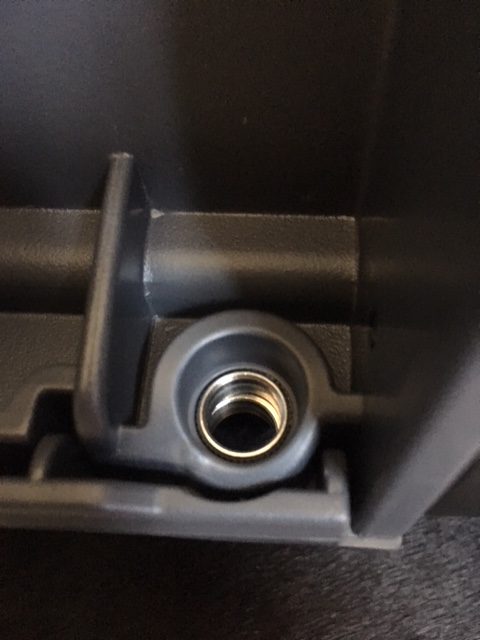
Steel-ringed (x2) rivets for padlocks. Make sure you get something high-quality. Nanuk cases don’t protect themselves from thieves.
As a note to the latching system, though the latching system is effective at preventing water and dust from getting in, it is NOT effective in securing the contents from unauthorized access. It is a hair-pulling pet peeve of mine when I see people buy a top-of-the-line protective case (like a Nanuk or Pelican, etc) to store an expensive piece of equipment (like a tricked-out rifle, research gear, optics, etc) and then go to Home Depot and buy a $10 lock to keep it “secure”. Just don’t. Please. If your investment in case and equipment is up there, why entrust it to a $10 lock? Do yourself a favour and visit a proper locksmith and spend the $80-$120 or so for a high-quality padlock (Like an ABUS, Abloy, S&G or something similar) and keep your stuff protected. Just do it. You’ll also be interested to know that Nanuk now offers to retrofit the latches to lockable latches to TSA specifications if you would like to lock your Nanuk without a padlock.
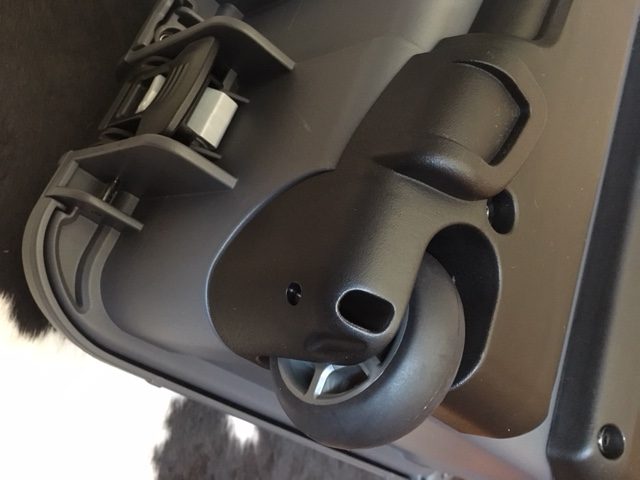
Heavy-duty polyurethane whees with stainless steel hardware roll smooth even when the case is fully loaded.
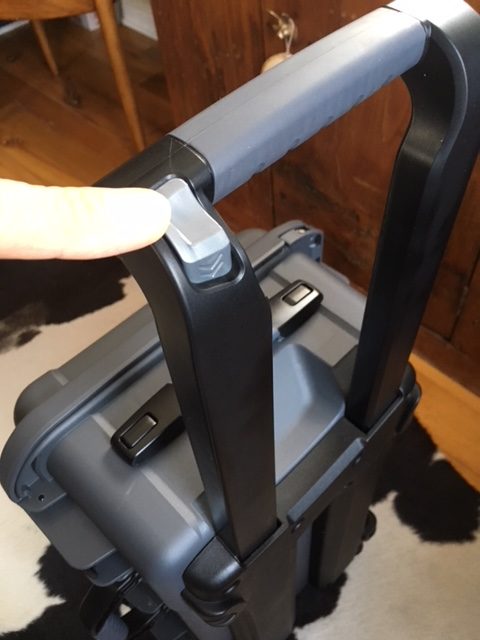
Substantial pull arm features a 2-stage adjustment and easy-access release button.
Automatic pressure relief valve.
Easy to carry with 3 handle options, lightweight for what it is and comfortable grips.
Can take a beating on the inside too.
All loaded up. With room to spare. Fantastic piece of kit.
All in all, I am very impressed with the Nanuk 935. You can take a look at their entire line of products here.
They feature protective solutions for everything from your smart phone to weapons cases, sensitive electronics, photography gear, laptops and even custom solutions for whatever you may need.
If you’re looking for a high-quality, Canadian-made protective case for your equipment, do consider Nanuk cases in your search. Unfortunately, members of the general public will have to look for Nanuk dealers near you to purchase, but if you’re Military or Law Enforcement, you can buy directly from them.
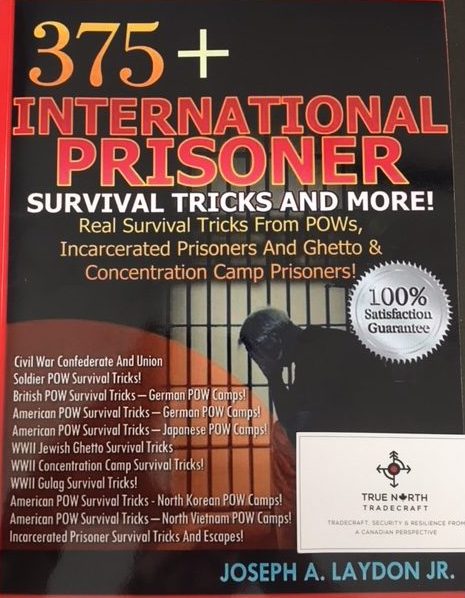
A while ago I heard about a book which chronicled the history and evolution of skills and tips for the Prisoners of War (POWs) or captives in a foreign land. After much digging, I contacted the author, Mr. Joseph A. Laydon Jr., and arranged to purchase a copy to be shipped to Canada.
Mr. Laydon was very kind and forthcoming in his communications with me and I received my copy (and a bunch of other goodies) from him shortly afterward.
Mr. Laydon’s compendium is a ~350-page tome of well researched historical material. He has dug deep into the world of POWs (in an American context, specifically) from the US Civil War to Cold War-era and their methods of survival, escape and reunification through simple tips as well as in-depth case studies.
American POWs in Hanoi, North Vietnam.
As the nature of warfare has changed with the introduction of ever-advancing technologies, the realities of captivity remain. Allied soldiers have been held captive in more recent conflicts such as the Gulf Wars, The Balkans/Former Yugoslavia and in the Middle East. And though one never knows in advance the circumstances of one’s possible captivity, a study of historical methods (both by captors and captives) is beneficial. It gives scope and depth of knowledge which may be adapted in given circumstances. In some current theatres of conflict, one’s adversaries may tend to be on the less-technologically advanced side. If one is to be effective in combating such foes, a study into their “low-tech” methods will yield insight into their weaknesses. To that end, studying past historical methods of captivity and restraint allows for the operator or agent to understand the weaknesses in those methods and train to exploit those weaknesses to one’s advantage.
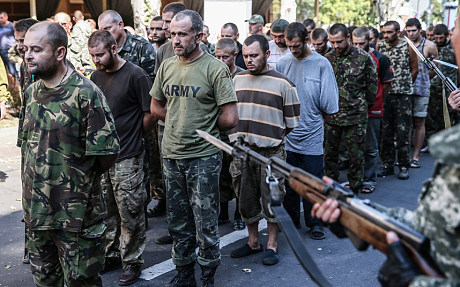
Captured “enemy combatants” in Ukraine.
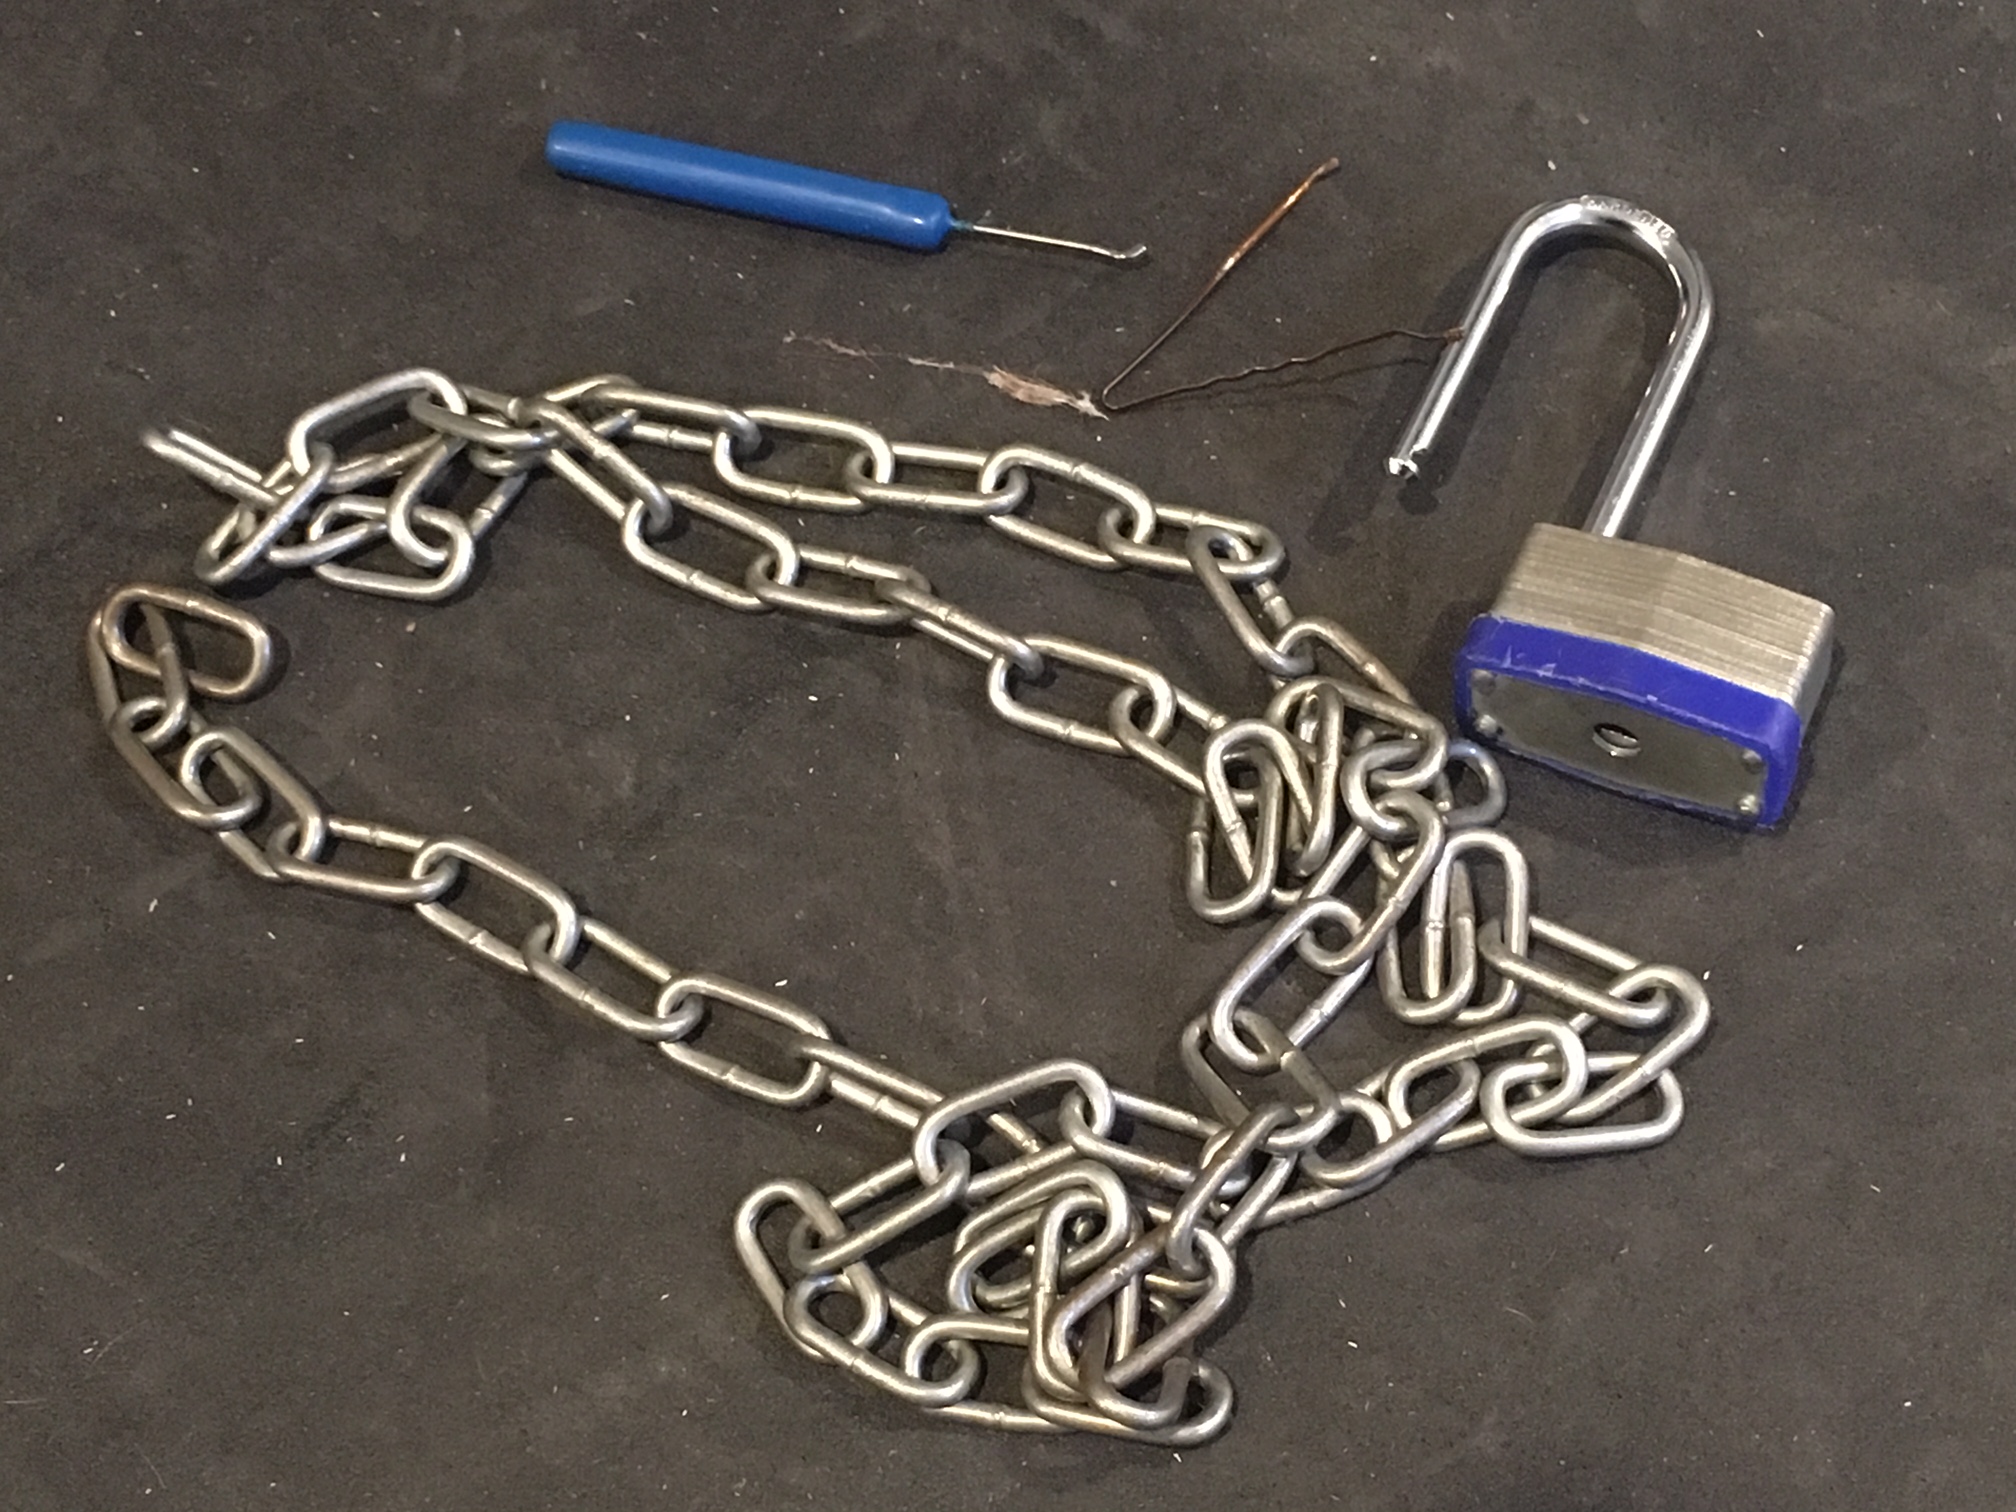
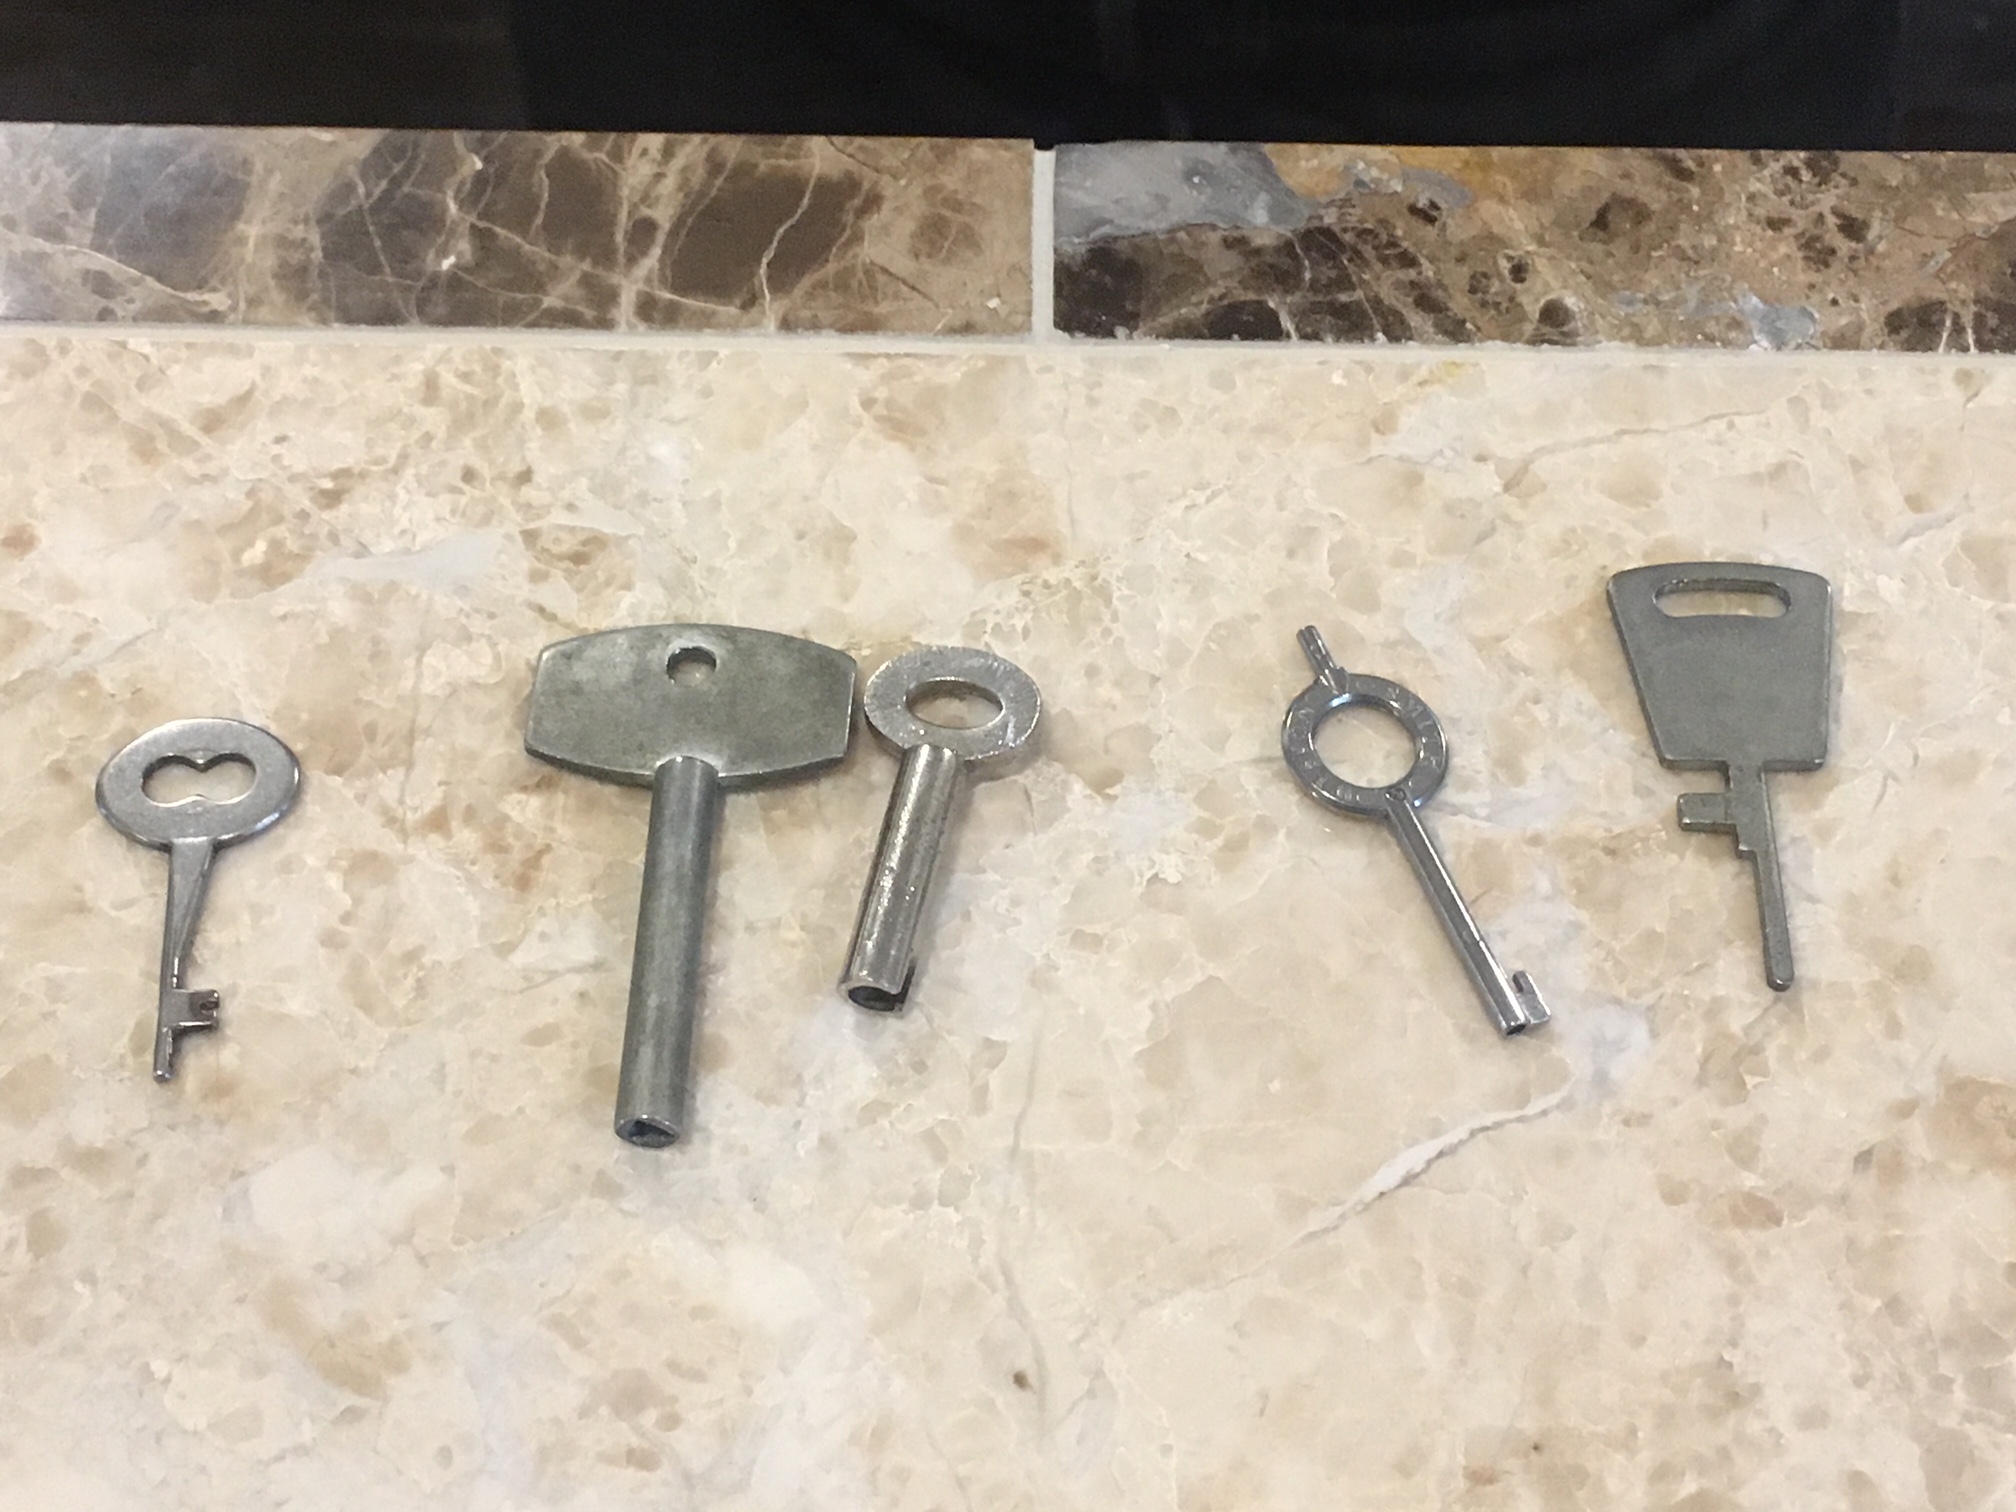
As an example, “high tech” security features, such as locks and handcuffs, may be in use by one’s own forces, but in some areas in the world, technology may be 50-80 years behind the times, often using outdated and “low tech” restraints and locking mechanisms. Awareness and training in the exploitation of these are crucial to one’s survival.
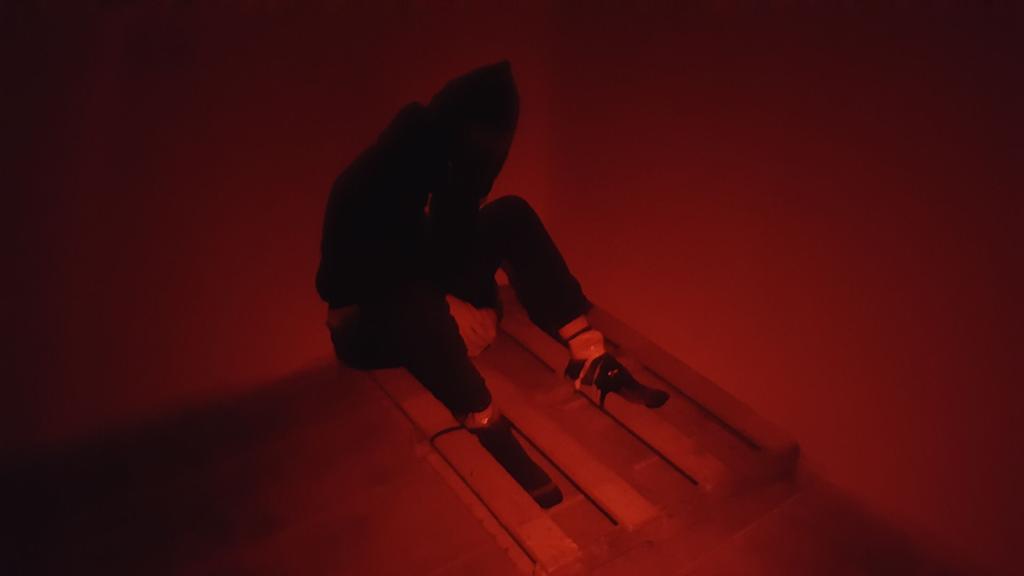
You never know where you’ll end up. Prepare now.
I would also argue that even by reading through it in a non-military or operational context, if one were to find themselves kidnapped or held in unlawful confinement, some of the points discussed in this book may be of help, again depending on the circumstances. But the more you know, the more options you may have.
To bring this around full circle, Mr. Laydon does an excellent job of providing a thoroughly researched historical account of survival methods used by POWs and also the captivity methods of their captors and aggressors over a very long period of time across a wide range of theatres. Even more useful are his personal notes from his time in the Military and through various survival schools. All very useful information. There are many practical and informative (and genuinely interesting) tips and tricks covered. It is not an instructional manual, per se, but rather an in-depth reference highlighting many historical and contemporary methods and ideas for use in such environments. The author has augmented historical methods with personal anecdotes and experiences to bring context. There are no pictures or diagrams to see (though there are a few exercises to learn some of the tricks shown) however the sheer multitude of referenced tips and tricks leaves one much to internalize and think about. I would recommend this publication to anyone looking to expand their knowledge of this subject matter. Sometimes, the saying “what’s old is new again” may come to pass. You never know, it may come in handy some day.
Though the information in this book is good to know, Would highly recommend finding training in these skillsets in-person. Nothing beats hands-on instruction and personal first-hand experience.
Joseph A. Laydon Jr. can be reached through www.survivalexpertbooks.com or at [email protected] and this book can be found on Amazon.com and Amazon.ca . He has written many other books on various other survival-related topics, similarly sized and deeply researched.
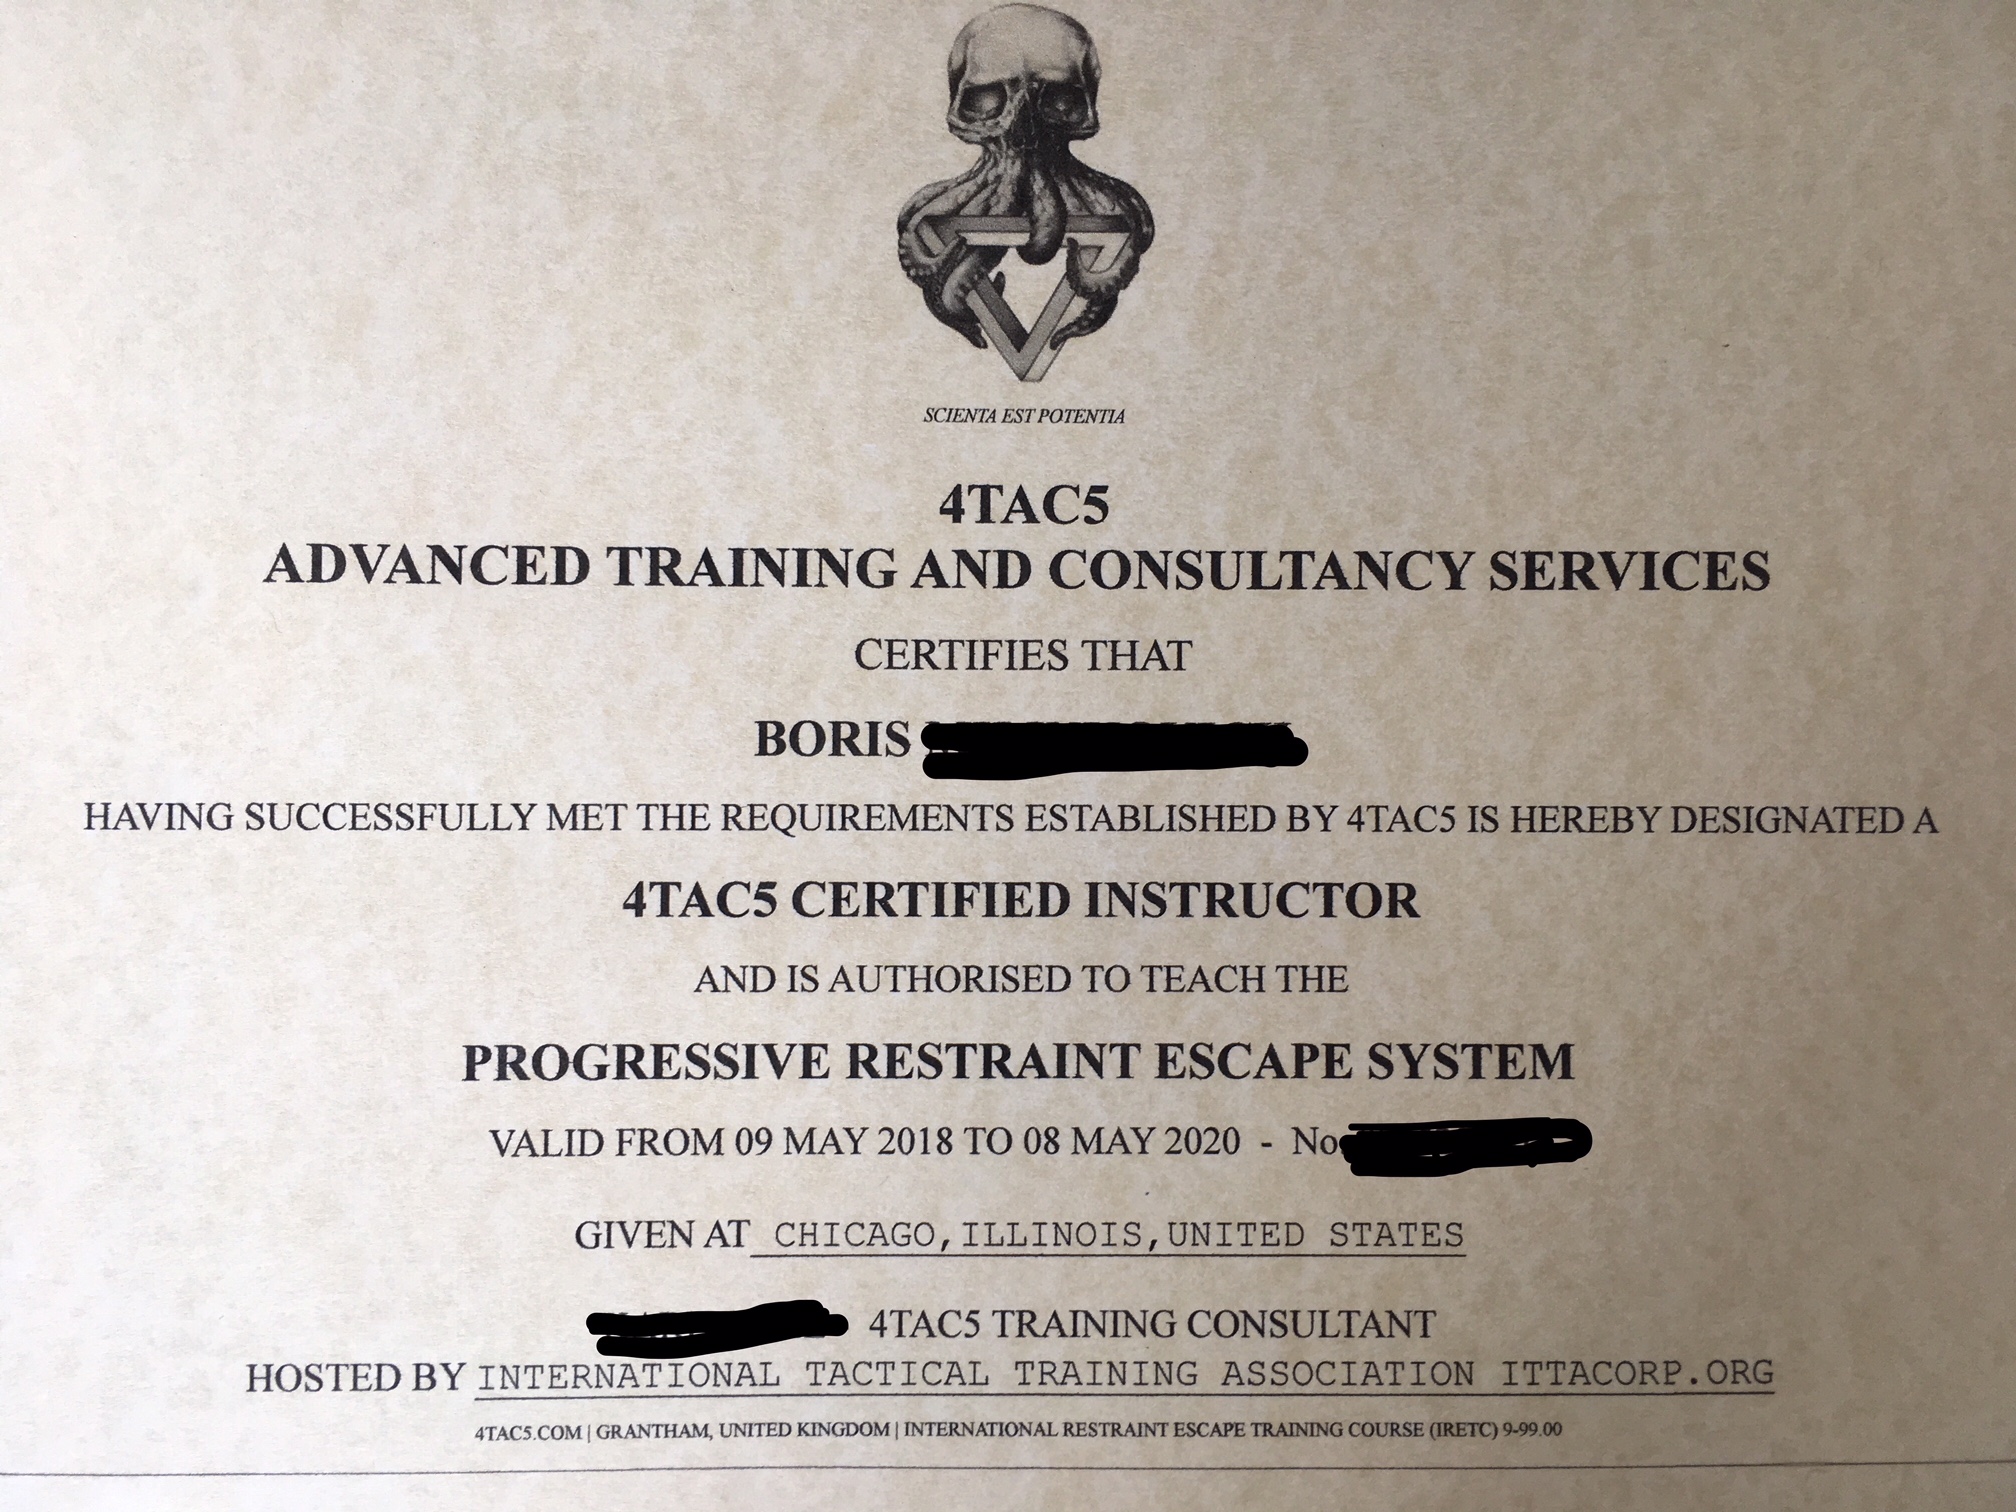
Training Review: IRETC with 4TAC5, Chicago, IL, May 2018
In May of this year (2018), I travelled to Chicago to expand my skills in the field of Counter-custody and counter-kidnapping but attending the IRETC Instructor Certification with Karl from 4TAC5.
For the longest time I had been working towards attending the counter-custody instructor certification course with 4TAC5 – IRETC (International Restraint Escape Training Course). I had tried for months to connect with them and was planning to travel to their training base in England to attend it when I was referred to Aaron Cunningham of the ITTA (International Tactical Training Association) as they were going to be hosing IRETC in Chicago. As luck would have it this made things much more convenient and less expensive.
Upon arrival I made contact with Aaron and he picked me up from the airport. I treated him to breakfast for the courtesy. As I had only had communications with him through e-mail to that point it was good to finally put a face to the name and get to know him. After breakfast, Aaron and I took a little tour around Chicago (he showed me some of the sights and gave me some background to the respective history and current situations with specific neighbourhoods we were traversing) and then we did two more circles to the airport to pick up other attendees and finally to pick up our instructor, Karl, and make our way to the training facility and our lodgings.
There were 4 of us with Karl and Aaron. A small but diverse group of LEO/MIL personnel.
***I will not speak to the identities of the others in the training as they are currently operational with their respective security services, nor will I get into specifics of the training due to it’s nature. ***
Over that first evening we all had a chance to get to know one another and discuss the upcoming week of training. Admittedly, I was very excited to get the training started and build upon my existing skills.
The next day training started and we covered a LOT of ground. The content for day 1 was vaguely as follows:
Overview of material, counter-custody principles, kidnapping & hostage survival;
Detailed review of improvised restraints and manufactured restraints;
Improvised tools against restraints;
Mindset and tactics
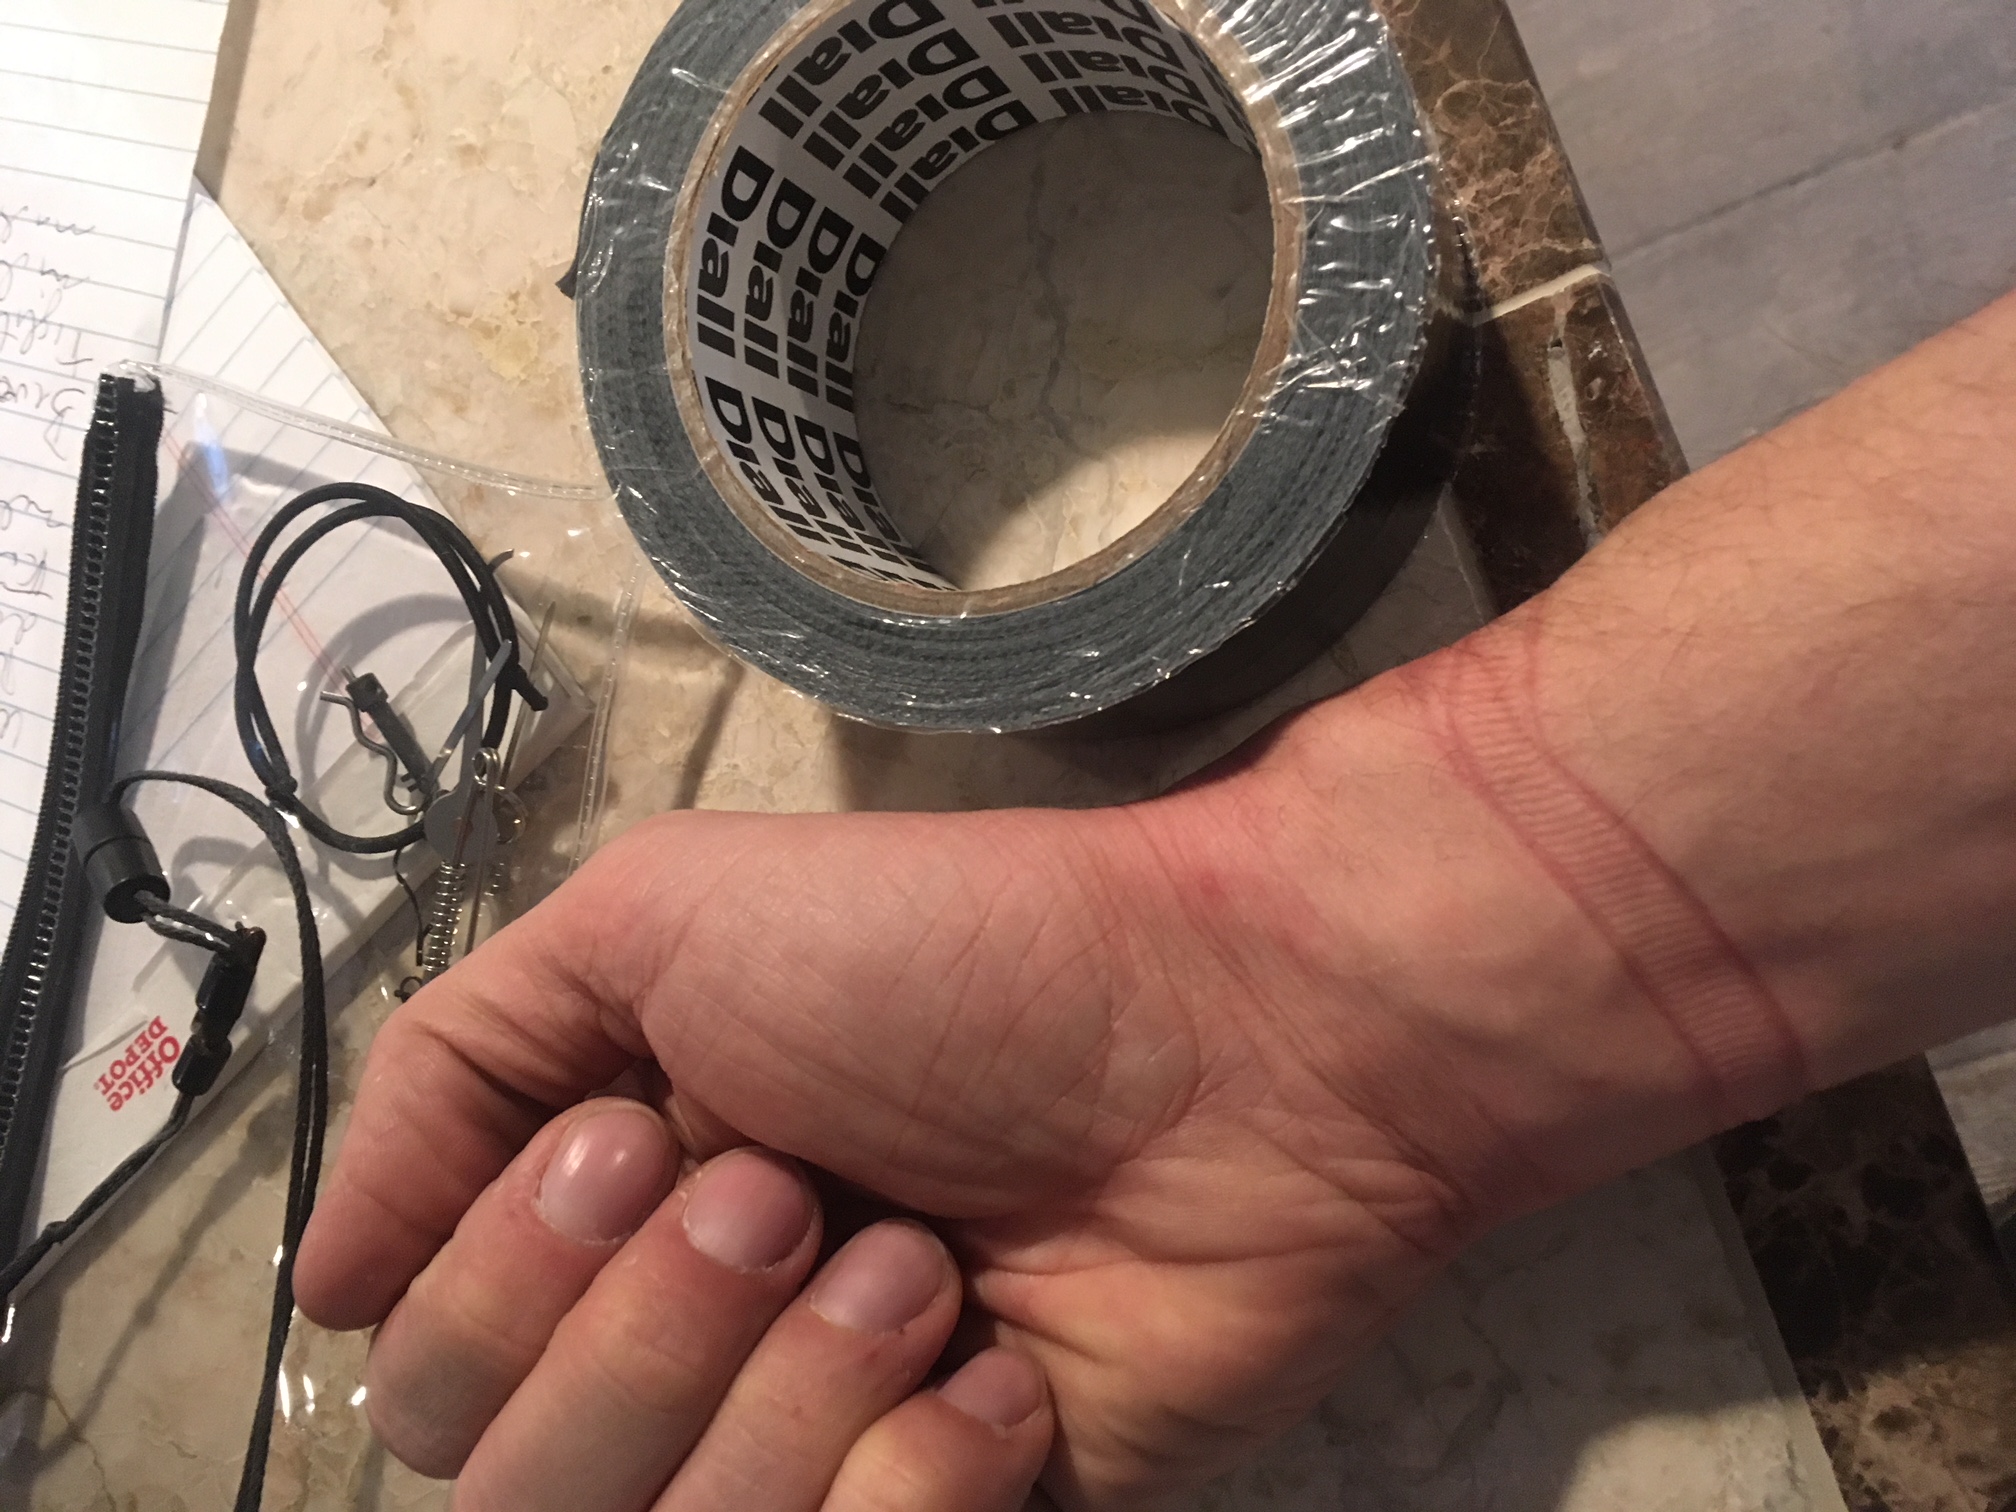
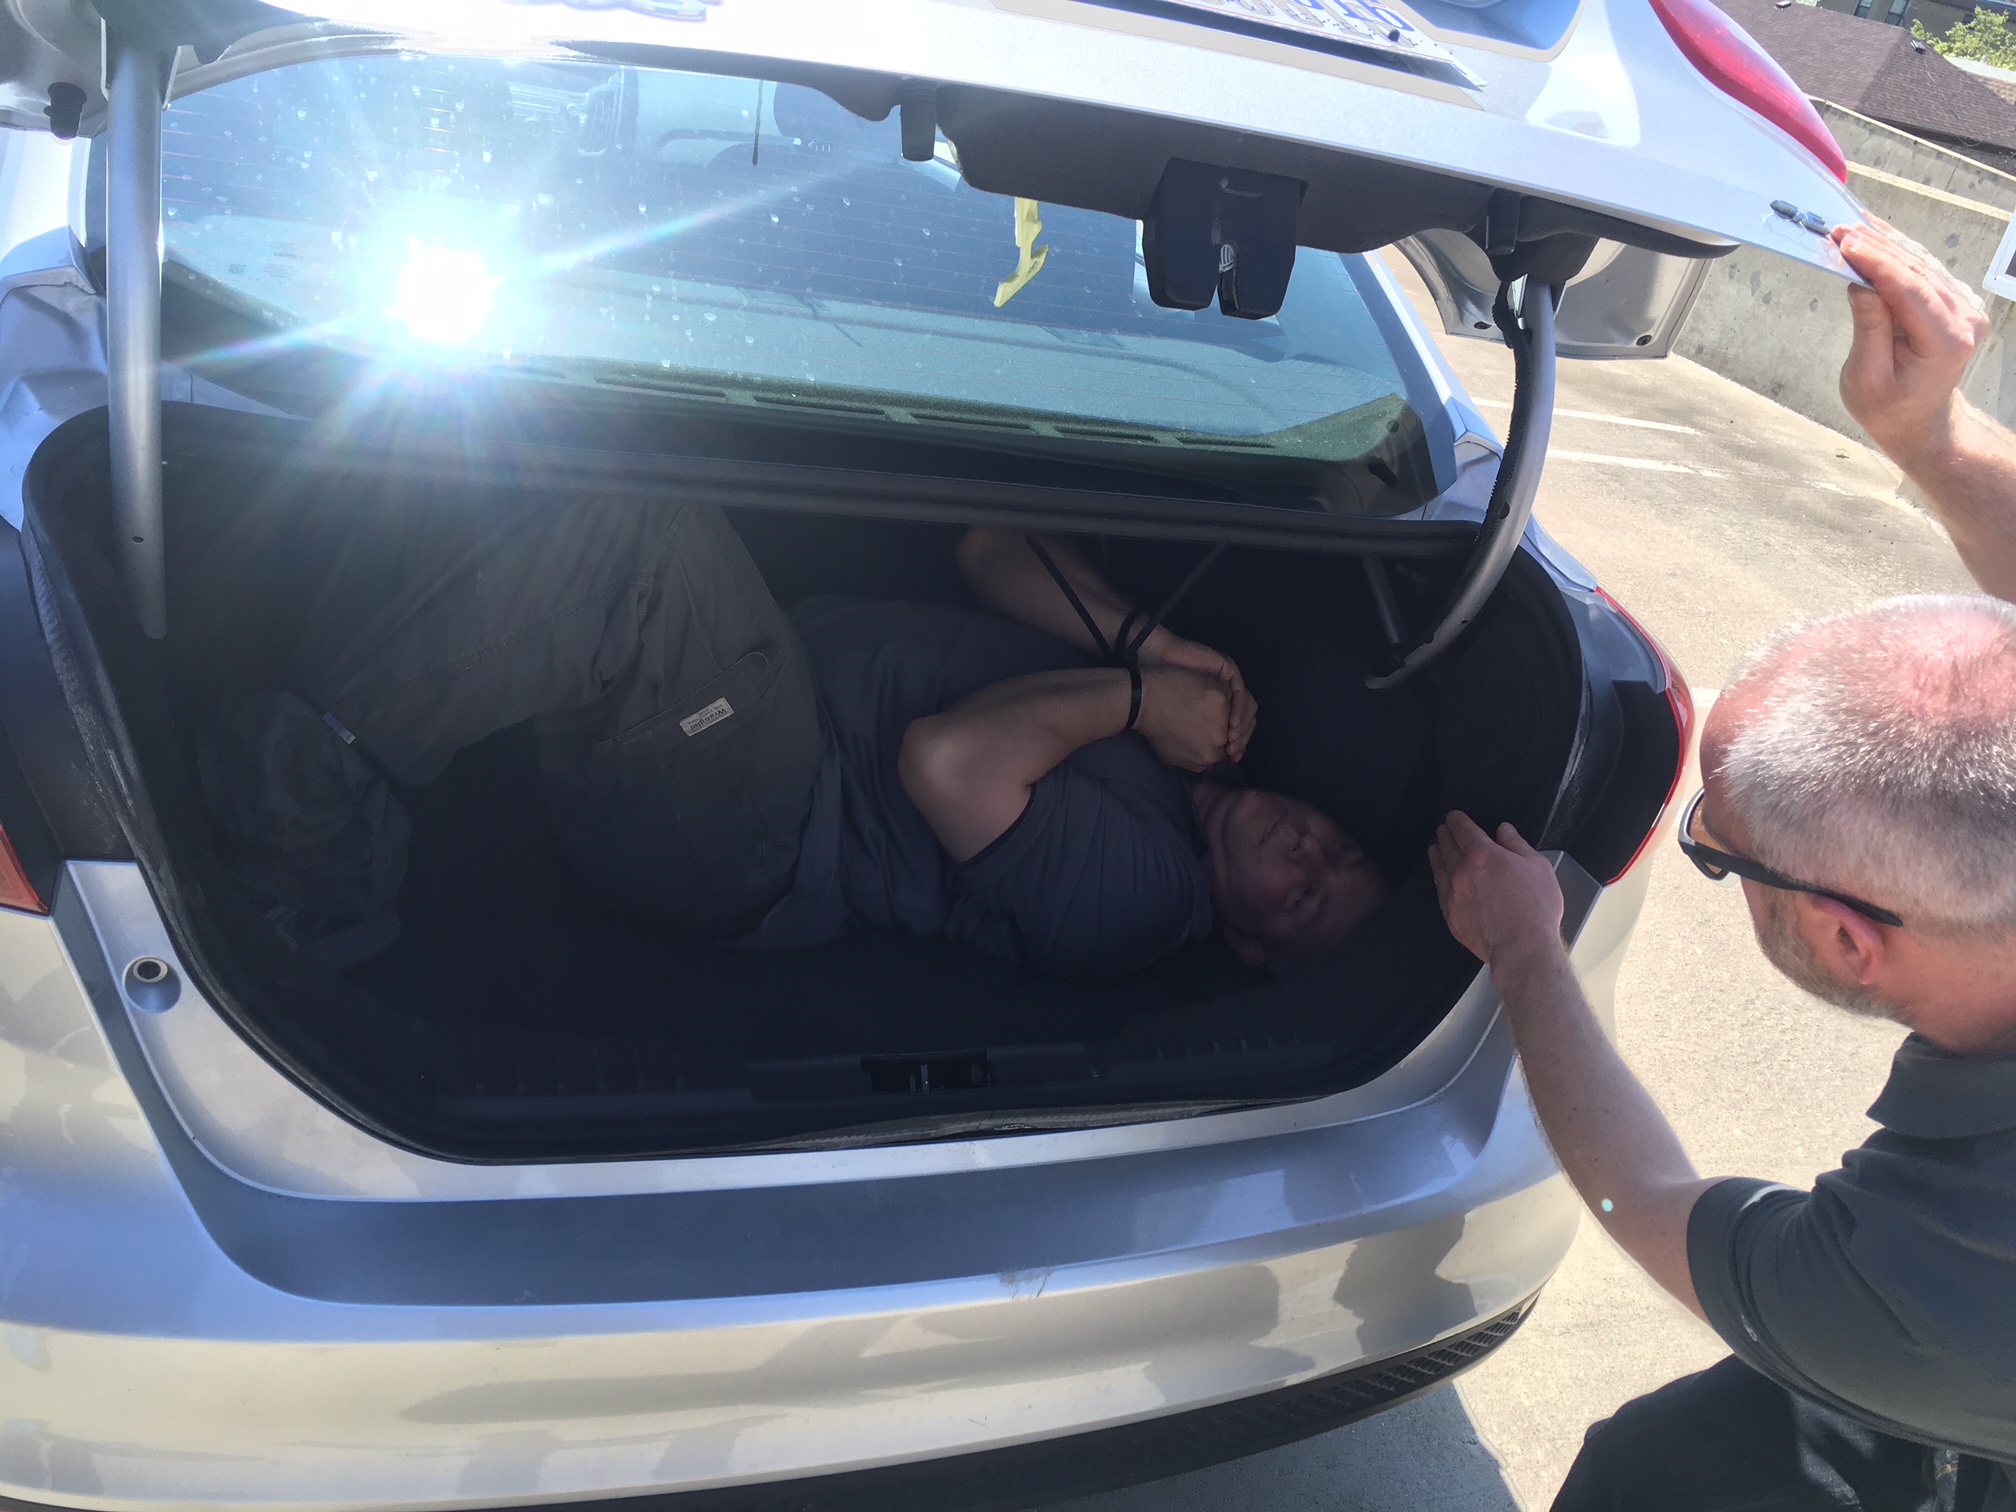
I felt as if I’d been overloaded with information and it took me a while to process what I was learning. So much amazing stuff was coming to me – efficient and effective techniques and principles to put to use immediately. My hands and wrists were smashed and raw by the end of the day but it was well worth the pain to gain the knowledge and hands-on experience in a controlled environment where mistakes can be made and learning can occur. Very helpful when you get yourself in a pickle and need someone to cut you out so you can try again.
Day 2 was much the same in so far as having a firehose of info shot my way. After a great breakfast, we got fuelled up on coffee and a recap of the previous day’s material and dove right in.
Recap Day 1;
Tools, carry, concealment and deployment;
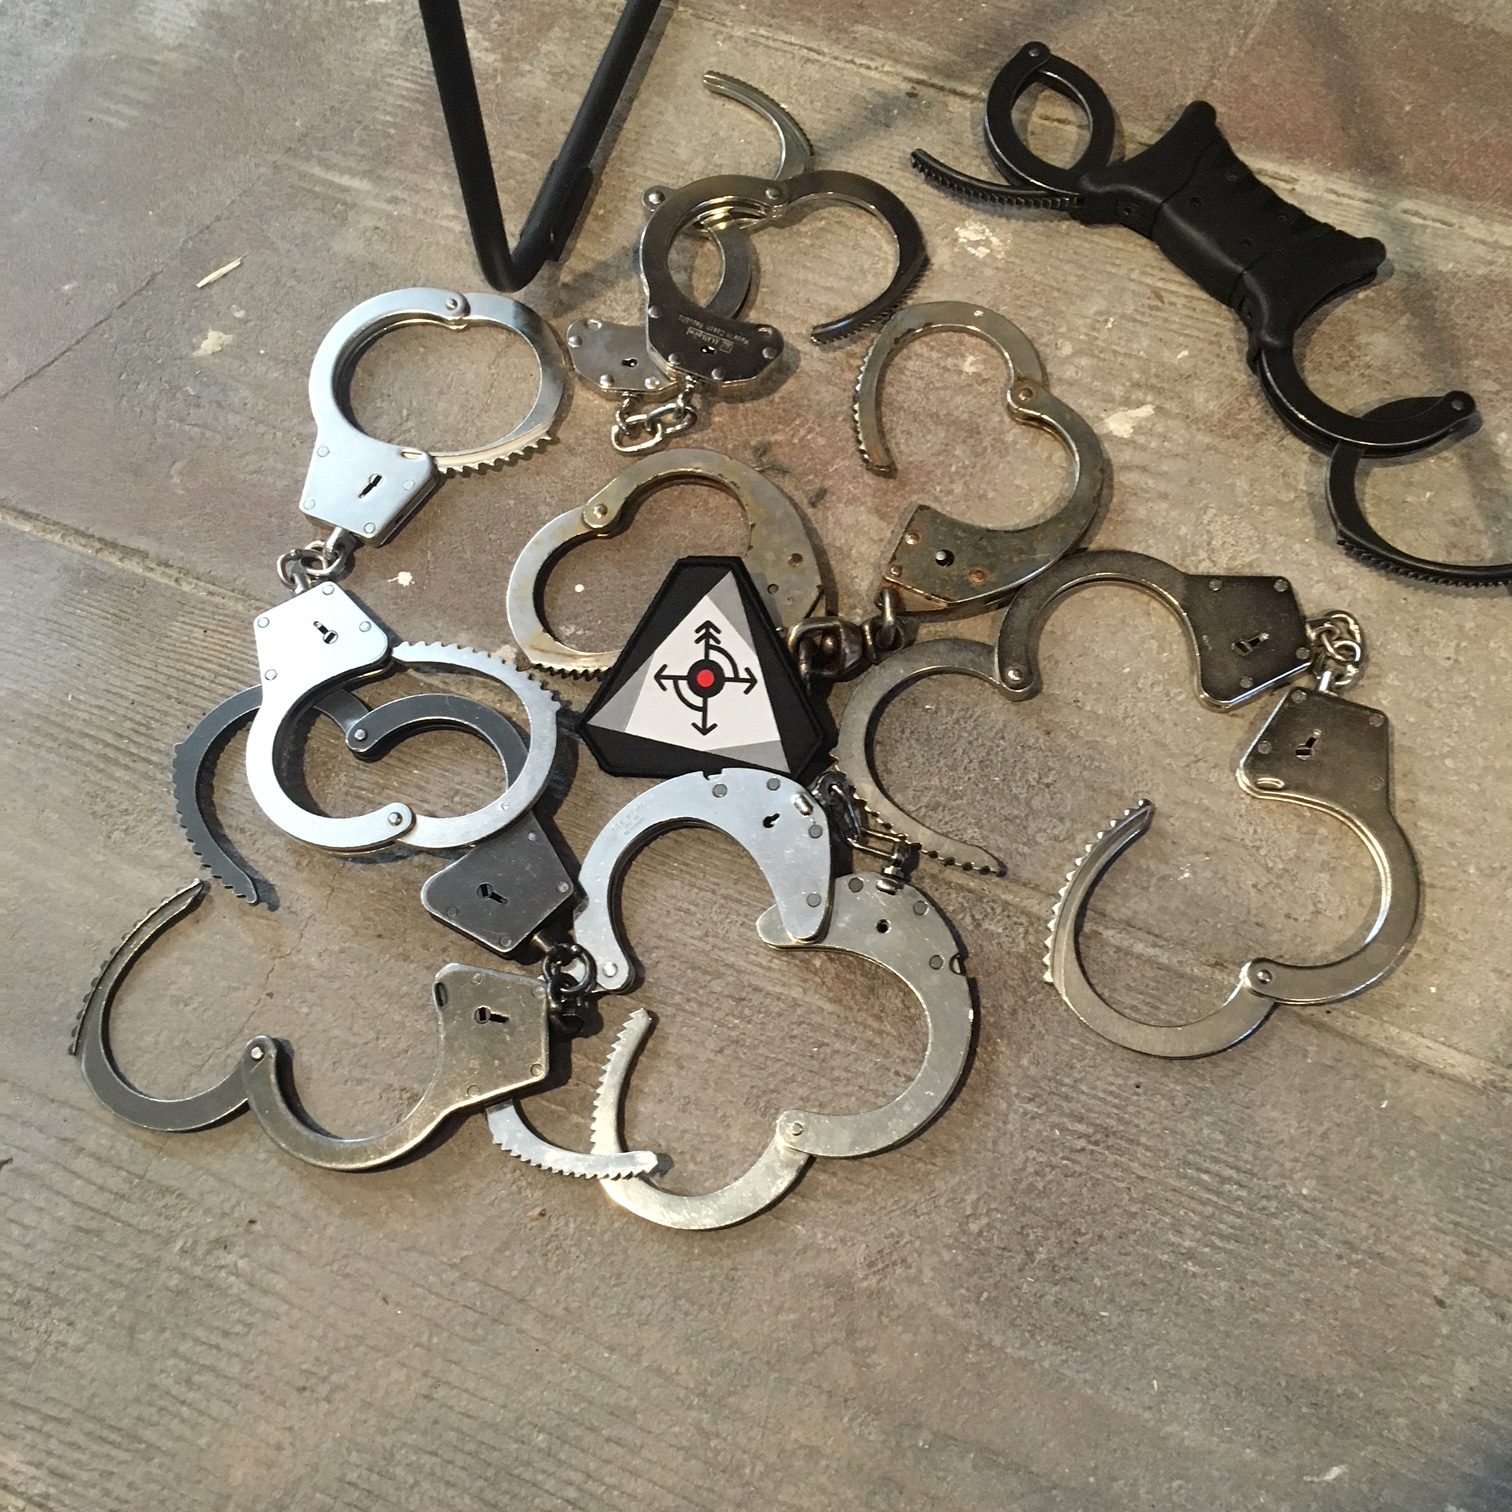
Handcuffs (various, identify, function, features)
More mindset and tactics;
Special tools (contents, function, use)
Anatomy of abduction and custody (phases, counter-intelligence, immediate actions)
Captivity & custody Exercise
Day 2 was a long day filled with more work, soreness and trial and error. However, the more exhaustively we practiced, the more confident I was with the little curve balls that were thrown our way and, with patience and focus, they could be overcome.
Day 2 dinner was another great time gelling with the group and expanding on the day’s lessons.
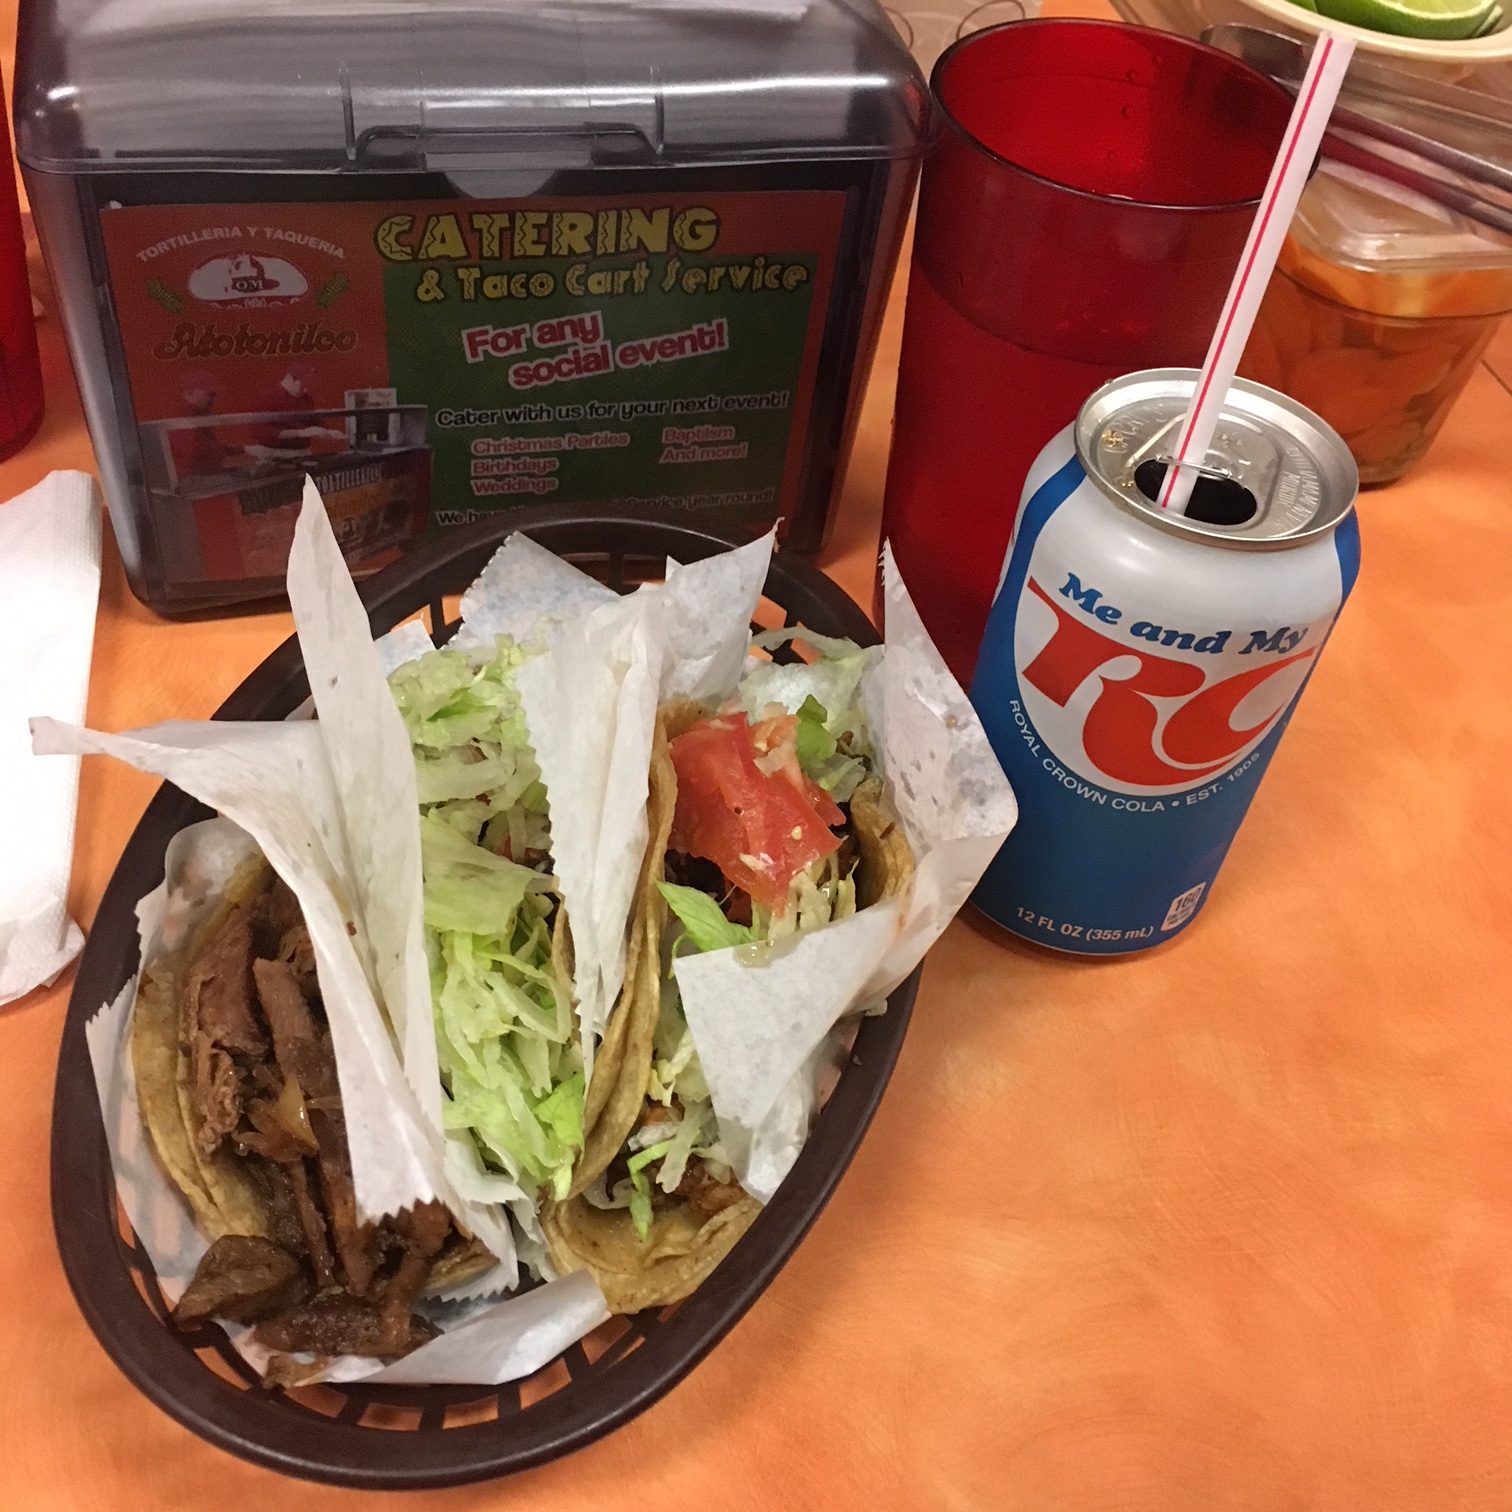
***BTW the food in Chicago was AWESOME!***
Day 3 was the Big Cahuna. Exercise after exercise after exercise, more scenarios and practice. Very involved to test our newly acquired skills and assure we’d assimilated the little tricks and remained focused on the task regardless of the negative stimulus applied. I found this culmination was a thorough test of my skills and my ability to apply them under stress and in unknown conditions.
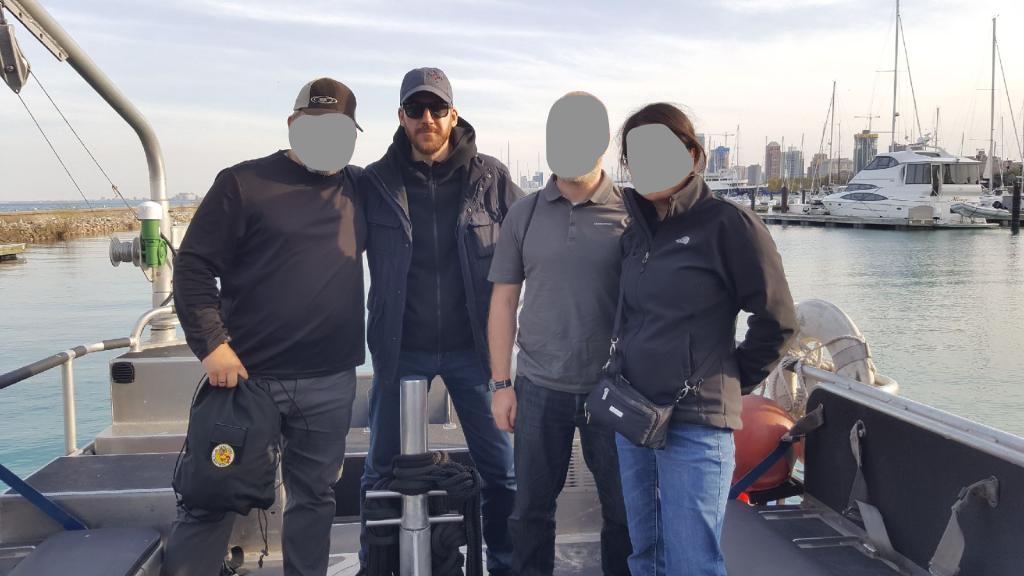
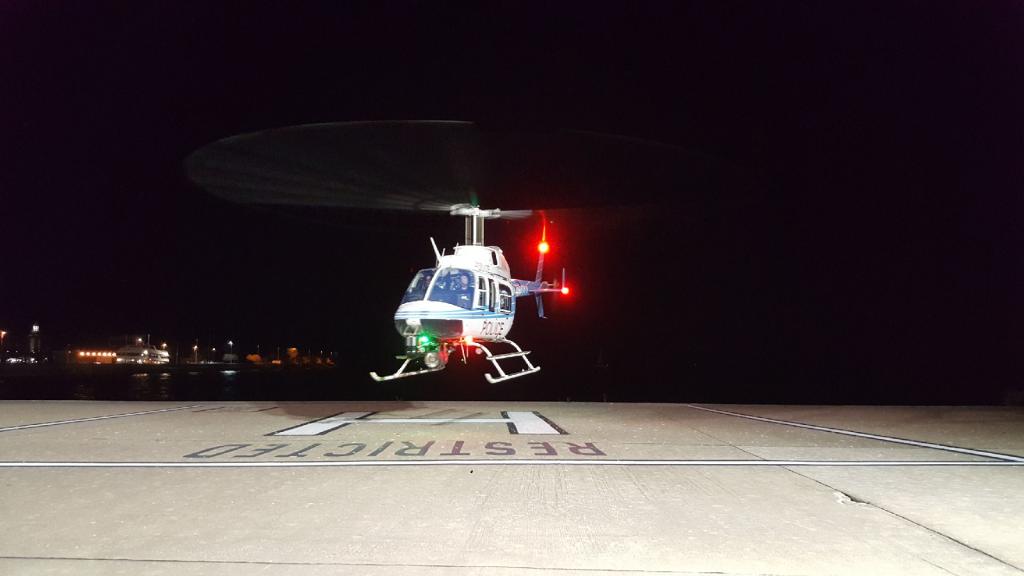
As a finale to the week, Aaron arranged a tour of the Chicago Police Marine Unit (with associated boat ride and waterfront tour) and topped it off with a ride-along with the Chicago Police Aviation Unit aboard a CPD helicopter above downtown Chicago. And, as it was Tuesday, what better dinner to have than tacos? I guess you really haven’t lived till you’ve watch a White Sox game at Wrigley Field from a police helicopter. Karl and I had a blast. What a great night.
The following day included a debrief, discussions, clean-up and certification presentations. My trip to the airport was bitter-sweet. I had made some new friends, learned and experienced some top-tier training and was leaving a very Toronto-like city (minus the 14 people who were shot while I was there).
I extend my sincerest thanks to Aaron Cunningham and the ITTA for hosting the training and for their wonderful hospitality. True professionals doing a great job.
To Karl of 4TAC5, thank you for your knowledge, patience and great sense of humour during the week.
To the Chicago Police Marine and Aviation units – thank you for your hospitality and for the amazing ride-alongs. Stay safe out there!
And to my fellow attendees, thank you for the laughs and lessons. Stay safe in your respective areas of operation and keep in touch.
For those of you who are in Canada looking for counter-custody and hostage survival training, keep your eyes peeled for our offerings for both civilians and military/law enforcement (restricted content) or contact us directly for private training solutions for your group.
For more information on mentioned training and entities, see below and feel free to contact us.