It is with great pride and excitement that we announce the release of the Second Edition, newly revised, expanded and updated with more information, more lists, photos and resources to prepare yourself for when disaster strikes.
On Tuesday, June 18th, 2019, I appeared on the CTV Morning Show in Ottawa.
I was asked to comment on the shooting incident the day previous in downtown Toronto during the celebration festivities of the Toronto Raptors’ NBA Championship win. Estimates placed the crowd sizes at 1.5-2 million. It was just huge.
Even when staying at really great digs, always remain vigilant.
There is a lot to be said about ensuring your safety and security where you hang your hat while travelling. With Summer approaching and vacations being planned, take some time to include your safety and security considerations into your trip planning.
Not everyone who goes on vacation goes with a “tactical” mindset. You don’t have to be an operator or security specialist to be vigilant of your environment, you just need to be informed and proactive. To that end, we’re adding more tips and info for you in addition to our previous travel security posts. (You can read them through the links at the bottom of this article.)
Prior to your travel, procure some local maps (if you’re a member of CAA they give them to you as part of your membership, or use Google Maps and print them off) and learn the location of your accommodations in relation to local hospitals, police/fire/ems/military stations, friendly embassies/consulates, transit routes, banks.
Get yourself a transit map and ask/research how to use the local public transit (cash, tokens, PRESTO card, etc.) Find out if you can purchase them at the front desk upon arrival. If you do find yourself using public transit, sit yourself in a position so that you can see the driver/conductor and they can see you.
Do your research. Read the local news and weather reports (you can use Google Translate or an extension on Chrome and translate the entire page) to get a feel for where you will be. This allows you to make informed decisions on travel plans. Don’t forget to check for travel advisories on the Government of Canada site here and the Department of State site here.
Learn a few words in the local language where you’ll be. It can help you get what you want/need, understand what locals may be saying about you and can aid in making you seem less like an “ignorant tourist” to the locals because at least you’re trying to fit in. Simple words like “please”, “thank you”, “excuse me”, “bathroom/wc”, “how much?” and “do you speak English? (French, Spanish, Croatian)” can be very helpful.
Part of my Every Day Carry (EDC)
Pack and carry appropriate emergency supplies. Anything you can’t take with you on a plane should be sourced locally as soon as possible upon arrival. You can identify locations (drug and hardware stores, department stores) prior to arrival or from hotel staff.
Always have multiple methods of payment available to you, as well as emergency back-ups. Example, if travelling to, let’s say, Italy, consider the following:
Credit Cards (VISA and Master Card preferred over others);
Debit card (PLUS or CIRRUS network-enabled);
Euros (local currency, primary);
Euros (local currency, emergency reserve);
US Dollars (readily accepted worldwide, emergency back-up cash);
Mini gold bars (very optional, but may be worth a look depending on where you’re travelling to or through).
Remember: CASH IS KING – but if you lose it, you’re screwed.
At your accommodations:
Take pictures of everything that you may need reminding of – hotel address, parking spot, taxi/Über driver ID, street signs or intersections, pictures of your credit cards (front & back), travel documents and travel itineraries.
Ask the front desk if they have dedicated security. If so, ask about the local areas to avoid. If you’re in more private accommodations (like an Air BnB) ask your host about safety concerns in the area.
If your room has an adjoining or connecting door, ensure that they are locked and that you have some method of securing it or enabling an early-warning alarm. (Remember, locks only keep honest people honest.)
Use your Do Not Disturb sign and deadbolt at all times when in your room and don’t answer the door for unanticipated visitors.
Employ a secondary method of securing your door, such as a door wedge, the “fork method” (view an example HERE), or a door wedge alarm. *NOTE: don’t secure the door in such a way as to prevent your escape in the dark in case of fire or other emergency.*
Use a single garbage bag in your room to collect all your refuse from your trip. This will help control your “information footprint”. A lot can be gleaned about you from your trash. In some countries, the information left in your room is used by criminal elements to target tourists for victimization. Be sure to dispose of your trash at a different location to minimize your exposure. If you have a rental car, sleep as close to it with your keys near you. In an emergency, you may be able to activate the alarm on the car to draw attention. (Thanks to Ed Calderon of @edsmanifesto for the tips. https://edsmanifesto.com)
It is now, before you set out into the world, to learn the necessary skills to keep you and your loved ones safe. Learn first aid, combatives, survival skills (including restraint escape, urban evasion and lock picking) to give yourself the best chance of surviving hostile situations.
Wherever you go, stay vigilant, be respectful to all but maintain awareness, stay crafty and always have an escape plan.
Review of the KIHD Stove: Collapsible, Compact, Capable & Canadian.
The KIHD Stove is a small and sturdy collapsible stick stove from KIHD Products.
It was designed and is manufactured here in Canada.
I picked up a KIHD Stove Deluxe courtesy of Ingo from KIHD. I took it home and gave it a go both inside and outside. My approach was to try the stove out as if it were put to use during a power outage in the city. Though it was designed primarily as a backpacking and paddling stove, I was drawn to the KIHD for its low-profile and versatility across environments.
The KIHD Stove comes in a nice cotton carry bag. It’s small and flat and comes with easy to understand instructions. It is easily assembled and tight once the base retaining piece is secured. Though small, it is very sturdy and easily put together and taken down, even with gloves.
The KIHD Stove in it’s retail packaging, a nice cotton pouch (Full-size Bic Lighter for size comparison).
Included instructions are simple, clear and easy to follow.
The KIHD Stove pieces all laid-out.
To give a you an idea as to the stove’s particulars, here they are from the KIHD website:
“For settings where wood is plentiful and burning it will not cause damage to fragile ecosystems, this wood burning stove allows you to travel without carrying fuel and it packs down to the size of a pancake.
The individual stainless steel panels easily fit into place during setup and the unique locking mechanism lock it together. The low square design focuses heat upward, directing it to the pot for quick, efficient cooking.
Made of 316 stainless steel, a material that withstands long-term heat without damage.
Designed for pots no larger than 1.5L.
Removable access door can be inserted or removed for air-control and for refuelling.
Extra set of cross strap as to be able to use gel or ethanol pods
Assembled dimensions are11.0 x 11.0 x 12 cm carrying case.
KIHD stove assembled.
Top-down view of the assembled KIHD Stove.
Technical Specifications
Made with 18 gauge stainless steel
Weight: 1.41 Lbs (640g)
Load capacity is 250 Lbs (115 Kg)
Packed size is 11 x 11 x 12 cm
Carrying case included.
Made in Canada”
So yeah, very solidly built. The stove is easily set up and disassembled. The steel used is very sturdy which tends to add to weight, however KIHD offers a titanium stove option (The KIHD Stove Ultimate) if that is a point of consideration for you.
So, on to the results.
Outside, on the ice while snowing, I took the KIHD out and, after a bit of adjustment, got it going enough to boil a litre of water. I used less-than-ideal fuel but the stove performed admirably in an outdoors/camping environment. The water was at a rolling boil quickly and made hot chocolate without a problem.
In the snow, ready to go!
And we’re off!
We even gave the toaster accessory a run and, surprisingly, the little guy manages to toast 2 pieces of bread easily and without making it all sooty.
And we have boiling water! Hot Chocolate-time!
Who want’s toast?
Toasty and tasty.
*NOTE: Though the KIHD Stove is capable of accepting small fuel pods (such as chafing dish heaters and other similar fuel-gel-based pods, I did not use these in this series of tests. I would recommend that if you live in a condo or townhouse, consider keeping a few of these fuel sources in your cupboard as an emergency cooking and heat source. Always ensure adequate ventilation and fire control protocols.***
When I transitioned inside the next day, simulating what it would be like to use it in my fireplace without power, the KIHD again performed very well. Because I was indoors, it was easier to get the stove going. Using only a few small sticks I got a litre of water boiling very quickly and could have used it for food or drink no problem. It made very little smoke yet produced a significant amount of heat and flame for the amount of fuel used.
Indoors, no power.
Overall, I was very impressed with the performance of the KIHD Stove inside. If you were to use this stove to heat you during a power outage, I would recommend doing so in a fireplace (if you have one), or MacGyvering the stove onto a heat-resistant surface and non-flammable base with adequate ventilation. You could also fashion a heat reflector from some aluminium foil in your kitchen to redirect the heat back into your living space.
Got it going!
Rolling boil in no time at all!
My biggest challenge with the KIHD Stove was one that plagues me with all my caping equipment – the cleanup. Though the KIHD stove is nicely designed with holes at the bottom for air circulation and ash removal, when it’s all done there’s a lot of soot and burn marks on the steel. This can come off with steel wool and soap, but I always find it a challenge, especially with the smaller pieces. That said, it’s a minor issue and does not affect the performance of the stove in any way.
Ash baked-on.
Nothing a scrub with steel wool won’t fix.
I would easily and readily recommend the KIHD Stove to anyone looking into this kind of low-profile, easily-transportable, sturdy and versatile product for their camping or emergency back-up needs. For the price, it’s very much worth the quality you’re getting as well as supporting a Canadian small business.
The KIHD Stove.
KIHD Products are available through their website, at their store front in Oakville, or at any of their retail partners listed on the website.
Have you ever felt afraid or threatened while walking alone at night? When out and accosted by some creep? When travelling in unfamiliar places? Felt something was ‘wrong’ in your gut but didn’t know what to do about it? Want to learn how to get out of handcuffs and other restraints?
Learn to understand your instinctive fears and use them effectively through understanding and awareness. Decrease and control your fear while maintaining awareness of threats and dangers, implementing personal security and risk management strategies and security tradecraft while building confidence in your abilities through training and learning.
Designed and developed to give you an advanced working knowledge of skills and principles which can be used immediately.
This class is exclusively for women only as it is tailored to providing a safe and positive environment for learning while highlighting women’s-specific issues with regards to personal security and safety.
Our goal is to arm you with knowledge and skills while empowering you to take control and responsibility for your own safety and security.
Topics covered include:
Situational Awareness (SA)
Survival Mindset
Social & behavioural analysis
Security risk management
Hostile surveillance awareness
Violence dynamics
Kidnapping and abduction awareness
Unlawful custody – methods and motivations
Introduction to common restraint escapes and counter-custody (theory & practice)
Every Day Carry (EDC) recommendations
Personal protection principles & improvised weapons
Ambush response and immediate actions to attack
Travel security
Home security
No other self-defence class in Canada will prepare you to avoid violent encounters and give you the skills to facilitate escape from unlawful custody or personal security threats at home or on the road.
You can contact us directly to book a 1 or 2 day workshop for your group (Varied formats depending on length of workshop and group requirements).
On March 30 & 31, 2019, True North Tradecraft, joined by Ace from Delta2Alpha, will be delivering a Personal Security & Combatives workshop in Toronto.
You will have the chance to learn, practice, and be coached through escape from some restraints commonly used in unlawful confinement; your success is guaranteed.
*pre-manufactured and improvised options will be covered*
Delta2Alpha will take you through a systematic approach to dealing with the common ranges where most fights are won or lost. Through a unique objective-focused method you will learn:
How to work in your existing skillset;
Earn your deployments;
Rapidly neutralize your immediate threat.
Come and learn how to find the calm in the storm, and what it takes to win…when the only way out…is through.
Designed as a fast paced, practical approach to get you started on your personal security plan.
EARLY BIRD PRICE: $250 CAD per person
SUPER-DEAL: $225 CAD per person for groups of two or more *Contact us at [email protected]*
Prepare yourself for the unknowns in the world with this next-generation training.
***Note: When you purchase this item, you will receive a joining instruction sheet for download listing the location & directions, schedule timings, contact information and a list of essential and supportive gear to bring.***
Are you ready for 2019? Make sure you are by picking up the The True North Tradecraft Disaster Preparedness Guide: A Primer on Urban and Suburban Disaster Preparedness.
PDF AVAILABLE THROUGH OUR STORE HERE Paperback and Ebook available worldwide through Amazon.
Over the past long while, we have been working on a guide for urban & suburban disaster preparedness. This book is meant to be an accessible planning and development blueprint for those wishing to establish and maintain a reasonable level of preparedness to be resilient in the face of a natural or man-made disaster.
It outlines the basics of survival and preparedness in an urban & suburban context. This gives you a foundation to create your own preparedness plan and build emergency readiness kits. For instance, have your plans and supplies in place before something happens.
Many to whom I have spoken about preparedness are uneasy about starting, stating their biggest challenge was not knowing where to start. Most importantly, this book gives the beginner (as well as the seasoned planner), a solid foundation on which to build.
This guide covers:
Disaster Planning
Preparedness Psychology
Priorities and Strategy
Water
Shelter
Fire, Heating & Cooking
Food
Medical & First Aid
Health, Santitation & Hygiene
Communications
Light, Electricity & Backups
Special Considerations
Recommendations
and so much MORE!
It is also specific in two contexts:
It does NOT get into wilderness survival (as this is a topic all it’s own) and;
It is written from a Canadian legal perspective.
This is our humble first edition to offer the tools of knowledge necessary for those who wish to prepare themselves and their families for future challenges, but don’t know where to start. It also contains tidbits which should be useful to even seasoned veterans in preparedness.
When you fail to plan you plan to fail…don’t let not knowing stop you. Get started today to be ready for tomorrow.
I would like to thank everyone who has read the blog, followed us on social media, attended training and been a positive voice through 2018 for all of your support. It has been a roller-coaster year of challenges, goal (missed and achieved), milestones and grit.
We have been fortunate to have made new friends, opened new doors and completed goals that have been many years in the making.
As we leave 2018 behind with all of those memories and lessons, we look forward to the possibilities which lie ahead in 2019. Stay tuned…many good things to come.
The new True North Tradecraft Store is open for business. We are the exclusive Canadian stockists for Tactikey, OscarDelta and Hard Case Survival. Visit the Blog and click the Store button up top or go direct.
Also, check out our new Friends Page listing mutually-supportive companies.
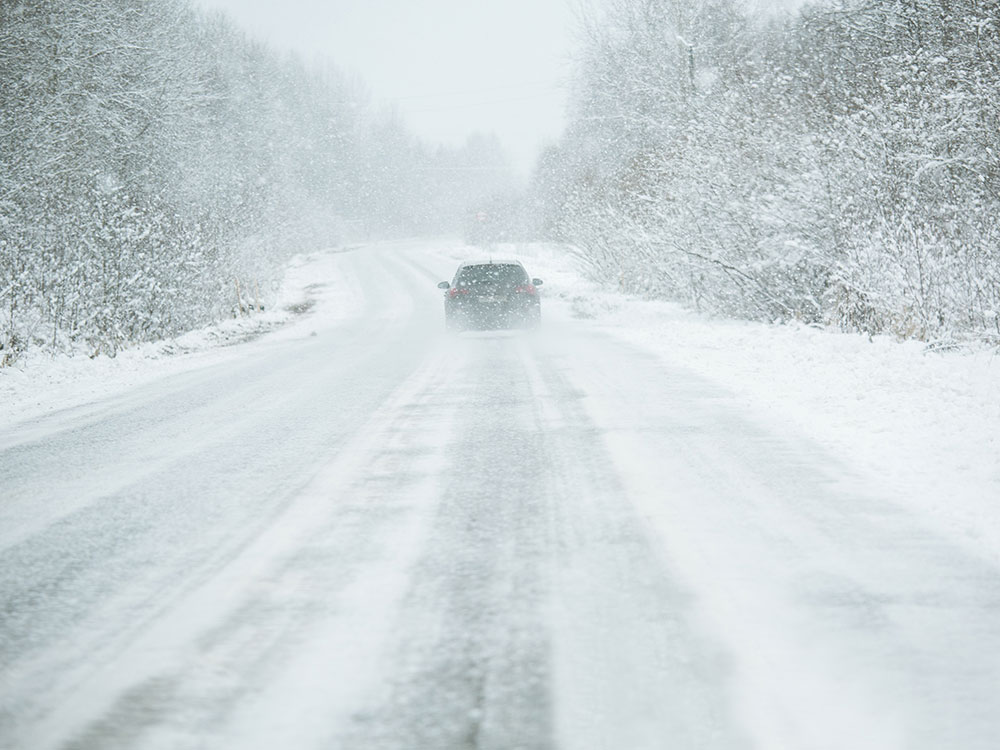
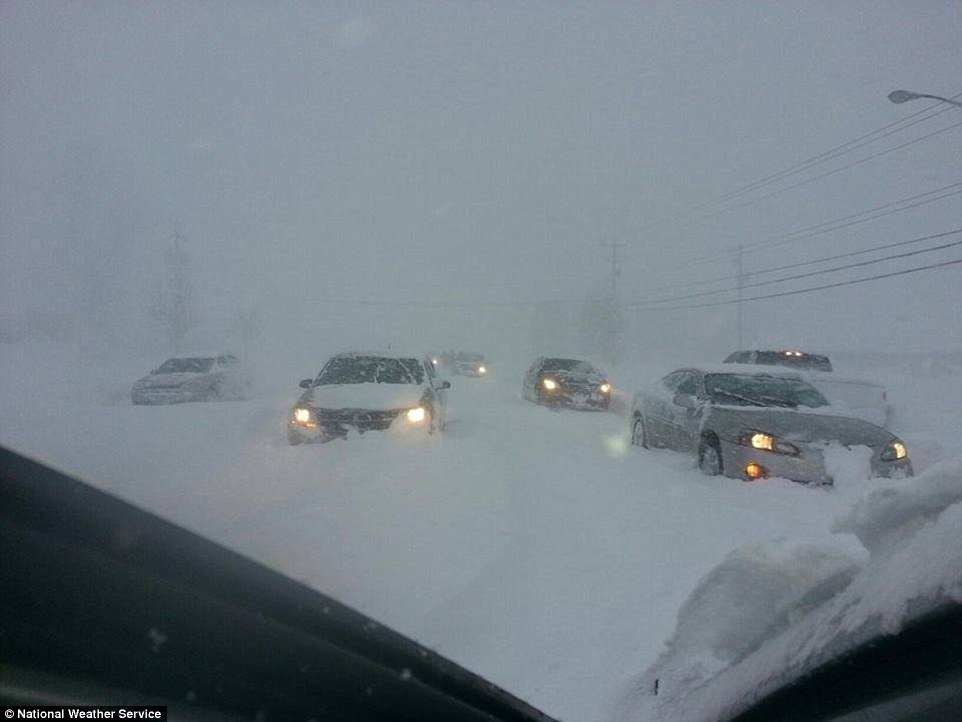
As we make our way through the last weeks of Fall and approach Winter, it’s time to do our twice-a-year vehicle change-over. For those of us who live in areas where snow and extreme cold are realities, being prepared for weather-related challenges is a wise investment.
As extreme and inclement weather, coupled with low temperatures, can negatively affect driving conditions, sometimes without warning. This time of year (approaching Christmas and New Year’s) sees us travelling to visit our friends and family, attending parties and generally spending more time on the roads. Roads that can sometimes go to hell real fast.
Be sure to get plenty of rest prior to a long road journey, stay hydrated and nourished and for the love of all that is holy, do NOT drive while impaired.
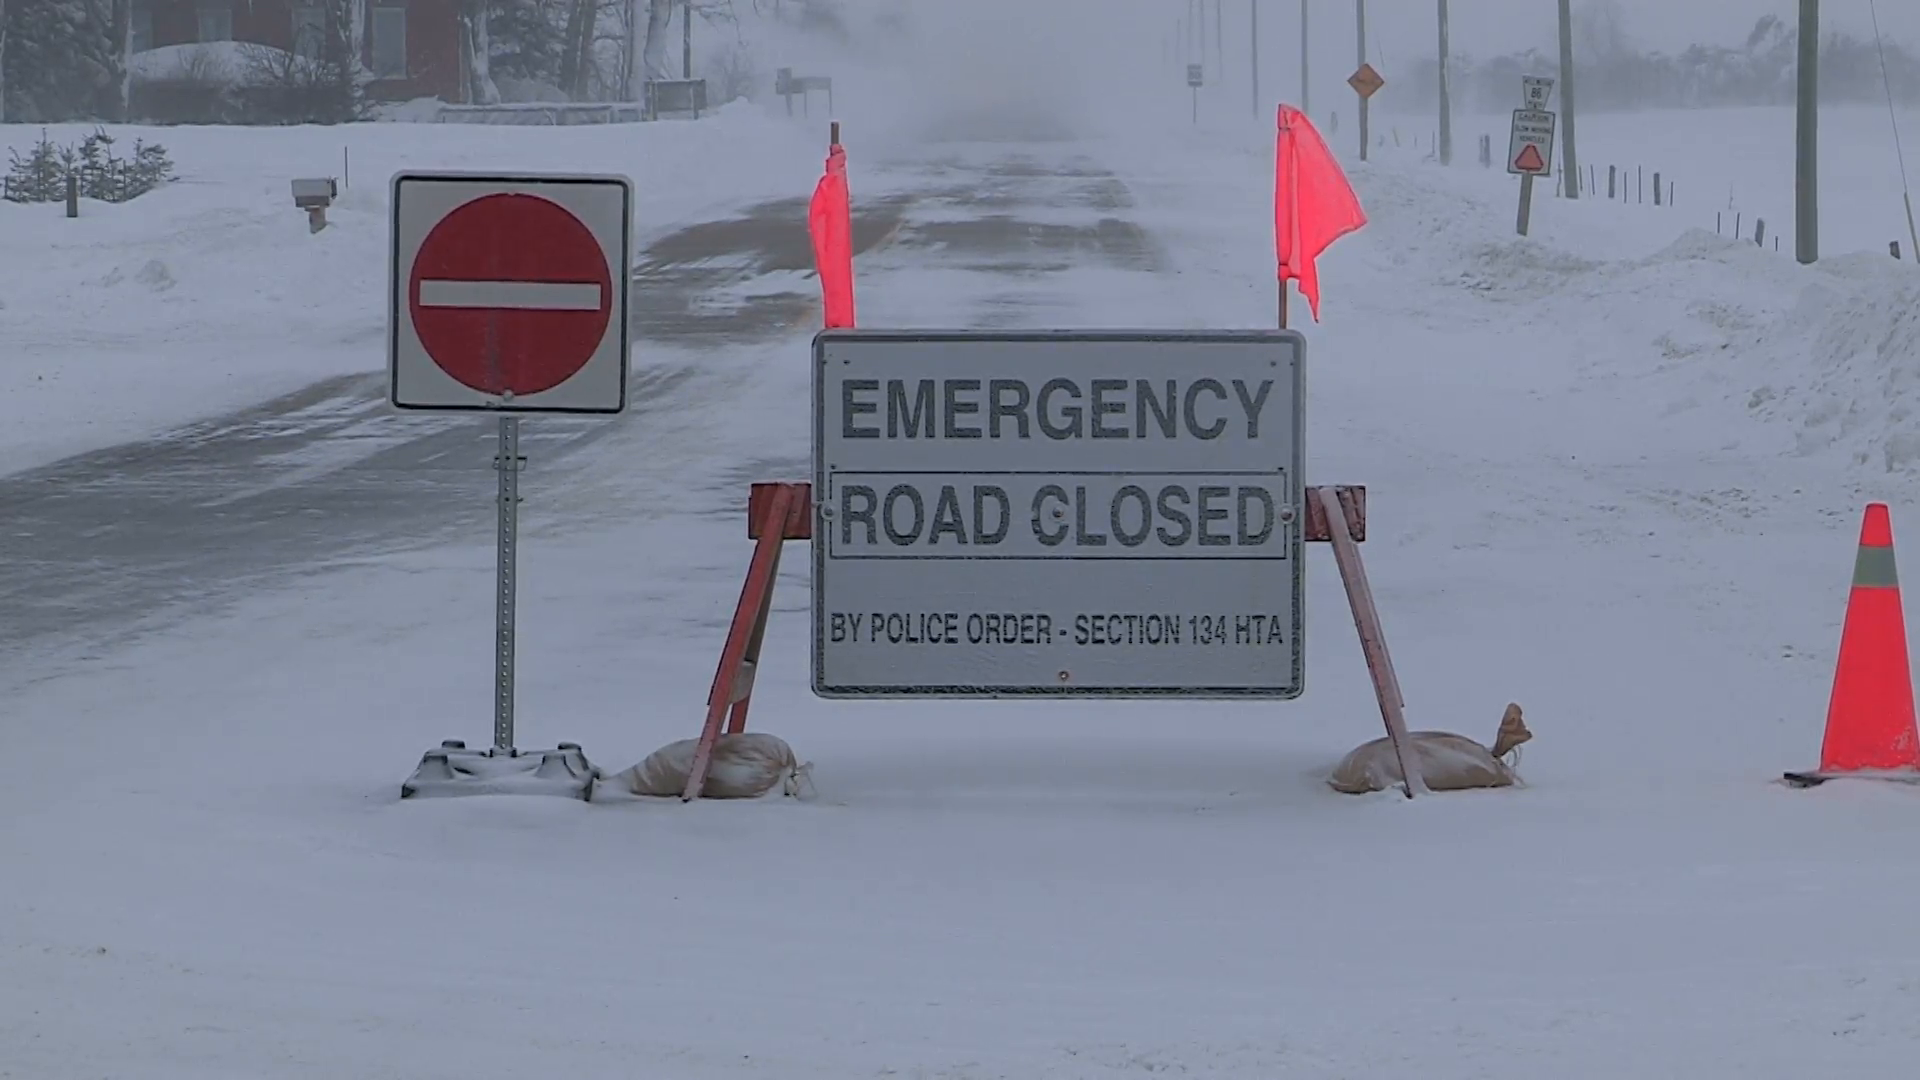
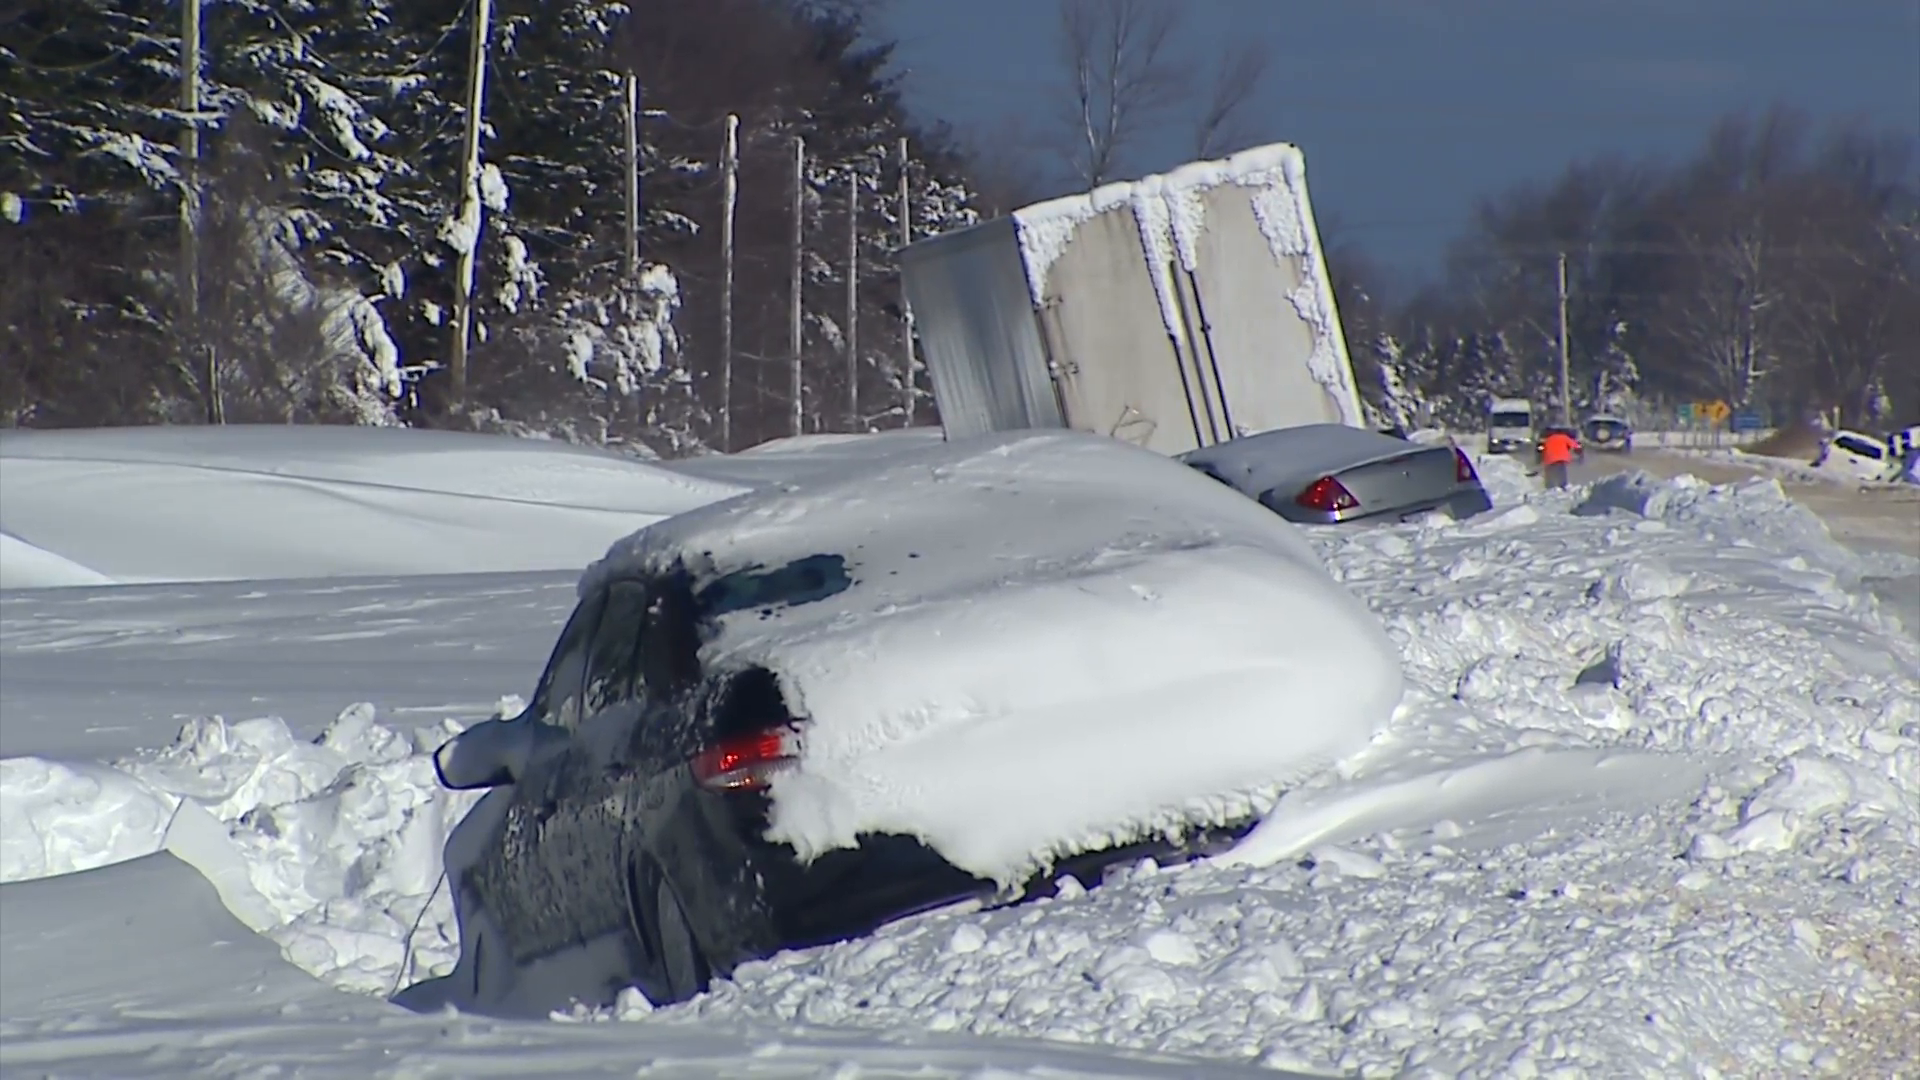
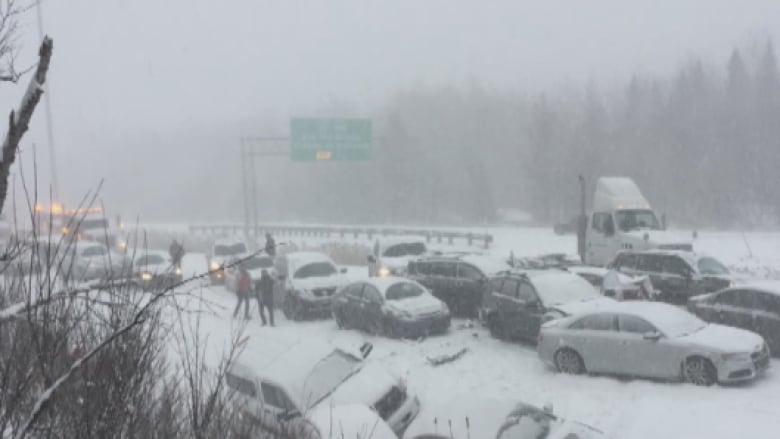
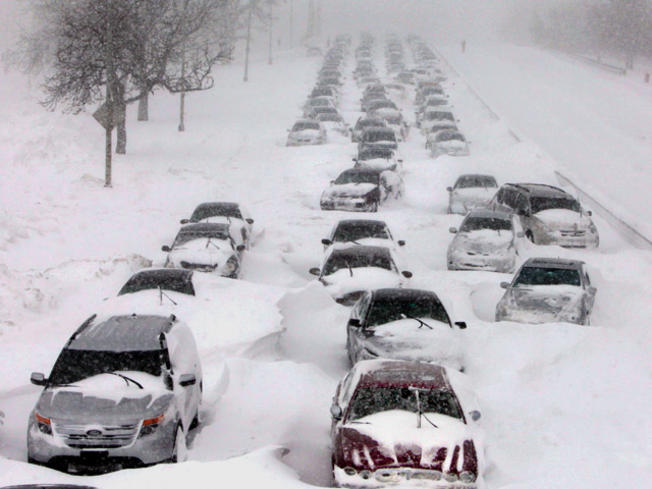
Winter weather brings with it snow storms, white-outs, icy roads (including black ice), freezing rain, traffic jams and accidents, breakdowns and more. A few well-focused steps and some essential equipment can mean the difference between a minor inconvenience, extreme discomfort or (in extreme cases) death. (Read a news article about a very unfortunate situation like this here.)
As the extreme cold and weather can hasten death under less-than-ideal circumstances, we look to some basic Survival Priorities to ensure a better chance of survivability. These principles include:
Shelter
Fire
Water
Signalling & Communication
Food
Security
*NOTE: These principles and their order of priority can and will change depending on your immediate circumstances. However, I have put them in this order at this time as a general theme and to illustrate their importance. The rationale is that, if you find yourself in a blizzard, shelter is paramount as you’ll freeze before the other considerations even enter into the equation. Then fire for warmth inside the shelter (car), and then water to keep your body functions going. Signalling for help would be next (flares, chemical lights, using a cell phone or radio) followed by food and security.***
Seasonal tires and Service. If you live in an area prone to winter weather, get snow tires, the best you can afford. Sure, you’ll have to switch between your All-Seasons and Winters, but well worth it for the better traction on snow and ice in colder temperatures. Also, be sure to get your car serviced at the same time to ensure maximum reliability through the winter. Have them check your battery, fluids, belts, lights, anti-freeze, windshield washer fluid (the -40 deg C kind) and the rest.
Don’t Run Dry. If heading out of the city or for a longer drive, don’t let your car’s gas tank drop below half-tank on your journey. Stop frequently, top-off your gas tank and stretch. It also helps fight fatigue and gives you the opportunity to get food and drink regularly.
Power-Up! Ensure you have a DC plug (cigarette plug) USB charger and charging cables for all your cell phones/devices. If there are more people in the car on your journey, run cables to as many phones as you can and charge them while driving, thus ensuring a full battery on as many devices as possible and a better chance for contacting help if needed.
Your Spare. If your car allows it, get a full-size spare tire and an appropriate tool kit. It should include a wrench for the lug nuts, a jack, nut lock tool (if your car has them), a small can of WD40 or similar, a small bottle of de-icer, block of wood for under the jack and a pair of warm work gloves. If you get a flat, you should know how to change it quickly and safely. Practice it in good weather so you know how to use all the tools and that the spare is in good repair.
Get a Grip. Stock a small shovel or entrenching tool and a bag of sand/gravel/cat litter to dig a wheel out of an icy patch and sprinkle the bag of sand under the tires to aid in the wheels gripping better. If your jurisdiction allows for chains, consider adding these to your kit and ensure you know how to put them on.
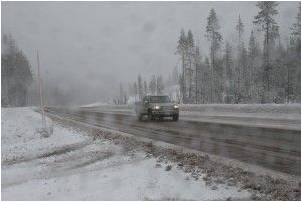
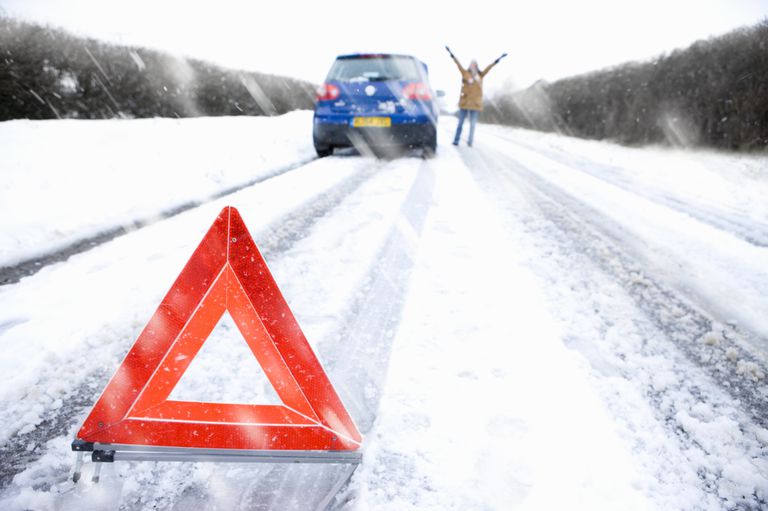
Be Seen. Carry emergency triangles, at a minimum, and consider a few road flares or an electronic LED road flare to increase your visibility to other motorists. If the visibility is low, the likelihood of people seeing you and stopping is low. By the same token, if they can’t see you, you may be struck by other vehicles in the dark. In these situations, visibility is your friend.
Keep In Touch. If you’re travelling longer distances, communicate with your hosts and let them know when you’re leaving and when, approximately, you plan on arriving. If possible, let them know the route you’ll be taking. If it changes, send them a text to keep them updated. If you fail to show or get in touch by a pre-set time, they can call police on your behalf and search for you.
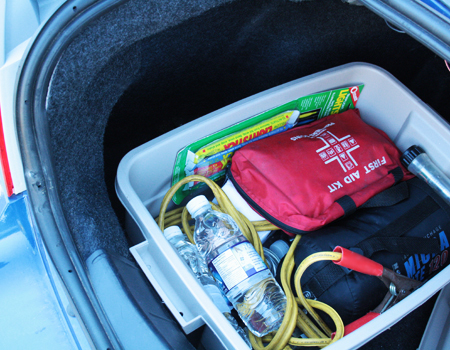
Stock a Winter Emergency Kit. Split between your glove box and a backpack or duffel bag in your trunk with some emergency essentials can mean the difference between life and death in extreme circumstances. No, I’m not being dramatic, I’m being realistic. If you have ever spent a few hours in -35 in the middle of the night in a broken-down vehicle without and equipment hoping for someone to help, you’d appreciate it. I have. And despite knowing that “help was coming”, it was still terrible and very cold You can include the following items in an emergency kit as a start and add-on for your specific circumstances later. Here are the essentials:
Snow brush & ice scraper;
2 emergency candles in a metal tin & 2 Bic lighters;
Flashlight & spare batteries, A few glow stick Chem lights;
First Aid kit with tourniquet (if you’ve not been trained, GO GET TRAINING!);
Warm blankets or sleeping bag;
Extra clothing (hats, gloves, socks, fleece jacket);
Winter boots (like Sorel);
Small bottle of lock de-icer or rubbing alcohol;
Food (such as a few Cliff Bars or similar);
A few bottles of water, plastic so as not to freeze and shatter);
Metal cup;
Consider a thermos filled with a hot drink;
A quality multi-tool;
Solid, full-tang knife;
Seatbelt cutter (stowed above driver visor or accessible in centre console);
A few contractor garbage bags;
Whistle;
25′ of paracord;
Small can of WD40 and small roll of duct tape;
Basic tool kit for car;
Wet wipes, small toilet paper & hand sanitizer;
Jumper cables (for you and to help others);
Extra cash and change (in small bills);
Fire Extinguisher (small);
Tow strap (if it can be attached to your vehicle);
Extra fuel;
Anything else you feel is necessary.
Staying in your vehicle, if possible, is the safest place to ride out a storm. It is a metal cage which protects you from other vehicles, but also from the elements. With the candles, blankets and extra clothes, you should be able to stay warm enough to survive. Adding food and possibly hot water, your chances go up even more. Adding to that higher levels of visibility and communications, your chances begin to climb higher.
If you do find yourself stranded, take immediate action to prepare yourself for a long stay.
Stay CALM.
Take stock of your situation. Stay in your vehicle.
Attempt to make contact with Police or anyone who may be able to render aid.
Remove your survival kit from your trunk to the back seat and break out its components while your engine is still running or is still warm.
Deploy your visibility markers and, if visibility is low and it’s night out, consider your glow sticks, LED flares and chemical road flares.
Use your shovel to clear the area around your exhaust pipe to prevent carbon monoxide from being pumped into your vehicle.
Run the engine for 10-15 minutes at a time to conserve your battery and fuel.
Ensure all unnecessary power expenditures (radio, phone use for games, etc, are cut. Only use your hazard lights if possible.
Use the items in your kit to their maximum.
I trust this will serve as a solid primer to preparing you to deal with many unforeseen eventualities this winter driving season. Use common sense. If the weather is bad, stop. Reschedule. Turn Back. Get a hotel for the night. It’s not worth the risk. Don’t be caught unawares and unprepared this winter. Prepare now and get home safely.